 |
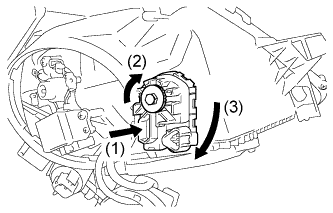
Attach the headlight levering motor to the headlight.
HEADLIGHT ASSEMBLY > INSTALLATION |
| 1. INSTALL HEADLIGHT LEVERING MOTOR ASSEMBLY LH (w/ HID Headlight System) |
|
Attach the headlight levering motor to the headlight.
Rotate the aiming screw on the headlight leveling motor in the direction indicated by arrow (2) in the illustration and install the shaft.
Rotate the headlight leveling motor in the direction indicated by arrow (3) in the illustration to install it.
| 2. INSTALL HEADLIGHT LIGHT CONTROL ECU SUB-ASSEMBLY (w/ HID Headlight System) |
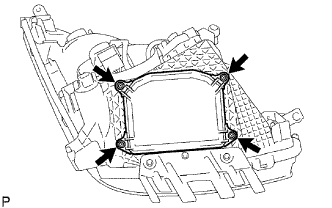 |
Install the headlight cover and gasket with the 4 screws.
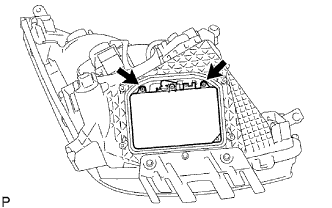 |
Install the 2 screws.
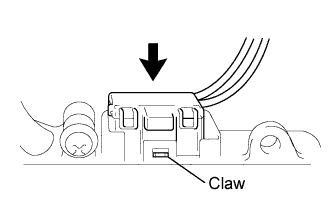 |
Attach the claw and disconnect the connector, and then install the headlight light control ECU.
| 3. INSTALL FRONT TURN SIGNAL LIGHT BULB |
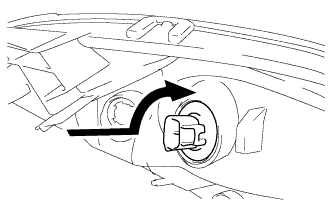 |
Rotate the front turn signal light socket and bulb in the direction indicated by the arrow in the illustration to install them.
| 4. INSTALL CLEARANCE LIGHT BULB |
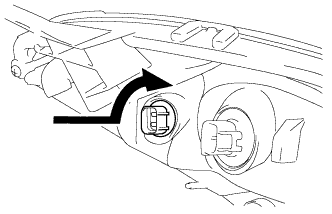 |
Turn the clearance light socket and bulb in the direction indicated by the arrow in the illustration to install them.
| 5. INSTALL HID HEADLIGHT BULB (w/ HID Headlight System) |
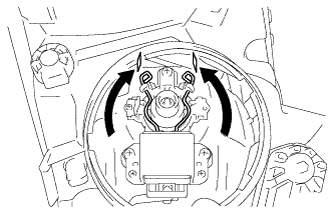 |
Push the set spring in the direction indicated by the arrow in the illustration and install the discharge headlight bulb.
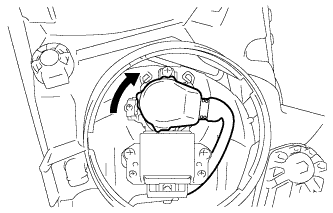 |
Turn the headlight light control ECU socket in the direction indicated by the arrow in the illustration to install it.
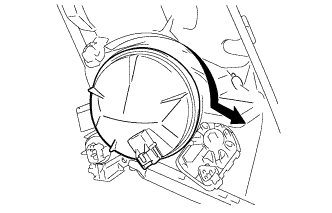 |
Turn the headlight socket cover in the direction indicated by the arrow in the illustration to install it.
| 6. INSTALL NO. 1 HEADLIGHT BULB (w/o HID Headlight System) |
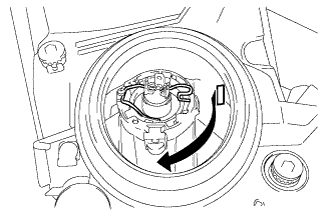 |
Push the set spring in the direction indicated by the arrow in the illustration to install the No. 1 headlight bulb.
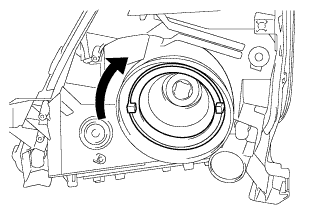 |
Turn the headlight socket cover in the direction indicated by the arrow in the illustration to install it.
| 7. INSTALL HEADLIGHT ASSEMBLY LH |
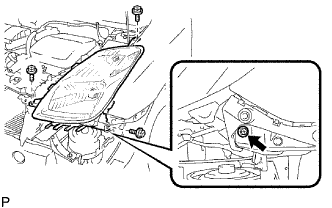 |
Install the 3 screws.
Connect all connectors and install the headlight.
| 8. INSTALL FRONT BUMPER COVER |
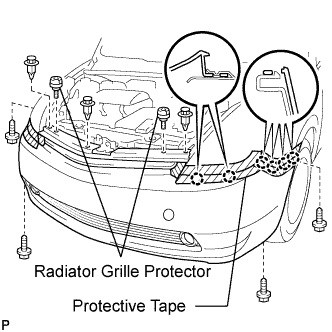 |
Put protective tape under the front fender.
w/ Fog light:
Connect the 2 fog light connectors.
Attach the 12 claws to install the bumper cover.
Install the 4 screws and 3 clips.
Install the 2 radiator grille protectors.
| 9. INSTALL FRONT FENDER LINER RH |
| 10. INSTALL FRONT FENDER LINER LH |
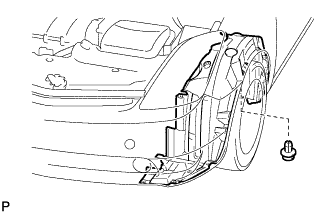 |
Install the fender liner with the clip.
| 11. CONNECT CABLE TO NEGATIVE BATTERY TERMINAL |
| 12. PERFORM INITIALIZATION |
Perform initialization (Click here).
| 13. ADJUST HEADLIGHT AIM ONLY |
Prepare the vehicle by performing the following.
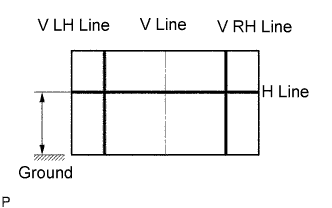 |
Prepare a piece of thick white paper (draw base lines).
V line (vehicle center position).
Draw a vertical line down the center of the paper to align with the center of the vehicle.
H line (headlight height).
Draw a horizontal line across the paper so that it is at the same height as the center mark of the low-beam light on the vehicle.
V LH line, V RH line (center mark position of right and left headlights).
Draw vertical lines on the left and right sides of the paper so that they line up with the center mark on the low-beam lights on the vehicle.
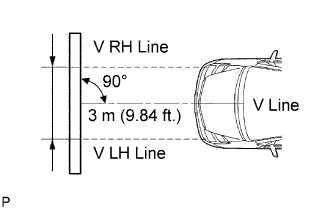 |
Check headlight aim
Align the paper and vehicle.
Start the engine.
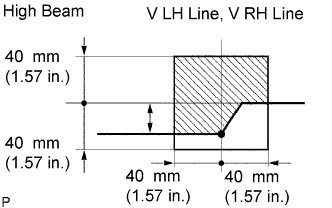 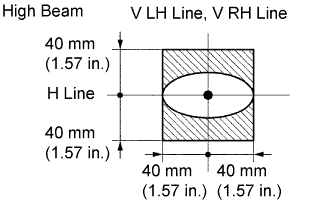 |
Turn on the headlight and check that the aim is within the specified range shown in the illustration.
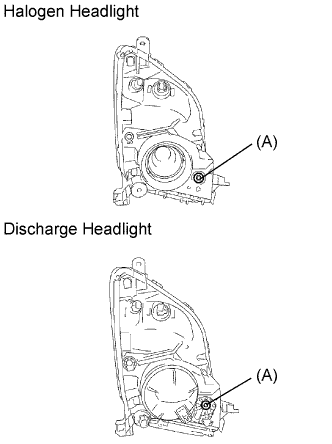 |
Adjust the aim in the vertical direction:
Using a screwdriver, adjust the headlight aim into the specified range by turning aiming screw A.
| 14. ADJUST FOG LIGHT AIMING |
Prepare the vehicle by performing the following.
Start the engine and let it idle.
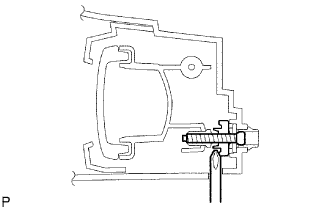 |
From underneath the vehicle, turn the screw to perform the adjustment.