 |
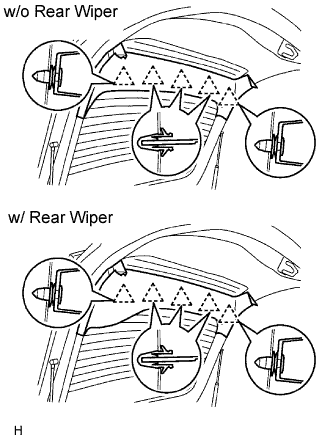
Using a screwdriver, detach the 5 clips and remove the upper trim board.
- HINT:
- Tape the screwdriver tip before use.
BACK DOOR > DISASSEMBLY |
| 1. REMOVE NO. 2 REAR FLOOR BOARD |
| 2. REMOVE REAR DECK FLOOR BOX |
| 3. REMOVE NO. 3 REAR FLOOR BOARD |
| 4. DISCONNECT CABLE FROM NEGATIVE BATTERY TERMINAL |
| 5. REMOVE REAR WIPER ARM ASSEMBLY |
Remove the nut and rear wiper arm.
| 6. REMOVE BACK DOOR LOWER TRIM BOARD ASSEMBLY |
Using a screwdriver, detach the 11 clips and remove the lower trim board.
| 7. REMOVE BACK DOOR UPPER TRIM BOARD ASSEMBLY |
|
Using a screwdriver, detach the 5 clips and remove the upper trim board.
| 8. REMOVE BACK DOOR TRIM UPPER PANEL ASSEMBLY |
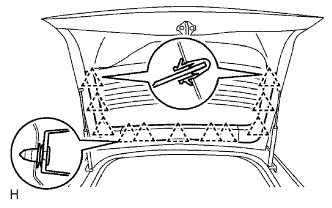 |
Using a screwdriver, detach the 5 clips and remove the trim panel.
| 9. REMOVE BACK DOOR SIDE GARNISH LH |
Using a screwdriver, detach the 3 clips and remove the garnish.
| 10. REMOVE BACK DOOR SIDE GARNISH RH |
Using a screwdriver, detach the 3 clips and remove the garnish.
| 11. REMOVE REAR WIPER MOTOR ASSEMBLY |
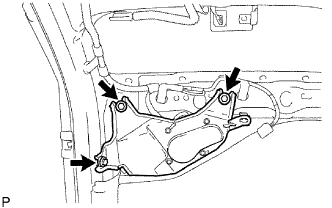 |
Disconnect the connector.
Remove the 3 bolts and rear wiper motor.
| 12. REMOVE REAR SPOILER SUB-ASSEMBLY |
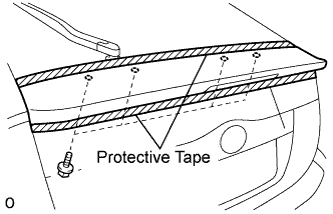 |
Put protective tape under the rear spoiler.
Remove the 4 bolts.
Regular Type:
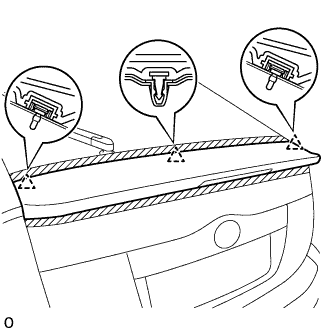 |
Using a screwdriver, detach the 3 clips.
Large Type:
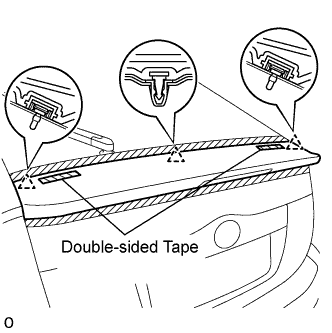 |
Using a screwdriver, detach the 3 clips and peel off the double-sided tape.
Disconnect the center stop light connector and remove the rear spoiler.
| 13. REMOVE BACK DOOR OUTSIDE GARNISH SUB-ASSEMBLY |
Disconnect the back door opener switch connector.
Remove the 4 nuts.
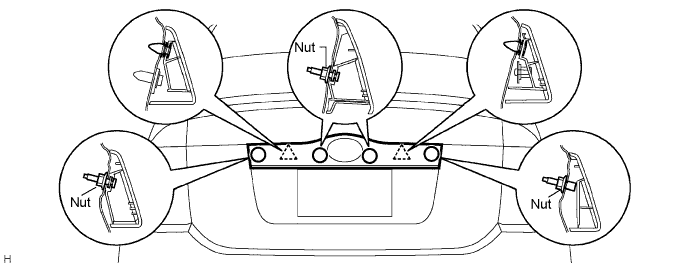
Using a screwdriver, detach the 2 clips and remove the garnish (with back door opener switch).
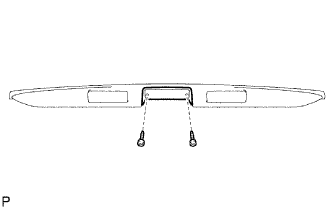 |
Remove the 2 screws and back door opener switch from the garnish.
| 14. REMOVE TELEVISION CAMERA ASSEMBLY |
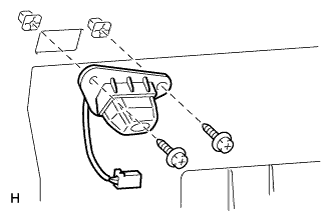 |
Remove the 2 screws.
Disconnect the connector and remove the camera.
| 15. REMOVE LICENSE PLATE LIGHT ASSEMBLY |
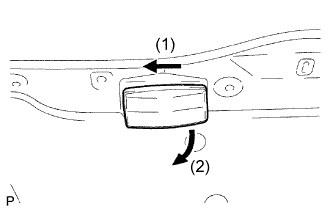 |
Remove the light as shown in the illustration.
Disconnect the connector.
Remove the bulb/socket unit from the light.
Remove the bulb from the socket.
| 16. REMOVE BACK DOOR LOCK STRIKER ASSEMBLY |
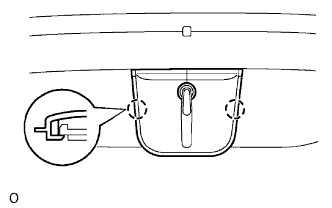 |
Using a screwdriver, detach the 2 claws and remove the cover.
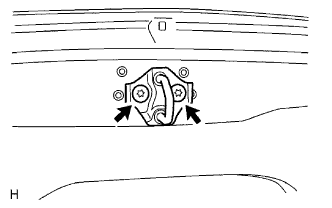 |
Using a T40 "torx" wrench, remove the 2 screws and remove the cover.
| 17. REMOVE BACK DOOR STAY ASSEMBLY LH |
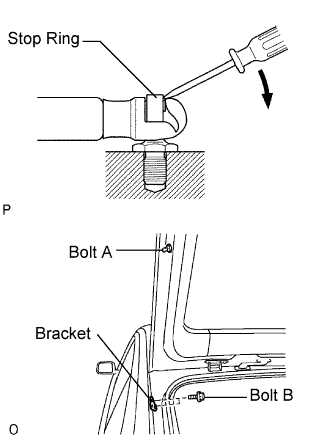 |
Using a screwdriver, remove the 2 stop rings and stay.
Remove the bolt labeled A from the door panel.
Remove the 2 bolts labeled B and stay bracket from the body panel.
| 18. REMOVE BACK DOOR STAY ASSEMBLY RH |
| 19. REMOVE REAR DECK TRIM COVER |
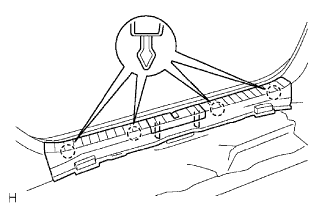 |
Using a screwdriver, detach the 4 claws and remove the trim cover.
| 20. REMOVE BACK DOOR LOCK ASSEMBLY |
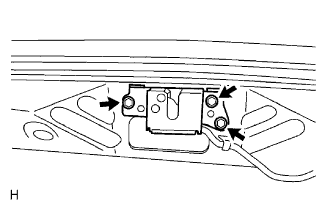 |
Disconnect the connector.
Remove the 3 bolts and door lock.
| 21. REMOVE BACK DOOR LOWER STOPPER |
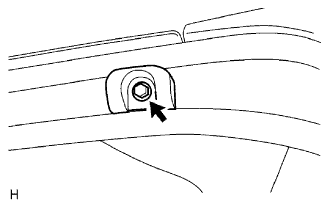 |
Remove the 2 bolts and stopper LH and RH.