FRONT DRIVE SHAFT > REASSEMBLY |
| 1. INSTALL FRONT DRIVE SHAFT DUST COVER LH |
![]() |
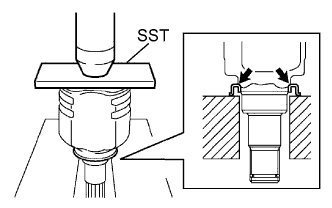
Using SST and a press, install a new front drive shaft dust cover and press it in until it contacts the end of the inboard joint.
| 2. INSTALL FRONT DRIVE SHAFT DUST COVER RH |
| 3. INSTALL FRONT DRIVE SHAFT HOLE SNAP RING LH |
Install a new front drive shaft hole snap ring.
| 4. INSTALL OUTBOARD JOINT BOOT |
Wrap protective tape around the spline of the outboard joint.
Install the following new parts on the outboard joint LH in order.
No. 2 outboard joint boot clamp LH
Outboard joint boot
Outboard joint boot clamp LH
Apply grease to the joint of the outboard joint LH and outboard joint boot.
Install the outboard joint boot into the outboard joint groove.
| 5. INSTALL NO. 2 FRONT AXLE OUTBOARD JOINT BOOT CLAMP LH |
![]() |
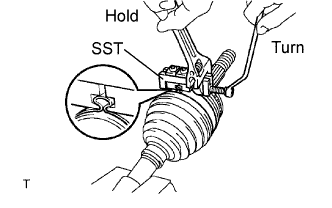
Hold the front drive shaft in a vise between 2 aluminum plates.
Set SST to the No. 2 outboard joint boot clamp and slightly tighten the SST bolt while pushing the outboard joint on.
Hold SST and tighten the SST bolt so that the clearance is within the specified value.
Remove SST.
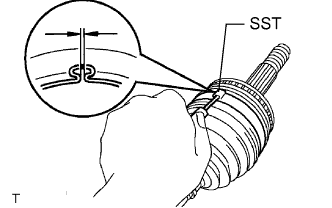
![]() |
Using SST, measure the clearance of the No. 2 outboard joint boot clamp LH.
| 6. INSTALL FRONT AXLE OUTBOARD JOINT BOOT CLAMP LH |
![]() |
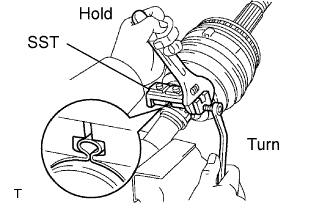
Set SST to the outboard joint boot clamp LH and slightly tighten the SST bolt while pushing the outboard joint on.
Hold SST and tighten the SST bolt so that the clearance is within the specified value.
Remove SST.
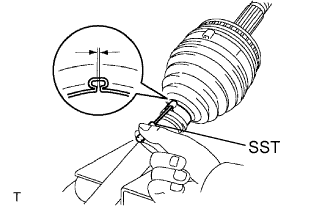
![]() |
Using SST, measure the clearance of the outboard joint boot clamp LH.
| 7. INSTALL FRONT DRIVE SHAFT DAMPER RH |
![]() |
Install the drive shaft damper to the outboard joint LH.
| 8. INSTALL DRIVE SHAFT DAMPER SETTING CLAMP |
![]() |
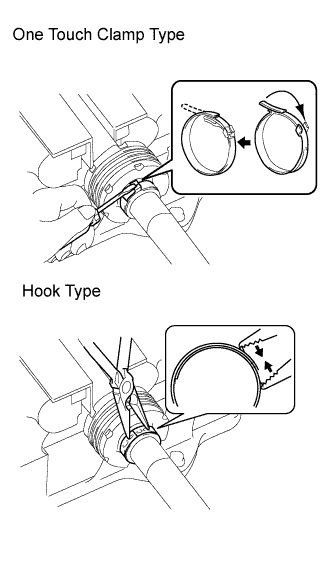
When using a one touch clamp:
Install the drive shaft damper clamp to the drive shaft damper and stake the drive shaft damper clamp using a flat-head screwdriver.
When using a hook type:
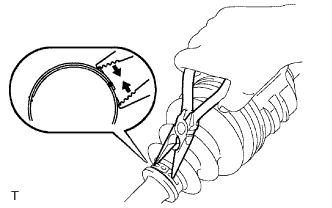
Using needle-nose pliers, align the concave part and protrusion of the drive shaft damper clamp in order to lock it.
| 9. INSTALL FRONT DRIVE INBOARD JOINT ASSEMBLY LH |
Install the following new parts on the outboard joint LH in order.
Inboard joint boot clamp
Inboard joint boot
No. 2 inboard joint boot clamp
Hold the drive shaft in a vise between 2 aluminum plates.
Remove the protective tape.
![]() |
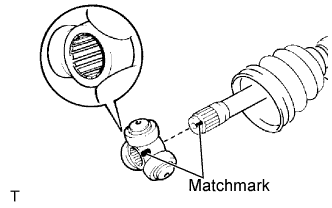
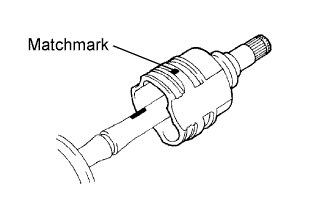
Align the matchmarks and install the tripod joint onto the outboard joint.
Using a brass bar and hammer, drive the tripod joint in.
![]() |
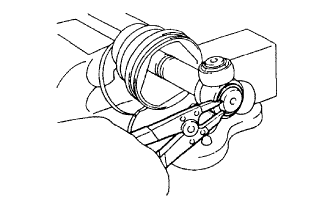
Using a snap ring expander, install a new front drive inner shaft snap ring.
Fill grease in the joint of the inboard joint and outboard joint boot.
![]() |
Align the matchmarks and install the inboard joint onto the outboard joint.
| 10. INSTALL FRONT AXLE INBOARD JOINT BOOT |
Install the inboard joint boot into the inboard joint LH and outboard joint LH grooves.
| 11. INSTALL NO. 2 FRONT AXLE INBOARD JOINT BOOT CLAMP LH |
![]() |
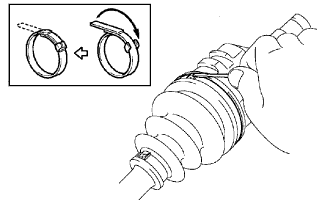
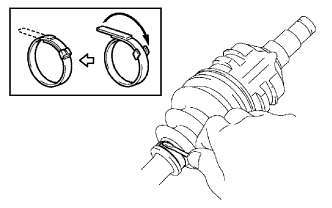
When using a one touch clamp:
Install the No. 2 inboard joint boot clamp LH to the inboard joint boot and stake the No. 2 inboard joint boot clamp LH using a flat-head screwdriver.
![]() |
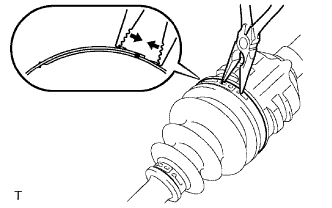
When using a hook type:
Using needle-nose pliers, align the concave part with the protrusion of the No. 2 inboard joint boot clamp LH in order to lock it.
| 12. INSTALL FRONT AXLE INBOARD JOINT BOOT CLAMP LH |
![]() |
When using a one touch clamp:
Install the inboard joint boot clamp to the inboard joint boot and stake the inboard joint boot clamp using a flat-head screwdriver.
![]() |
When using a hook type:
Using needle-nose pliers, align the concave part with the protrusion of the No. 2 inboard joint boot clamp in order to lock it.
| 13. INSPECT FRONT DRIVE SHAFT ASSEMBLY LH |
![]() |
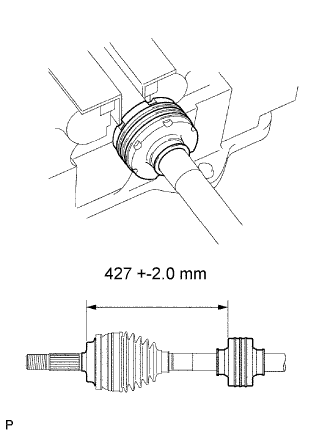
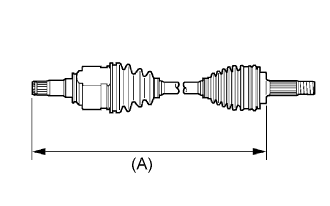
Check if the front drive shaft is within the following dimension.
| LH | RH |
| 588.6 mm (23.173 in.) | 849.1 mm (33.429 in.) |
Check for noticeable looseness when turning the joint up and down, left and right, and in the thrust direction.
Check for cracks, damage or grease leaks on the joint boot.