Home › BODY ELECTRICAL › LIGHTING › FOG LIGHT ASSEMBLY

FOG LIGHT ASSEMBLY > INSTALLATION

for Preparation Click here


HINT:
  1. Use the same procedures for the RH and LH sides.
  2. The procedures listed below are for the LH side.


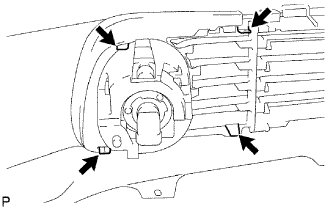
1. INSTALL FOG LIGHT UNIT LH


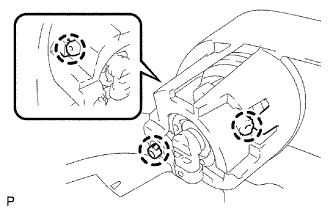
E074103E02
  1. Install the fog light bulb to the fog light unit.

  1. Attach the 3 claws to install the light unit.


2. INSTALL RADIATOR GRILLE LOWER LH


    B073577E01
  1. Attach the 4 claws to install the grille.


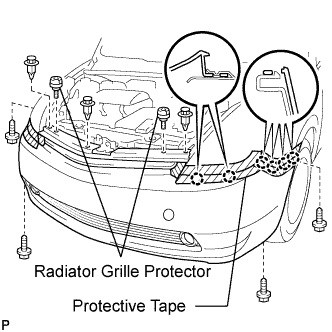
3. INSTALL FRONT BUMPER COVER


    B132997E01
  1. Put protective tape under the front fender.

  1. w/ Fog light:
    Connect the 2 fog light connectors.

  1. Attach the 12 claws to install the bumper cover.

  1. Install the 4 screws and 3 clips.

  1. Install the 2 radiator grille protectors.

    Torque:
    5.0 N*m{ 51 kgf*cm , 44 in.*lbf }


4. INSTALL FRONT FENDER LINER RH

HINT:
Use the same procedure described for the LH side.


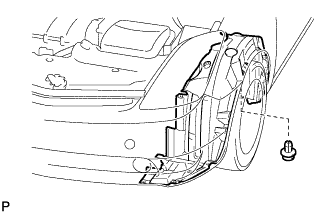
5. INSTALL FRONT FENDER LINER LH


    B130315
  1. Install the fender liner with the clip.


6. ADJUST FOG LIGHT AIMING
  1. Prepare the vehicle by performing the following.

    1. Ensure there is no damage or deformation to the body around the headlights.
    2. Fill the fuel tank.
    3. Make sure that the oil is filled to the specified level.
    4. Make sure that the coolant is filled to the specified level.
    5. Inflate the tires to the appropriate pressure .
    6. Place the spare tire, tools, and jack in their original position.
    7. Unload the trunk.
    8. Sit a person of average weight (68 kg (150 lbs)) in the driver's seat.

  1. Start the engine and let it idle.


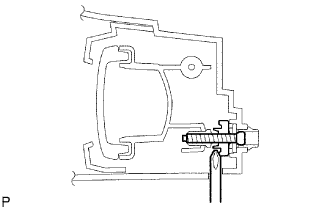
    I038409E01
  1. From underneath the vehicle, turn the screw to perform the adjustment.

    HINT:
    1. The light moves up when turning the screw clockwise, and moves down when turning the screw counterclockwise.
    2. When adjusting the fog light, insert a screwdriver into the front fender liner fog light service hole.


7. CONNECT CABLE TO NEGATIVE BATTERY TERMINAL


8. PERFORM INITIALIZATION
  1. Perform initialization (Click here).

    NOTICE:
    Certain systems need to be initialized after disconnecting and reconnecting the cable from the negative (-) battery terminal.