 |
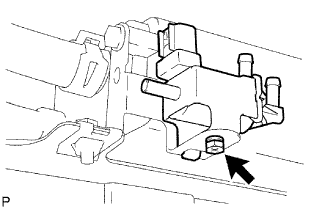
Install the pressure switching valve with the bolt.
- Torque:
- 2.9 N*m{ 30 kgf*cm , 26 in.*lbf }
PURGE FLOW SWITCHING VALVE > INSTALLATION |
| 1. INSTALL PRESSURE SWITCHING VALVE |
|
Install the pressure switching valve with the bolt.
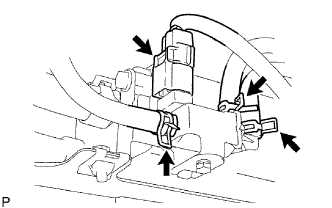 |
Connect the 3 canister hoses to the pressure switching valve.
Connect the pressure switching valve.
| 2. CONNECT CABLE TO NEGATIVE BATTERY TERMINAL |
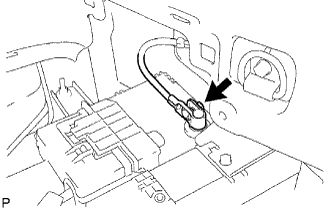 |
Connect the battery negative cable, and then tighten the nut.
| 3. INSTALL REAR NO. 3 FLOOR BOARD |
 |
Install the floor board, and then attach the 4 claws.
| 4. INSTALL REAR DECK FLOOR BOX |
 |
Install the rear deck floor box to the vehicle.
| 5. INSTALL REAR NO. 2 FLOOR BOARD |
 |
Install the floor board, and then lock the 2 cover knobs.
| 6. PERFORM INITIALIZATION |
Perform initialization (Click here).