Home › BODY ELECTRICAL › AUDIO / VISUAL › FRONT DOOR SPEAKER

FRONT DOOR SPEAKER > ON-VEHICLE INSPECTION

for Preparation Click here


1. INSPECT FRONT NO. 1 SPEAKER

HINT:
Remove interior parts so that the front No. 1 speaker can be seen.

  1. Check the speaker installation.

    OK:
    The speaker is securely installed.

    If the result is not as specified, reinstall the front No. 1 speaker.

  1. Visually check the speaker.

    OK:
    The cone paper of the speaker is not torn.

    If the result is not as specified, replace the front No. 1 speaker.


  1. Speaker resistance check


      E107214
    1. Disconnect the front No. 1 speaker connector.

    2. Measure the resistance between the terminals of the speaker.

      Standard resistance:
      Tester Connection
      Specified Condition
      1 - 2
      Approx. 4 Ω
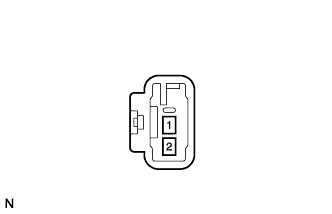
      If the result is not as specified, replace the front No. 1 speaker.


2. INSPECT FRONT NO. 2 SPEAKER

HINT:
Remove interior parts so that the front No. 2 speaker can be seen.

  1. Check the speaker installation.

    OK:
    The speaker is securely installed.

    If the result is not as specified, reinstall the front No. 2 speaker.

  1. Visually check the speaker.

    OK:
    The cone paper of the speaker is not torn.

    If the result is not as specified, replace the front No. 2 speaker.