BODY WELD POINT REAR FLOOR PAN ASSEMBLY REPLACEMENT
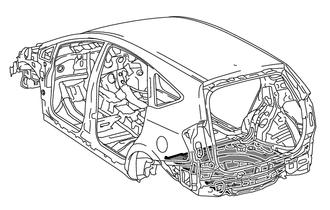
With the body lower back panel removed.
REMOVAL
| Symbol meaning | |
|---|---|

|
Remove Weld Points |

|
Cut with Disc Sander etc. |
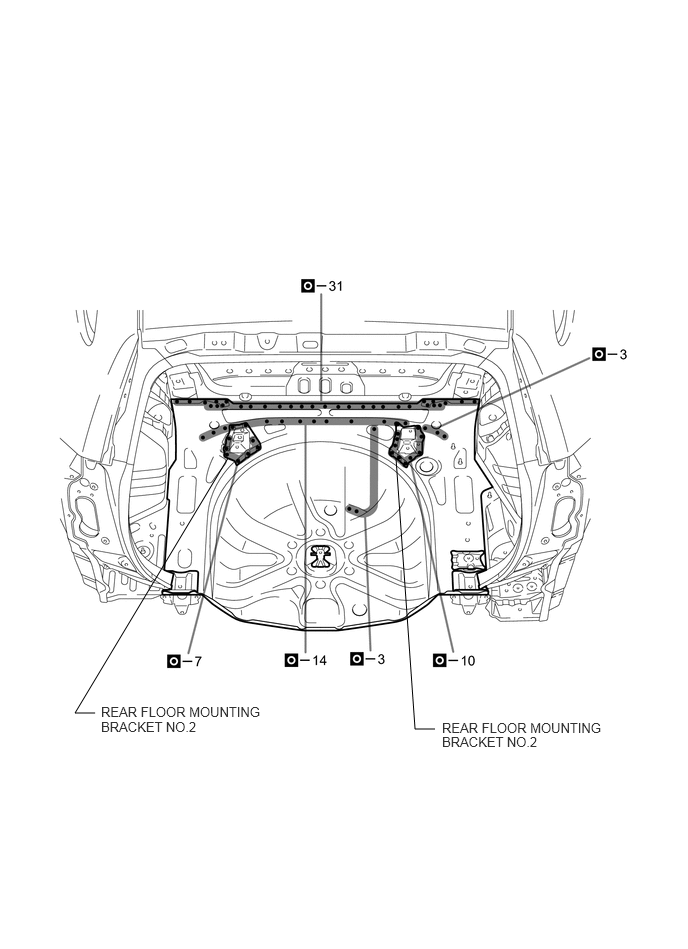
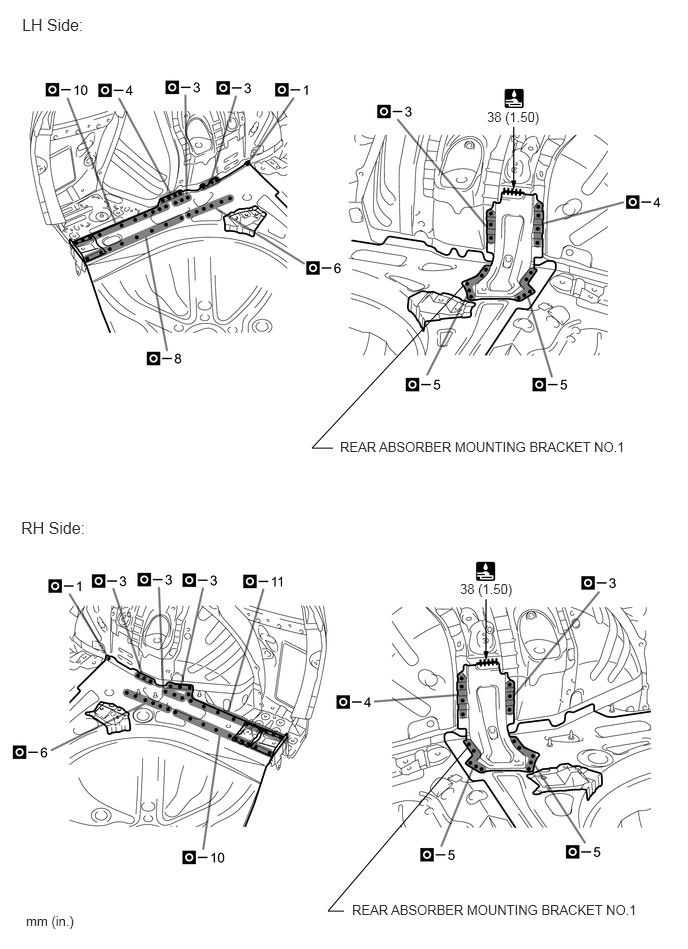
After removing the rear absorber mounting bracket No. 1, remove the rear floor pan.
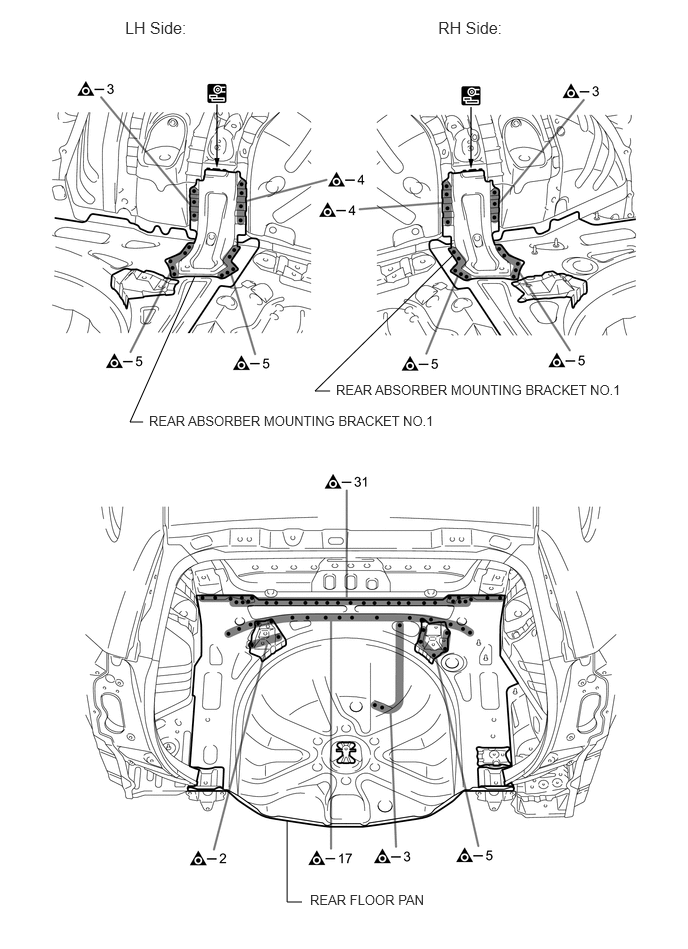
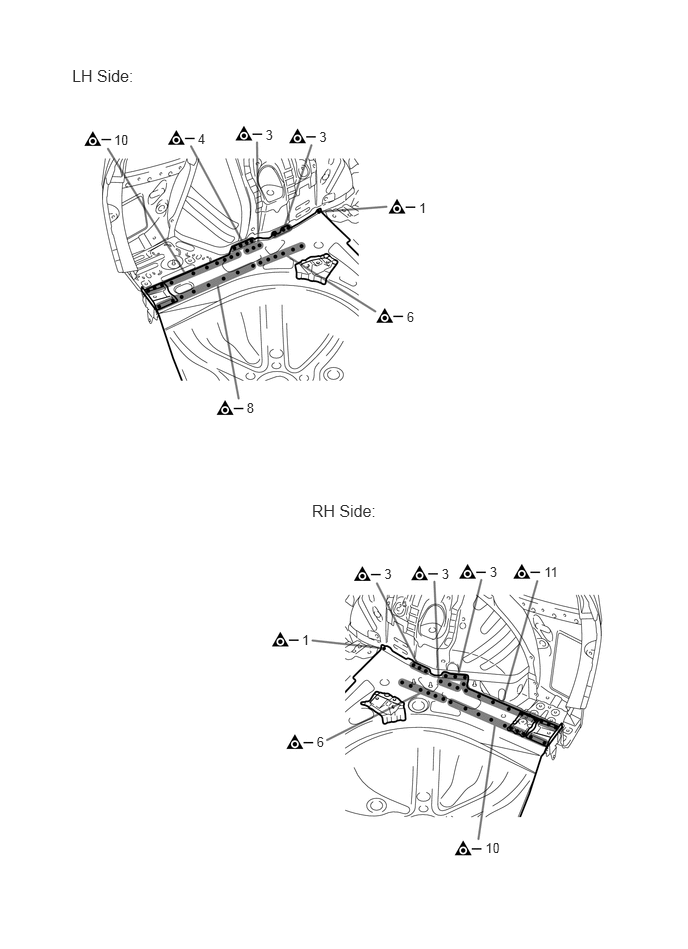
INSTALLATION
| Symbol meaning | |
|---|---|

|
Plug Weld |

|
Fillet Weld |
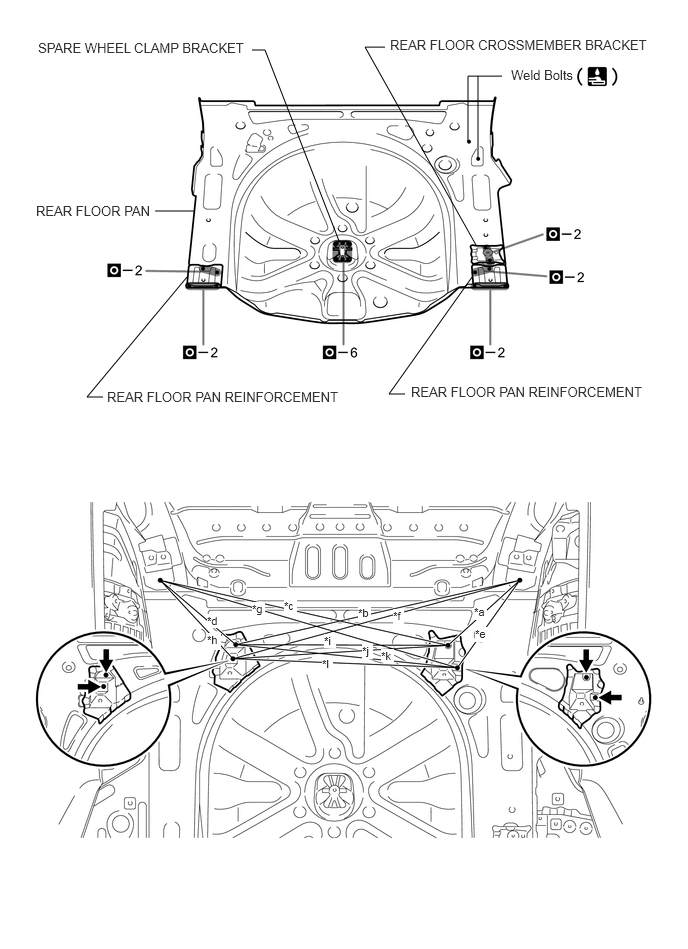
Temporarily install the new parts and measure each part of the new parts in accordance with the body dimension diagram. (See the body dimensions)
Before temporarily installing the new parts, weld the rear floor pan, spare wheel clamp bracket, rear floor pan reinforcement, rear floor crossmember bracket and weld bolts with the standard number of welding points.
After welding the rear floor pan to the vehicle side, install the rear absorber mounting bracket No. 1.
After welding, apply body sealer and undercoating to the corresponding parts. (See the painting / coating)
After applying the top coat, apply anti-rust agent to the internal panel portion of the closed section structural weld points.
| Area | Measurement | Area | Measurement |
|---|---|---|---|
| *a | 268 mm (10.55 in.) | *b | 793 mm (29.09 in.) |
| *c | 802 mm (31.57 in.) | *d | 273 mm (10.75 in.) |
| *e | 298 mm (11.73 in.) | *f | 810 mm (31.89 in.) |
| *g | 841 mm (33.11 in.) | *h | 297 mm (11.69 in.) |
| *i | 575 mm (22.64 in.) | *j | 583 mm (22.95 in.) |
| *k | 602 mm (23.70 in.) | *l | 606 mm (23.86 in.) |