HEATING / AIR CONDITIONING AIR CONDITIONING UNIT REASSEMBLY
PROCEDURE

 88625
1.INSTALL NO. 1 COOLER THERMISTOR
88501
2.INSTALL NO. 1 COOLER EVAPORATOR SUB-ASSEMBLY
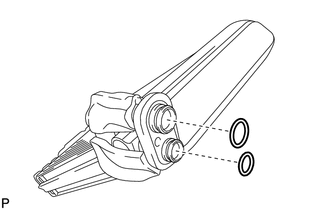
Sufficiently apply compressor oil to 2 new O-rings and the fitting surfaces.
- NOTICE:
-
Keep the O-rings and O-ring fitting surfaces free from dirt or any foreign objects.
- Compressor oil:
ND-OIL 11 or equivalent
Install the 2 O-rings to the No. 1 cooler evaporator sub-assembly.
- NOTICE:
- ·
Keep the O-rings and O-ring fitting surfaces free from dirt or any foreign objects.
·Do not use any compressor oil other than ND-OIL 11 or equivalent. If any compressor oil other than ND-OIL 11 or equivalent is used, compressor motor insulation performance may decrease, resulting in a leakage of electric power.
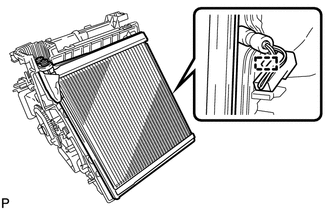
Engage the clamp to install the No. 1 cooler evaporator sub-assembly with the No. 1 cooler thermistor.
- HINT:
-
Completely cover the tube with the grommet.
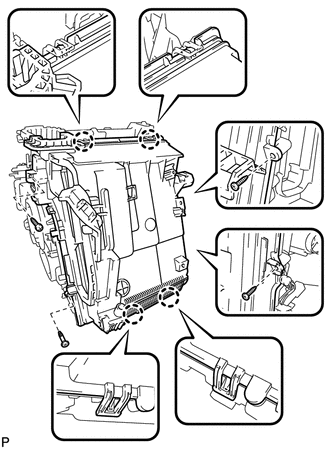
Engage the 4 claws.
Install the lower heater case with the 4 screws.
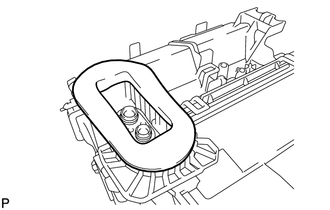
Install the packing.
88539
3.INSTALL NO. 1 COOLER UNIT DRAIN HOSE
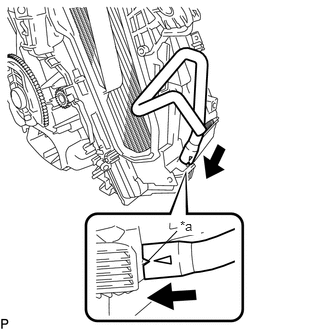
Install the No. 1 cooler unit drain hose as shown in the illustration.
| *a | Matchmark |
55388C
4.INSTALL CONSOLE MOUNTING BRACKET RH
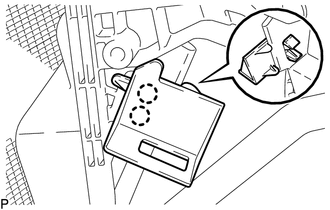
Engage the 2 claws to install the console mounting bracket RH.
88650N
5.INSTALL AIR CONDITIONING AMPLIFIER ASSEMBLY
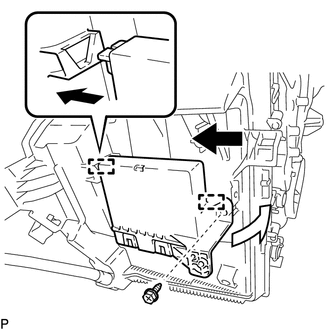
Engage the 2 guides as shown in the illustration.
Install the air conditioning amplifier assembly with the screw.
55389A
6.INSTALL CONSOLE MOUNTING BRACKET LH
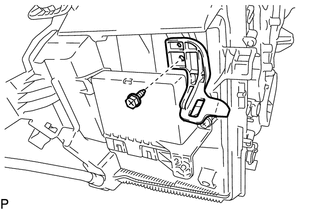
Install the console mounting bracket LH with the screw.
87107A
7.INSTALL HEATER RADIATOR UNIT SUB-ASSEMBLY
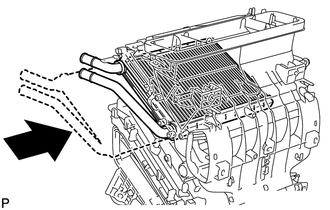
Install the heater radiator unit sub-assembly as shown in the illustration.
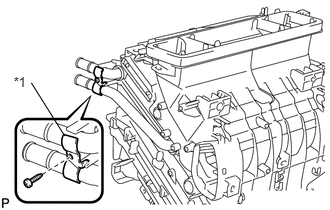
Install the clamp with the screw.
| *1 | Clamp |
87710G
8.INSTALL QUICK HEATER ASSEMBLY (w/ PTC Heater)
87050C
9.INSTALL NO. 1 AIR CONDITIONING RADIATOR DAMPER SERVO SUB-ASSEMBLY
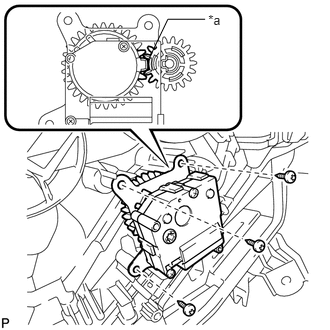
Using the reference point, install the No. 1 air conditioning radiator damper servo sub-assembly with the 3 screws.
| *a | Reference Point |
87050D
10.INSTALL NO. 2 AIR CONDITIONING RADIATOR DAMPER SERVO SUB-ASSEMBLY
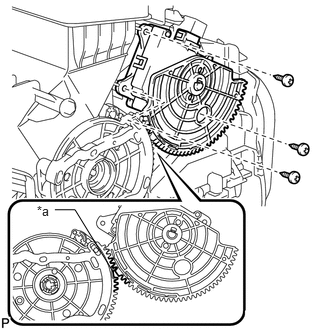
Using the reference point, install the No. 2 air conditioning radiator damper sub-assembly with the 3 screws.
| *a | Reference Point |
82210K
11.INSTALL AIR CONDITIONING HARNESS ASSEMBLY
Engage the 16 clamps.
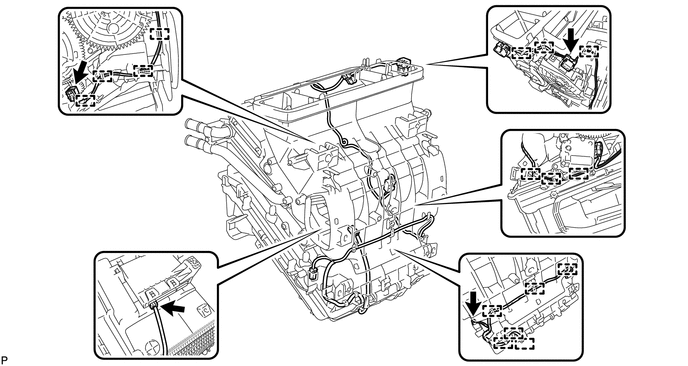
Connect the 4 connectors to install the air conditioning harness assembly.
88897P
12.INSTALL ASPIRATOR
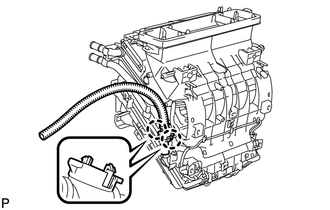
Engage the 2 claws to install the aspirator.
87201B
13.INSTALL NO. 2 AIR DUCT SUB-ASSEMBLY
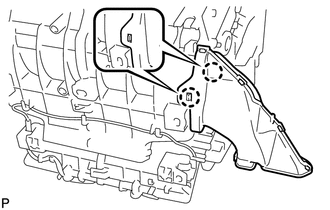
Engage the 2 claws to install the No. 2 air duct sub-assembly.
88515
14.INSTALL COOLER EXPANSION VALVE
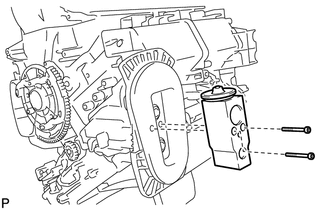
Using a 4 mm hexagon socket wrench, install the cooler expansion valve with the 2 hexagon bolts.
- Torque:
- 3.5 N*m (36 kgf*cm, 31 in.*lbf)
87130D
15.INSTALL BLOWER ASSEMBLY