WINDOW / GLASS ROOF WINDOW FIX GLASS REMOVAL
PROCEDURE

 63250H
1.REMOVE SUNSHADE HOUSING ASSEMBLY
63215A
2.REMOVE ROOF WINDOW UPPER MOULDING
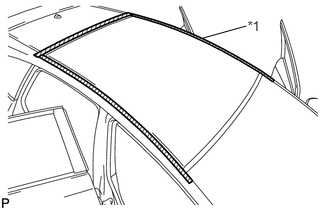
Apply protective tape to the outer surface of the vehicle body to prevent scratches.
| *1 | Protective Tape |
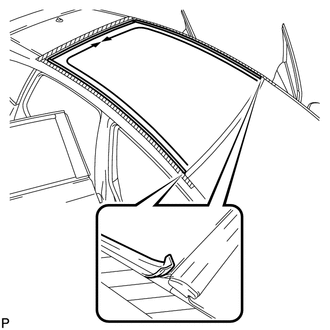
Pull back the ends of the roof window upper moulding and remove the roof window upper moulding by pulling the ends in the direction of the arrows as shown in the illustration.
63212A
3.REMOVE ROOF WINDOW GLASS
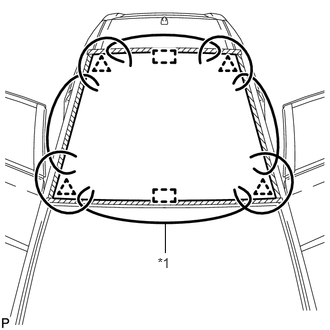
Pass a piano wire between the vehicle body and roof window glass from the interior as shown in the illustration.
| *1 | Piano Wire |
- HINT:
-
Ensure not to interfere with the clips and pins when passing the piano wire.
Tie both wire ends to wooden blocks or similar objects that can serve as handles.
- NOTICE:
-
When separating the roof window glass from the vehicle, be careful not to damage the paint or interior and exterior ornaments.
Cut off the adhesive by pulling the piano wire around the roof window glass.
- NOTICE:
-
Leave as much adhesive on the vehicle body as possible when removing the roof window glass.
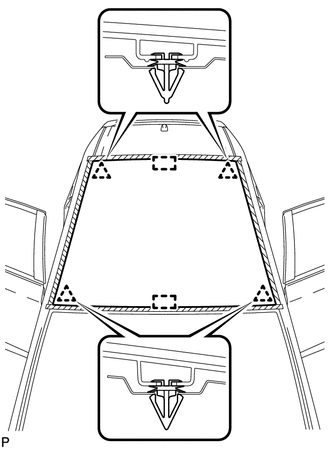
Using suction cups, disengage the 4 clips and 2 pins, and remove the roof window glass.
63251N
4.REMOVE NO. 1 ROOF WINDOW GLASS ADHESIVE DAM
When reusing the roof window glass:
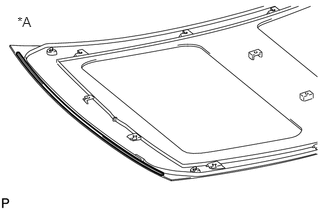
Using a scraper, remove the No. 1 roof window glass adhesive dam.
| *A | Back Side |
- NOTICE:
- ·
Be careful not to damage the roof window glass.
·Be sure to replace the No. 1 roof window glass adhesive dam with a new one.
63212A
5.CLEAN ROOF WINDOW GLASS
Using a scraper, remove the adhesive tape and adhesive sticking to the roof window glass.
- NOTICE:
-
Be careful not to damage the roof window glass.
Clean the outer circumference of the roof window glass with isopropyl alcohol.
- NOTICE:
- ·
Do not touch the roof window glass surface after cleaning it.
·Even if using a new roof window glass, clean the roof window glass with isopropyl alcohol.
6.CLEAN VEHICLE BODY
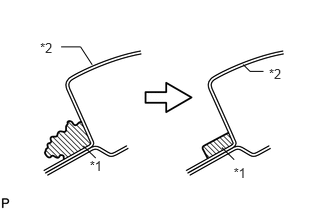
Using a scraper, remove the adhesive from the roof window glass.
| *1 | Adhesive |
| *2 | Vehicle Body |
Clean and shape the contact surfaces of the vehicle body.
Using a knife, cut away excess adhesive on the contact surfaces of the vehicle body, as shown in the illustration.
- NOTICE:
-
Be careful not to damage the vehicle body.
- HINT:
-
Leave as much adhesive on the vehicle body as possible.
Clean the contact surfaces of the vehicle body with a piece of cloth saturated with cleaner.
- HINT:
-
Even if all the adhesive has been removed, clean the vehicle body.