 |
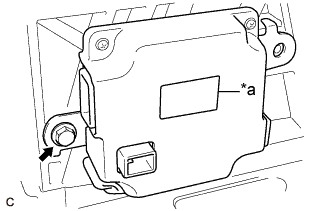
Install the battery smart unit to the HV battery with the bolt.
| *a | Red Label |
- Torque:
- 7.5 N*m{ 76 kgf*cm , 66 in.*lbf }
- NOTICE:
- Check color of the label.
BATTERY SMART UNIT > INSTALLATION |
| 1. INSTALL BATTERY SMART UNIT |
|
Install the battery smart unit to the HV battery with the bolt.
| *a | Red Label |
Install the wiring harness protector to the battery smart unit connector.
Connect the battery smart unit connector.
Engage the 2 claws to install the wiring harness protector cover to the battery smart unit connector.
| 2. INSTALL NO. 2 HYBRID VEHICLE BATTERY CARRIER BRACKET SUB-ASSEMBLY |
Install the No. 2 hybrid vehicle battery carrier bracket sub-assembly with the bolt and 2 nuts.
Connect the 3 clamps.
Connect the connector.
| 3. INSTALL NO. 1 HYBRID BATTERY SHIELD SUB-ASSEMBLY |
Install the No. 1 hybrid battery shield sub-assembly with the 2 bolts and 2 nuts.
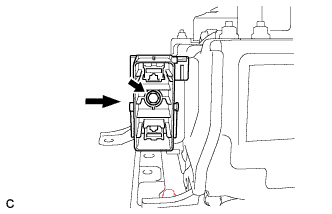 |
Install the electric vehicle battery plug with the bolt as shown in the illustration.
| 4. INSTALL HYBRID BATTERY SERVICE PLUG COVER |
Install the hybrid battery service plug cover with the 2 nuts.
| 5. CONNECT WIRE HARNESS |
Connect the 2 connectors and clamp.
| 6. INSTALL NO. 1 HYBRID BATTERY EXHAUST DUCT |
Install the No. 1 hybrid battery exhaust duct with the clip.
| 7. INSTALL REAR SEAT CUSHION LEG SUB-ASSEMBLY |
Temporarily install the rear seat cushion leg sub-assembly with the 4 bolts.
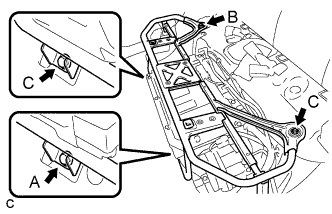 |
Tighten the bolt (A).
Tighten the bolt (B).
Tighten the 2 bolts (C).
| 8. INSTALL REAR SEAT CUSHION ASSEMBLY |
Place the rear seat cushion assembly in the cabin.
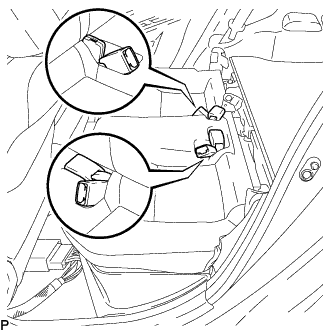 |
Push out the seat belt buckles from the back of the rear seat cushion assembly so that they are positioned as shown in the illustration.
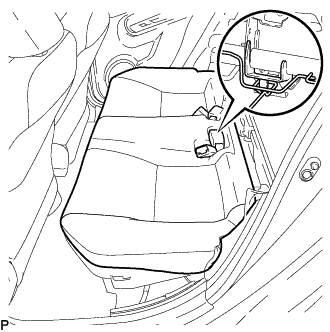 |
Engage the hook of the rear seat cushion assembly to the CRS anchor bracket.
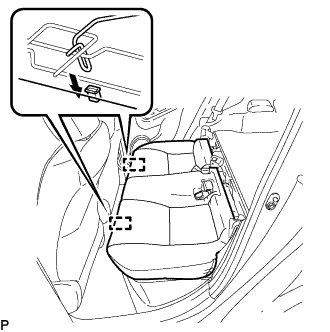 |
Engage the 2 rear seat cushion lock hooks to install the rear seat cushion assembly as shown in the illustration.
Confirm that the seat cushion is firmly installed.
Engage the 2 clips.
| 9. INSTALL SERVICE PLUG GRIP |