Check for looseness.
Lift up the vehicle.
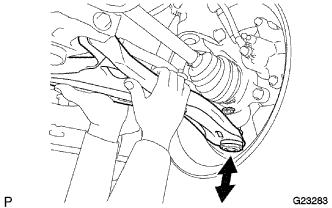
Move the front lower No. 1 suspension arm sub-assembly up and down by hand (294 N {30 kgf} or more) to check that there is no looseness at the front lower No. 1 suspension arm sub-assembly.
 |
FRONT LOWER SUSPENSION ARM > INSPECTION |
| 1. INSPECT FRONT LOWER NO. 1 SUSPENSION ARM SUB-ASSEMBLY |
Check for looseness.
Lift up the vehicle.
|
Move the front lower No. 1 suspension arm sub-assembly up and down by hand (294 N {30 kgf} or more) to check that there is no looseness at the front lower No. 1 suspension arm sub-assembly.
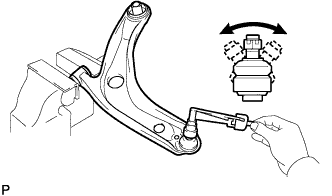 |
Inspect the turning torque of the ball joint.
Secure the front lower No. 1 suspension arm sub-assembly in a vise using aluminum plates.
Install the nut to the front lower ball joint stud.
Using a torque wrench, turn the nut continuously at a rate of 2 to 4 seconds per turn and take the torque reading on the 5th turn.
Inspect the dust cover.
Check that the dust cover is not cracked and that there is no grease on it.
If the dust cover is cracked or there is grease on it, replace the front lower No. 1 suspension arm sub-assembly with a new one.