Home › Drivetrain › DRIVE SHAFT / PROPELLER SHAFT › FRONT DRIVE SHAFT ASSEMBLY

FRONT DRIVE SHAFT ASSEMBLY > REMOVAL

for Preparation Click here


HINT:
  1. Use the same procedure for the RH side and LH side.
  2. The procedure listed below is for the LH side.


1. REMOVE FRONT WHEELS


2. REMOVE ENGINE UNDER COVER LH


3. REMOVE ENGINE UNDER COVER RH


4. DRAIN HYBRID TRANSAXLE FLUID


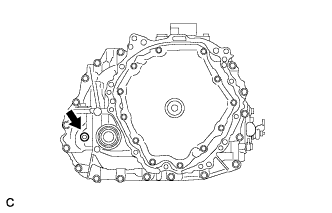
    C249711
  1. Using a 10 mm hexagon socket wrench, remove the filler plug and gasket.
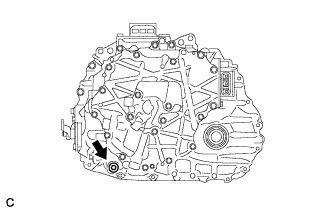


    C249712
  1. Using a 10 mm hexagon socket wrench, remove the drain plug and gasket to drain the hybrid transaxle fluid.

  1. Using a 10 mm hexagon socket wrench, install the drain plug and a new gasket.

    Torque:
    50 N*m{ 510 kgf*cm , 37 ft.*lbf }


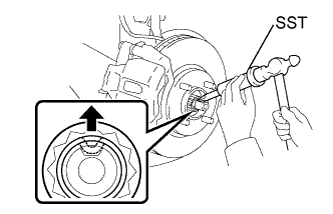
5. REMOVE FRONT AXLE SHAFT NUT


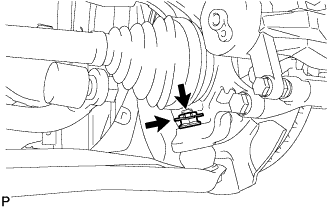
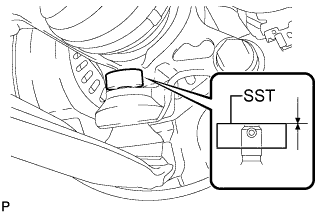
    C236996E01
  1. Using SST and a hammer, release the staked part of the front axle shaft nut.

    SST
    09930-00010  

    NOTICE:
    Loosen the staked part of the nut completely, otherwise the threads of the drive shaft may be damaged.

  1. While applying the brakes, remove the front axle shaft nut.


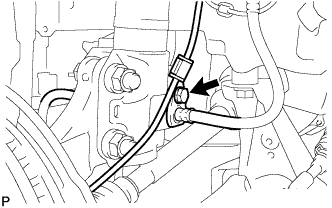
6. SEPARATE FRONT SPEED SENSOR


    C107502
  1. Remove the bolt and separate the front speed sensor wire and front flexible hose from the front shock absorber assembly.
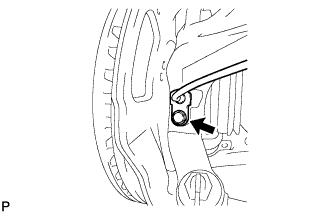
    NOTICE:
    Be sure to separate the front speed sensor from the front shock absorber assembly completely.


    C112274
  1. Remove the bolt and separate the front speed sensor from the steering knuckle.

    NOTICE:
    1. Prevent foreign matter from contacting the sensor tip.
    2. Be careful not to damage the front speed sensor.
    3. Clean the speed sensor installation hole and the contact surfaces every time the speed sensor is removed.


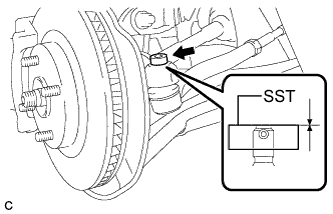
7. SEPARATE TIE ROD END SUB-ASSEMBLY
  1. Remove the cotter pin and nut.


    C249937E01
  1. Install SST to the tie rod end.

    SST
    09960-20010   (09961-02060)

    NOTICE:
    Make sure that the upper end of the tie rod end and SST are aligned.

  1. Secure SST using a string.

    NOTICE:
    Be sure to tighten the string firmly to secure SST to the steering knuckle to prevent SST from falling off.


  1. Using SST, separate the tie rod end from the steering knuckle.
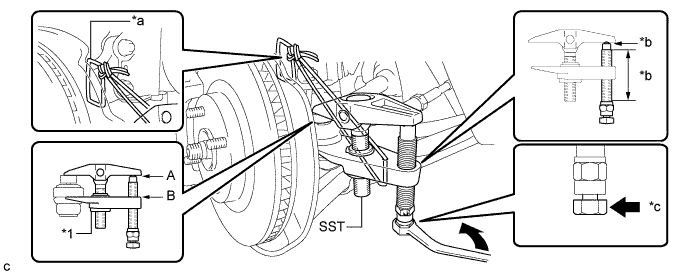
    SST
    09960-20010   (09961-02060)


    C249935E01


    Text in Illustration 
    *1
    Center Nut
    -
    -
    *a
    String
    *b
    Grease Application Area
    *c
    Place the wrench here.
    -
    -

    CAUTION:
    Apply grease to the bolt threads and the tip of SST.

    NOTICE:
    1. Install SST with the center nut so that A and B shown in the illustration are parallel. Otherwise, the dust cover may be damaged.
    2. Be sure to place the wrench on the part indicated in the illustration.
    3. Do not damage the front disc brake dust cover.
    4. Do not damage the ball joint dust cover.
    5. Do not damage the steering knuckle.


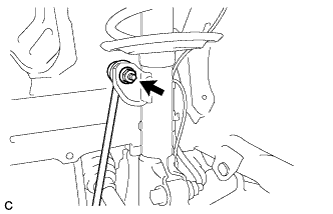
8. SEPARATE FRONT STABILIZER LINK ASSEMBLY


    C249870
  1. Remove the nut and separate the front stabilizer link assembly from the front shock absorber assembly.

    HINT:
    Use a hexagon socket wrench to hold the stud.


9. SEPARATE FRONT LOWER NO. 1 SUSPENSION ARM SUB-ASSEMBLY


    C107513
  1. Remove the clip and nut.


    C172759E06
  1. Install SST to the threaded section of the lower ball joint.

    SST
    09960-20010   (09961-02060)

    NOTICE:
    Make sure that the upper ends of the threaded section of the lower ball joint and SST are aligned.


  1. Using SST, separate the front lower No. 1 suspension arm sub-assembly LH from the steering knuckle.
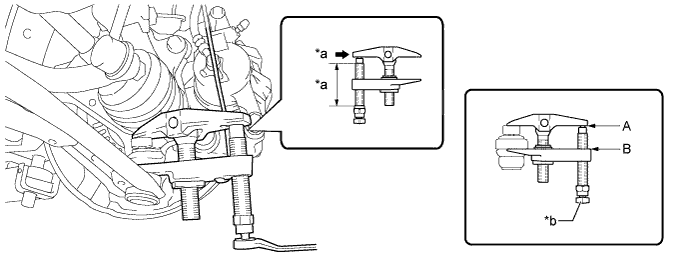
    SST
    09960-20010   (09961-02010, 09961-02060)


    C236386E01


    Text in Illustration 
    *a
    Apply grease
    *b
    Place wrench here

    CAUTION:
    Apply grease to the threads and end of the SST bolt.

    NOTICE:
    1. Make sure to tie the string of SST to the vehicle to prevent SST from dropping.
    2. Install SST so that A and B are parallel.
    3. Be sure to place the wrench on the part indicated in the illustration.
    4. Do not damage the lower ball joint dust cover.
    5. Do not damage the drive shaft outboard joint boots.
    6. Do not damage the front disc brake dust cover.
    7. Do not damage the steering knuckle.


10. SEPARATE FRONT DRIVE SHAFT ASSEMBLY


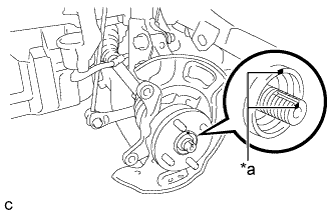
    C249882E01
  1. Put matchmarks on the front drive shaft assembly and front axle hub sub-assembly.
    Text in Illustration 
    *a
    Matchmark

  1. Using a plastic hammer, separate the front drive shaft assembly from the front axle assembly. If it is difficult to separate, tap the end of the front drive shaft assembly using a brass bar and a hammer.

    NOTICE:
    Be careful not to damage the drive shaft boot.


11. REMOVE FRONT DRIVE SHAFT ASSEMBLY


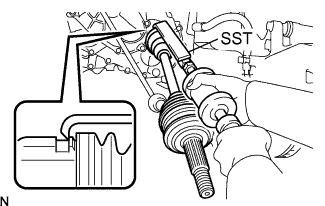
    C107924E01
  1. Using SST, remove the front drive shaft assembly.

    SST
    09520-00031  
    09520-01010  

    NOTICE:
    1. Do not damage the hybrid vehicle transaxle assembly type T oil seal.
    2. Do not damage the inboard joint boot.
    3. Do not drop the front drive shaft assembly.


12. REMOVE FRONT DRIVE SHAFT HOLE SNAP RING


    C129495
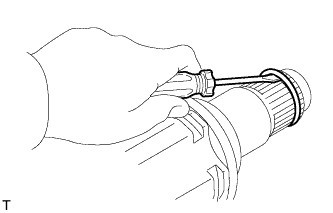
  1. Using a screwdriver, remove the front drive shaft hole snap ring.