 |
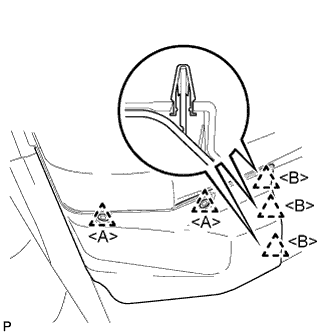
Using a clip remover, remove the 2 clips <A>.
POWER SWITCH > REMOVAL |
| 1. PRECAUTION |
| 2. REMOVE FRONT FLOOR COVER RH |
|
Using a clip remover, remove the 2 clips <A>.
Disengage the 3 clips <B>.
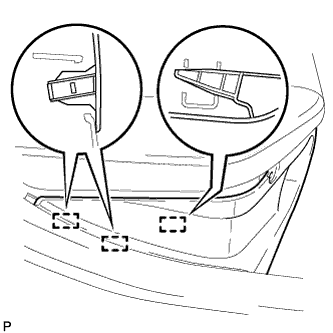 |
Disengage the 3 guides and remove the front floor cover RH.
| 3. DISCONNECT CABLE FROM AUXILIARY BATTERY NEGATIVE TERMINAL |
| 4. REMOVE CENTER INSTRUMENT CLUSTER FINISH PANEL SUB-ASSEMBLY |
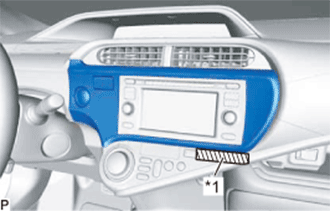 |
Apply protective tape to the area shown in the illustration.
| *1 | Protective Tape |
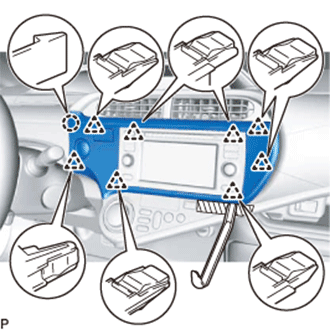 |
Using a moulding remover, disengage the 8 clips and claw.
Disconnect the connector and remove the center instrument cluster finish panel sub-assembly.
| 5. REMOVE POWER SWITCH |
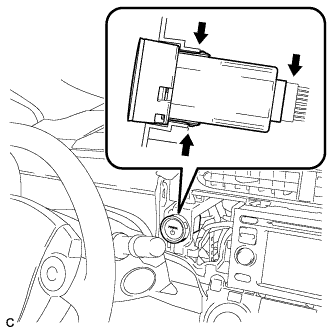 |
Disengage the 2 claws and remove the power switch.
Disconnect the power switch connector.