 |
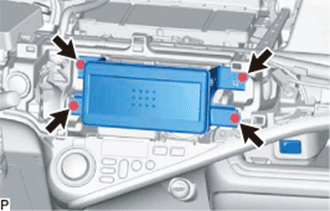
Remove the 4 screws <C> and radio tuner opening cover with bracket.
POWER OUTLET SOCKET > REMOVAL |
| 1. REMOVE AIR CONDITIONER CONTROL ASSEMBLY |
| 2. REMOVE RADIO TUNER OPENING COVER WITH BRACKET (w/o Radio Receiver) |
|
Remove the 4 screws <C> and radio tuner opening cover with bracket.
| 3. REMOVE RADIO RECEIVER ASSEMBLY WITH BRACKET (for Radio Receiver Type) |
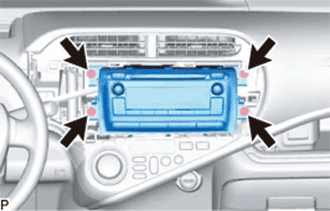 |
Remove the 4 screws.
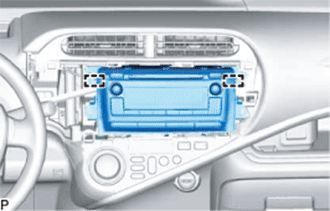 |
Disengage the 2 guides and pull the radio receiver assembly with bracket toward the rear of the vehicle.
Disconnect each connector and remove the radio receiver assembly with bracket.
| 4. REMOVE RADIO AND DISPLAY RECEIVER ASSEMBLY WITH BRACKET (for Radio and Display Type) |
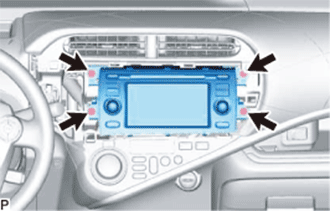 |
Remove the 4 screws.
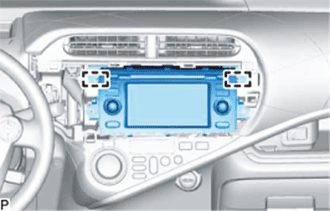 |
Disengage the 2 guides and pull the radio and display receiver assembly with bracket toward the rear of the vehicle.
Disconnect each connector and remove the radio and display receiver assembly with bracket.
| 5. REMOVE NO. 1 POWER OUTLET SOCKET ASSEMBLY |
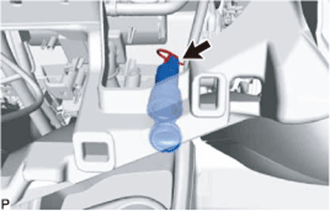 |
Disconnect the connector.
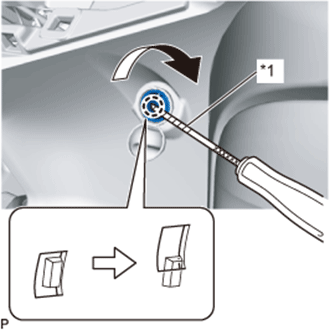 |
Using a screwdriver with its tip wrapped with protective tape, disengage the claw, then turn the No.1 power outlet socket assembly clockwise and pull the No. 1 power outlet socket assembly half way out.
| *1 | Protective Tape |
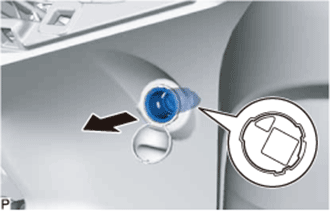 |
Align the protrusion of the No. 1 power outlet socket assembly with the cutout of the No. 1 power outlet socket cover and then pull the No. 1 power outlet socket assembly out.
Remove the No. 1 power outlet socket assembly.
| 6. REMOVE NO. 1 POWER OUTLET SOCKET COVER |
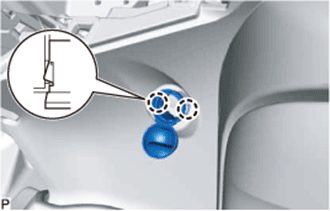 |
Disengage the 2 claws and remove the No. 1 power outlet socket cover.