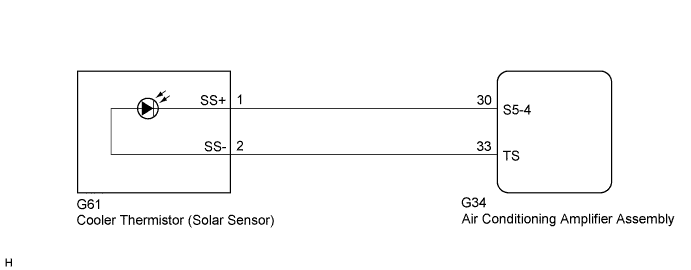
DTC B14A2 Driver Side Solar Sensor Short Circuit |
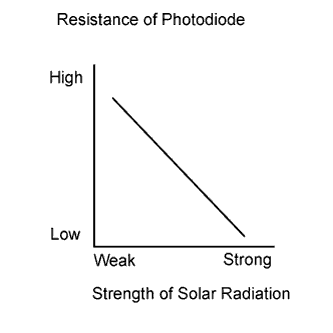
| DTC No. | DTC Detection Condition | Trouble Area |
| B14A2 | Short in cooler thermistor (solar sensor) circuit |
|
| 1.READ VALUE USING TECHSTREAM |
Connect the Techstream to the DLC3.
Turn the ignition switch to ON (IG).
Turn the Techstream on.
Enter the following menus: Body Electrical / Air Conditioner / Data List.
Check the value(s) by referring to the table below.
| Tester Display | Measurement Item/Range | Normal Condition | Diagnostic Note |
| Solar Sensor (D Side) | Solar sensor / Min.: 0 Max.: 255 | Solar sensor value increases as brightness increases | - |
| Result | Proceed to |
| NG | A |
| OK (When troubleshooting according to Problem Symptoms Table) | B |
| OK (When troubleshooting according to the DTC) | C |
|
| ||||
|
| ||||
| A | |
 |
| 2.CHECK HARNESS AND CONNECTOR (POWER SOURCE CIRCUIT) |
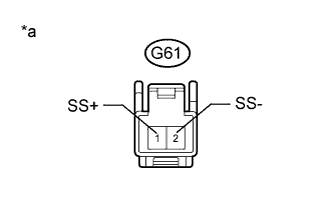 |
Disconnect the G61 cooler thermistor (solar sensor) connector.
Measure the voltage according to the value(s) in the table below.
| Tester Connection | Condition | Specified Condition |
| G61-1 (SS+) - G61-2 (SS-) | Ignition switch off | Below 1 V |
| G61-1 (SS+) - G61-2 (SS-) | Ignition switch ON (IG) | 4.75 to 5.25 V |
| *a | Front view of wire harness connector (to Cooler Thermistor (Solar Sensor)) |
|
| ||||
| OK | |
|
| 3.INSPECT COOLER THERMISTOR (SOLAR SENSOR) |
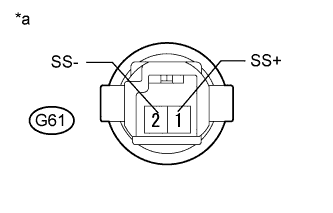 |
Remove the cooler thermistor (solar sensor) (Click here).
Reconnect the G61 cooler thermistor (solar sensor) connector.
Turn the ignition switch to ON (IG).
Measure the voltage according to the value(s) in the table below.
| Tester Connection | Condition | Specified Condition |
| G61-1 (SS+) - G61-2 (SS-) | Sensor is subjected to electric light | 0.8 to 4.3 V |
| G61-1 (SS+) - G61-2 (SS-) | Sensor is covered with a cloth | Below 0.8 V |
| *a | Component with harness connected (Cooler Thermistor (Solar Sensor)) |
|
| ||||
| OK | ||
 | ||
| ||
| 4.CHECK HARNESS AND CONNECTOR (AIR CONDITIONING AMPLIFIER ASSEMBLY - COOLER THERMISTOR (SOLAR SENSOR)) |
Disconnect the G34 air conditioning amplifier assembly connector.
Measure the resistance according to the value(s) in the table below.
| Tester Connection | Condition | Specified Condition |
| G61-1 (SS+) - G34-30 (S5-4) | Always | Below 1 Ω |
| G61-2 (SS-) - G34-33 (TS) | Always | Below 1 Ω |
| G61-1 (SS+) - Body ground | Always | 10 kΩ or higher |
| G61-2 (SS-) - Body ground | Always | 10 kΩ or higher |
|
| ||||
| OK | ||
| ||
| ||

