 |
Install the front door inside locking cable assembly as shown in the illustration.
FRONT DOOR LOCK > INSTALLATION |
| 1. INSTALL FRONT DOOR INSIDE LOCKING CABLE ASSEMBLY |
|
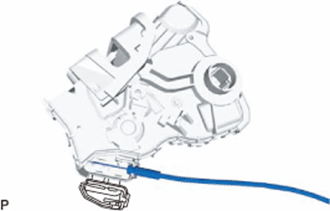
Install the front door inside locking cable assembly as shown in the illustration.
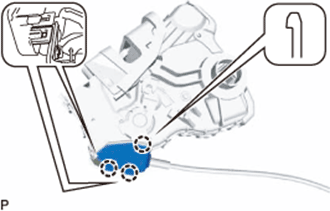 |
Engage the 3 claws as shown in the illustration.
| 2. INSTALL FRONT DOOR LOCK REMOTE CONTROL CABLE ASSEMBLY |
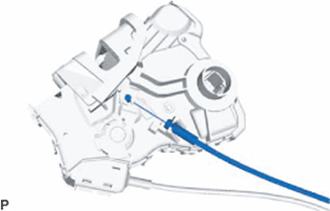 |
Install the front door lock remote control cable assembly as shown in the illustration.
| 3. INSTALL FRONT DOOR LOCK ASSEMBLY |
Apply MP grease to the sliding parts of the front door lock assembly.
When reusing the front door lock assembly:
Install a new door lock wiring harness seal to the front door lock assembly.
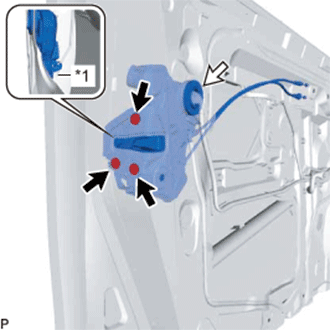 |
Insert the front door lock open rod to the front door lock assembly.
| *1 | Front Door Lock Open Rod |
Using a T30 "TORX" socket wrench, install the front door lock assembly with the 3 screws.
Connect the connector.
| 4. INSTALL FRONT DOOR OUTSIDE HANDLE COVER WITH LOCK CYLINDER ASSEMBLY (w/ Lock Cylinder) |
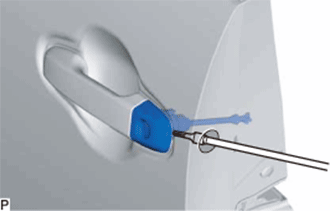 |
Install the front door outside handle cover with lock cylinder assembly.
Using a T30 "TORX" socket wrench, install the front door lock cylinder with the screw.
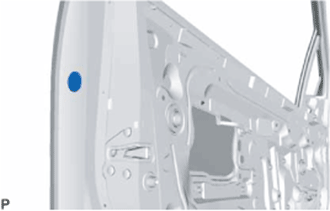 |
Install the hole plug.
| 5. INSTALL FRONT DOOR REAR LOWER FRAME SUB-ASSEMBLY |
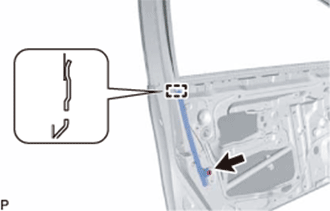 |
Engage the guide.
Install the front door rear lower frame sub-assembly with the bolt.
| 6. INSTALL FRONT DOOR GLASS RUN |
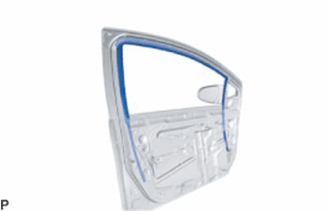 |
Install the front door glass run.
| 7. INSTALL FRONT DOOR GLASS SUB-ASSEMBLY |
Connect the cable to the negative (-) auxiliary battery terminal and power window regulator master switch assembly and move the front door glass subassembly so that the door glass bolts can be seen.
Disconnect the cable from the negative (-) auxiliary battery terminal and power window regulator master switch.
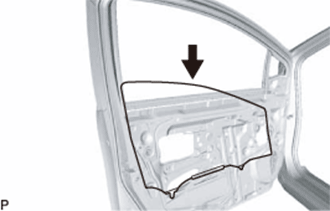 |
Insert the front door glass sub-assembly into the front door panel along the front door glass run as shown in the illustration.
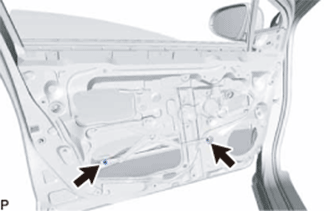 |
Install the front door glass sub-assembly with the 2 bolts.
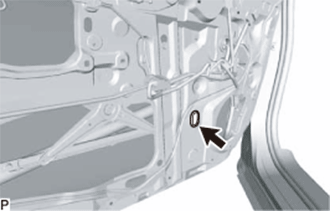 |
Install the front door No. 2 service hole cover.
| 8. INSTALL FRONT DOOR SERVICE HOLE COVER |
Apply new butyl tape to the front door panel.
Pass the front door lock remote control cable assembly and front door inside locking cable assembly through a new front door service hole cover.
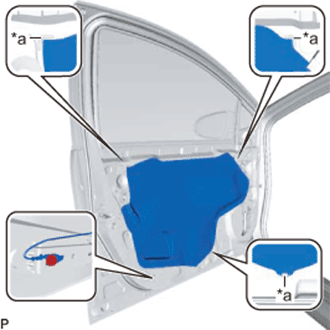 |
Attach the front door service hole cover according to the reference points on the front door panel.
| *a | Reference Point |
Connect the earth wire with the bolt.
| 9. CONNECT DOOR SIDE AIRBAG SENSOR CONNECTOR |
Connect the door side airbag sensor connector .
| 10. INSTALL FRONT NO. 2 SPEAKER ASSEMBLY |
Install the front No. 2 speaker assembly with the 2 screws.
Connect the connector.
| 11. INSTALL FRONT DOOR TRIM BOARD SUB-ASSEMBLY |
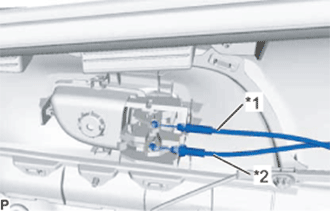 |
Connect the front door lock remote control cable assembly and front door inside locking cable assembly to the front door inside handle sub-assembly.
| *1 | Front Door Inside Locking Cable Assembly |
| *2 | Front Door Lock Remote Control Cable Assembly |
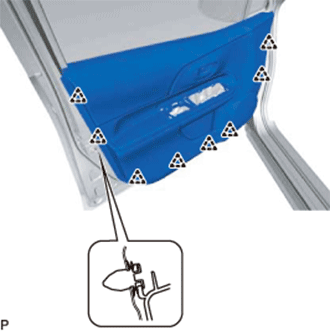 |
Engage the 8 clips.
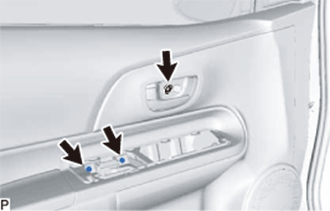 |
Install the front door trim board sub-assembly with the 3 screws.
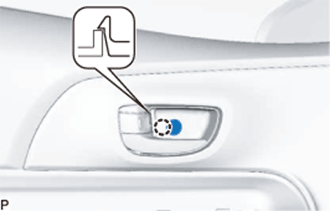 |
Engage the claw and close the cover.
| 12. INSTALL POWER WINDOW REGULATOR MASTER SWITCH ASSEMBLY WITH FRONT DOOR ARMREST BASE PANEL (for Driver Side) |
Connect the connector.
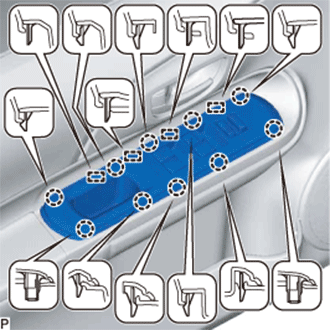 |
Engage the 4 guides and 10 claws to install power window regulator master switch assembly with front door armrest base panel.
| 13. INSTALL POWER WINDOW REGULATOR SWITCH ASSEMBLY WITH FRONT DOOR ARMREST BASE PANEL (for Front Passenger Side) |
Connect the connector.
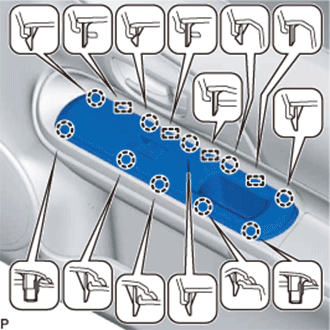 |
Engage the 4 guides and 10 claws to install power window regulator switch assembly with front door armrest base panel.
| 14. CONNECT CABLE TO NEGATIVE AUXILIARY BATTERY TERMINAL |
| 15. INSTALL FRONT FLOOR COVER RH |
Engage the 3 guides.
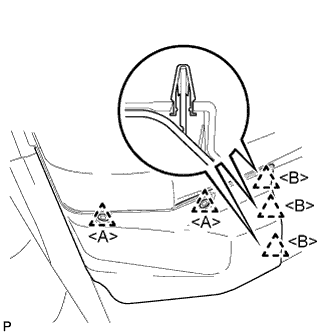 |
Engage the 3 clips <B> to install the front floor cover RH.
Install the 2 clips <A>.
| 16. INITIALIZE POWER WINDOW CONTROL SYSTEM (for Driver Side) |
| 17. CHECK POWER WINDOW CONTROL SYSTEM |
| 18. INSPECT SRS WARNING LIGHT |