 |
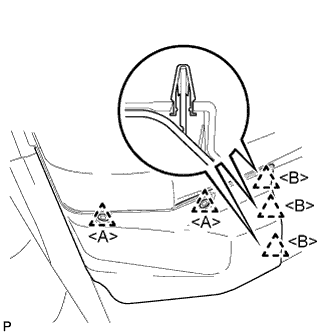
Using a clip remover, remove the 2 clips <A>.
REAR DOOR LOCK > REMOVAL |
| 1. PRECAUTION (w/ Power Window) |
| 2. REMOVE FRONT FLOOR COVER RH (w/ Power Window) |
|
Using a clip remover, remove the 2 clips <A>.
Disengage the 3 clips <B>.
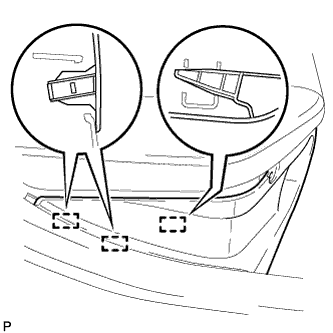 |
Disengage the 3 guides and remove the front floor cover RH.
| 3. DISCONNECT CABLE FROM AUXILIARY BATTERY NEGATIVE TERMINAL (w/ Power Window) |
| 4. REMOVE REAR DOOR FRAME GARNISH |
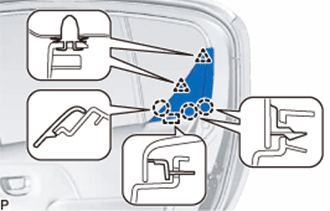 |
Disengage the 2 clips and 3 claws.
Disengage the guide and remove the rear door frame garnish.
| 5. REMOVE REAR POWER WINDOW REGULATOR SWITCH ASSEMBLY WITH REAR DOOR ARMREST BASE PANEL (w/ Power Window) |
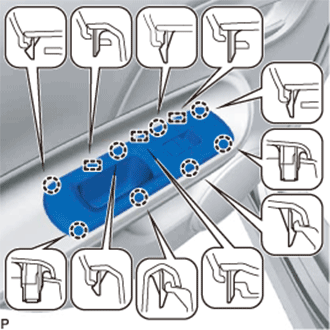 |
Disengage the 8 claws and 3 guides.
Disconnect the connector and remove the rear power window regulator switch assembly with rear door armrest base panel.
| 6. REMOVE REAR DOOR ARMREST BASE UPPER PANEL (w/o Power Window) |
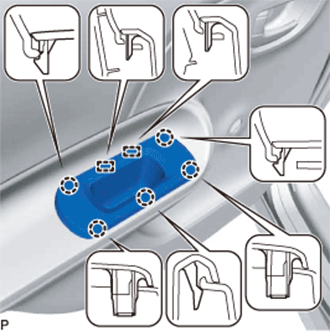 |
Disengage the 5 claws and 2 guides and remove the rear door armrest base upper panel.
| 7. REMOVE REAR DOOR WINDOW REGULATOR HANDLE ASSEMBLY (w/o Power Window) |
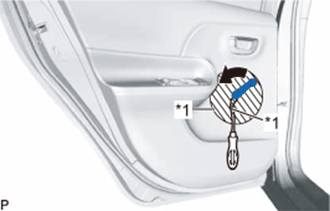 |
Apply protective tape to the area shown in the illustration.
| *1 | Protective Tape |
Insert a clip remover between the plate and front door trim board.
Turn the handle with the clip remover inserted, as shown in the illustration.
Remove the rear door window regulator handle assembly and clip.
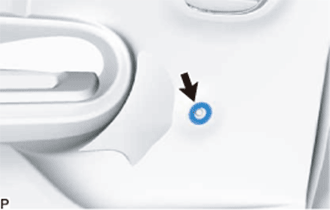 |
Remove the plate.
| 8. REMOVE REAR DOOR TRIM BOARD SUB-ASSEMBLY |
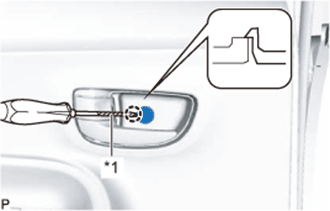 |
Using a screwdriver with its tip wrapped in protective tape, disengage the claw and open the cover.
| *1 | Protective Tape |
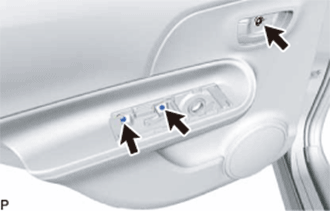 |
Remove the 3 screws.
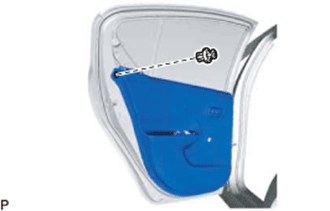 |
Remove the clip.
Pull the rear door trim board sub-assembly at each position indicated in the illustration and disengage the 6 clips (A) in the order shown in the illustration.
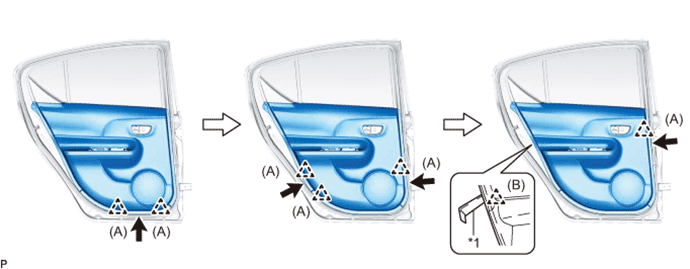
Using a moulding remover, disengage the clip (B).
| *1 | Moulding Remover |
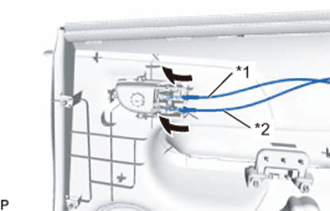 |
Disconnect the rear door lock remote control cable assembly and rear door inside locking cable assembly and remove the rear door trim board.
| *1 | Rear Door Inside Locking Cable Assembly |
| *2 | Rear Door Lock Remote Control Cable Assembly |
| 9. DISCONNECT REAR DOOR WEATHERSTRIP |
Disconnect the upper part of the rear door weatherstrip.
| 10. REMOVE REAR DOOR SERVICE HOLE COVER |
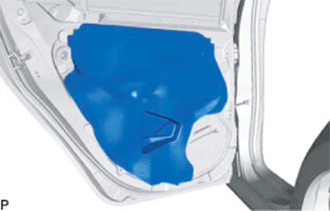 |
Remove the rear door service hole cover.
| 11. REMOVE REAR DOOR GLASS RUN |
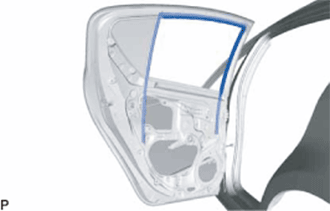 |
Remove the rear door glass run.
| 12. REMOVE REAR DOOR WINDOW DIVISION BAR SUB-ASSEMBLY |
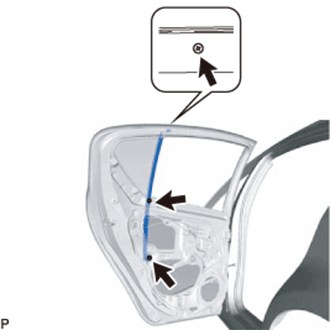 |
Remove the 2 bolts and screw, and rear door window division bar sub-assembly.
| 13. REMOVE REAR DOOR QUARTER WINDOW GLASS |
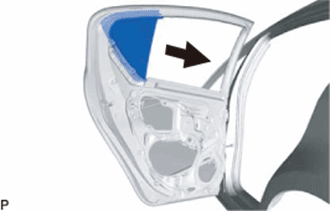 |
Remove the rear door quarter window glass as shown in the illustration.
| 14. REMOVE REAR DOOR GLASS SUB-ASSEMBLY |
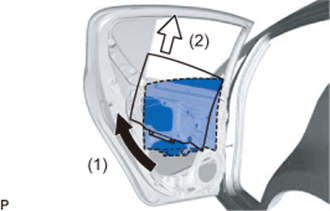 |
Slide the lower section of the rear door glass and disengage the rear door glass from the rear window regulator sub-assembly.
Remove the rear door glass sub-assembly as indicated by the arrows in the order shown in the illustration.
| 15. REMOVE REAR DOOR LOCK ASSEMBLY |
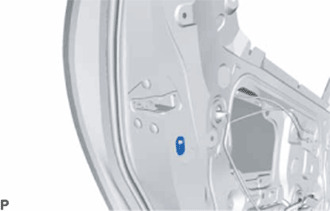 |
Remove the rear door lock child protection cover.
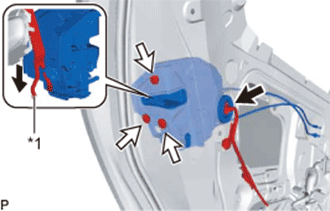 |
Disconnect the connector.
Using a T30 "TORX" socket wrench, remove the 3 screws.
Move the rear door lock assembly downward and pull the release plate out of the rear door outside handle frame.
| *1 | Release Plate |
When reusing the rear door lock assembly:
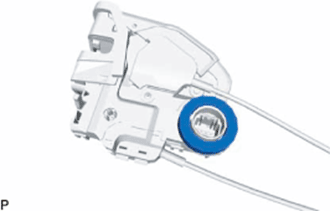 |
Remove the door lock wiring harness seal from the rear door lock assembly.
| 16. REMOVE REAR DOOR LOCK REMOTE CONTROL CABLE ASSEMBLY |
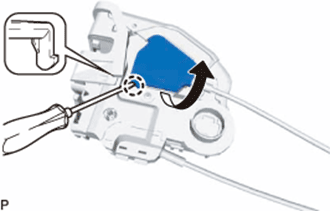 |
Using a screwdriver, disengage the claw as shown in the illustration.
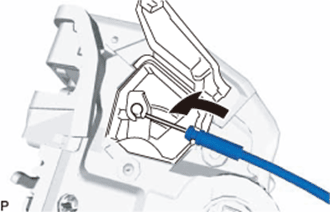 |
Remove the rear door lock remote control cable assembly as shown in the illustration.
| 17. REMOVE REAR DOOR INSIDE LOCKING CABLE ASSEMBLY |
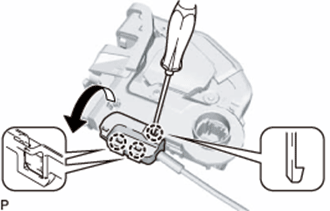 |
Using a screwdriver, disengage the 3 claws as shown in the illustration.
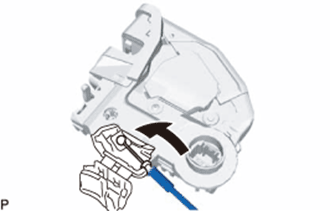 |
Remove the rear door inside locking cable assembly as shown in the illustration.