 |
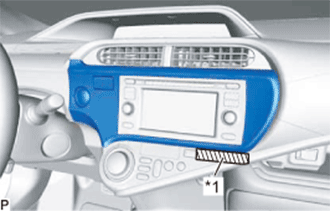
Apply protective tape to the area shown in the illustration.
| *1 | Protective Tape |
ROOM TEMPERATURE SENSOR > REMOVAL |
| 1. REMOVE CENTER INSTRUMENT CLUSTER FINISH PANEL SUB-ASSEMBLY |
|
Apply protective tape to the area shown in the illustration.
| *1 | Protective Tape |
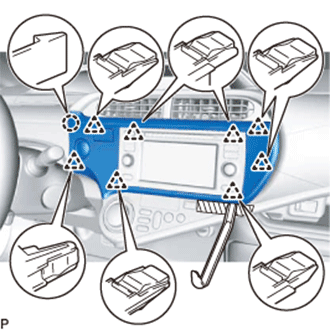 |
Using a moulding remover, disengage the 8 clips and claw.
Disconnect the connector and remove the center instrument cluster finish panel sub-assembly.
| 2. REMOVE NO. 2 INSTRUMENT PANEL REGISTER ASSEMBLY |
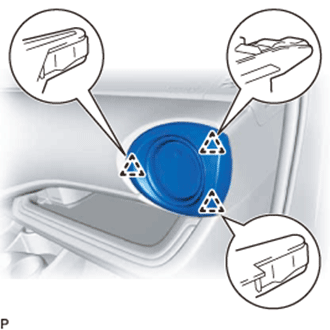 |
Disengage the 3 clips and remove the No. 2 instrument panel register assembly.
| 3. REMOVE INSTRUMENT CLUSTER FINISH PANEL GARNISH |
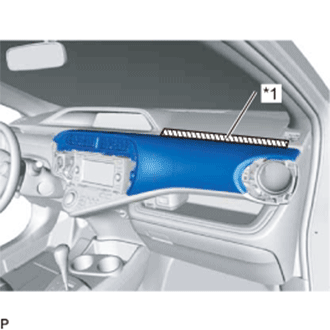 |
Apply protective tape to the area shown in the illustration.
| *1 | Protective Tape |
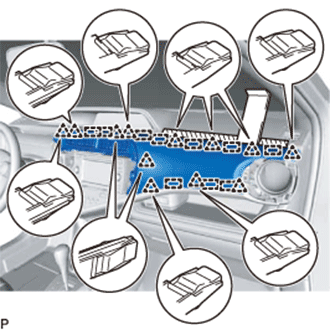 |
Using a moulding remover, disengage the 12 clips and 10 guides to remove the instrument cluster finish panel garnish.
| 4. REMOVE LOWER INSTRUMENT CLUSTER FINISH PANEL GARNISH |
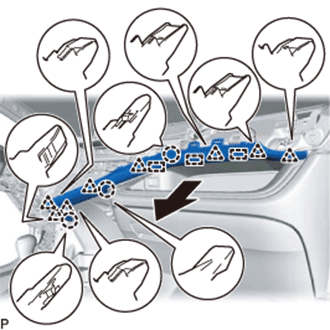 |
Disengage the 3 claws, 8 clips and 3 guides, and remove the lower instrument cluster finish panel garnish as shown in the illustration.
| 5. REMOVE AIR CONDITIONING CONTROL ASSEMBLY |
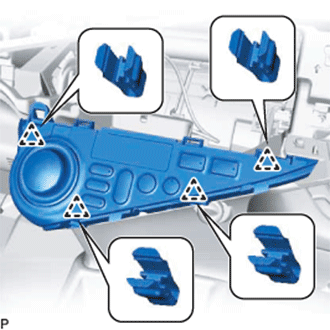 |
Disengage the 4 clips.
Disconnect the connector and remove the air conditioning control assembly.
| 6. REMOVE ROOM TEMPERATURE SENSOR (COOLER THERMISTOR) |
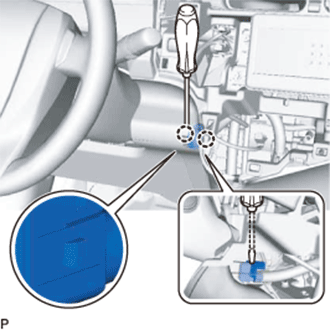 |
Insert a screwdriver into the position shown in the illustration to disengage the 2 claws.
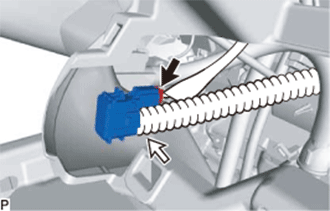 |
Disconnect the connector and aspirator and remove the room temperature sensor (cooler thermistor).