Home › Suspension › FRONT SUSPENSION › FRONT SHOCK ABSORBER

FRONT SHOCK ABSORBER > INSTALLATION

for Preparation Click here


HINT:
  1. Use the same procedure for the LH side and RH side.
  2. The procedure listed below is for the LH side.


1. INSTALL FRONT COIL SPRING LOWER INSULATOR


    C188480E02
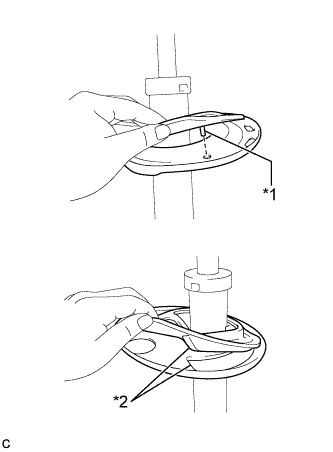
  1. Install the front coil spring lower insulator to the front shock absorber assembly.
    Text in Illustration 
    *1
    Positioning Pin
    *2
    Depression

    NOTICE:
    When installing the insulator, fit the insulator to the depression of the spring seat and align the positioning pin into the hole.
2. INSTALL FRONT SPRING BUMPER


    C212035E01
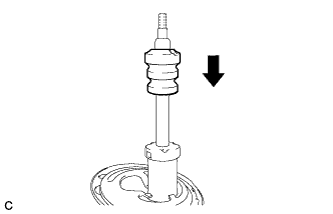
  1. Install the front spring bumper to the front shock absorber assembly.

    NOTICE:
    Face the smaller diameter end of the front spring bumper downward.


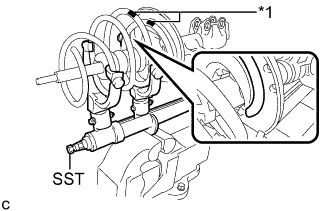
3. INSTALL FRONT COIL SPRING


    C265532E01
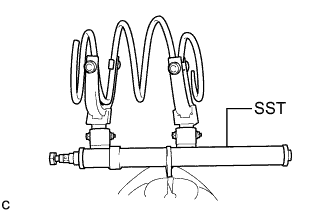
  1. Attach SST to the front coil spring and secure it in a vise.

    SST
    09727-30021   (09727-00010, 09727-00021, 09727-00031)


    C263591
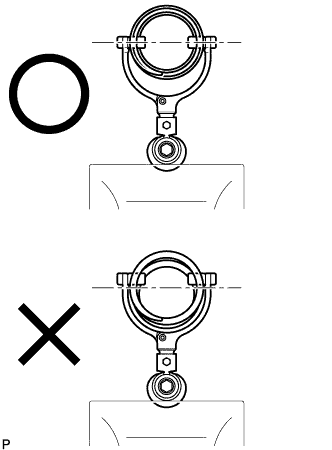
  1. Attach the arm of SST to the diameter of the front coil spring.

    CAUTION:
    1. Make sure that the front coil spring is installed so that the distance between the upper and lower hooks of SST is at the maximum.
    2. Make sure that the claws of the hooks are securely attached.

  1. Using SST, compress the front coil spring.

    CAUTION:
    1. If the front coil spring bends during the compression, immediately stop the compression and reinstall SST.
    2. Do not compress the spring until the coil springs contact each other.
    3. Do not use an impact wrench. It will damage SST.


    C265533E03
  1. Install the front coil spring to the front shock absorber assembly.
    Text in Illustration 
    *1
    Paint Mark

    NOTICE:
    1. Make sure that the end of the front coil spring is positioned in the depression of the front lower spring seat.
    2. Make sure to install the coil spring to the front shock absorber assembly so that the paint marks will be positioned at the lower side of the vehicle.


4. INSTALL FRONT COIL SPRING UPPER INSULATOR


5. INSTALL FRONT COIL SPRING UPPER SEAT


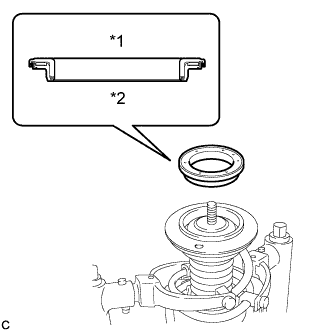
6. INSTALL STRUT MOUNTING BEARING


    C207004E01
  1. Install the strut mounting bearing.
    Text in Illustration 
    *1
    Upper Side
    *2
    Lower Side

    NOTICE:
    Do not install the bearing upside down.


7. INSTALL FRONT SUSPENSION SUPPORT SUB-ASSEMBLY
  1. Install the front suspension support sub-assembly to the front shock absorber assembly.

    NOTICE:
    When installing, align the cutout on the front suspension support sub-assembly and the shock absorber piston rod end.


8. TEMPORARILY TIGHTEN FRONT SUPPORT TO FRONT SHOCK ABSORBER NUT


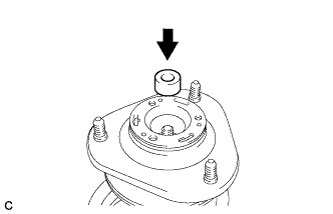
    C188975E05
  1. Install the collar to the front shock absorber assembly.


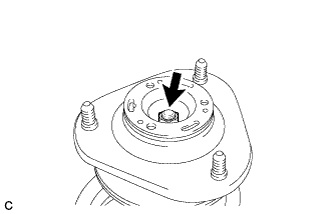
    C188476
  1. Temporarily tighten a new front support to front shock absorber nut.

  1. Remove SST from the front coil spring.

    NOTICE:
    Do not use an impact wrench. It will damage SST.


9. INSTALL FRONT SHOCK ABSORBER WITH COIL SPRING


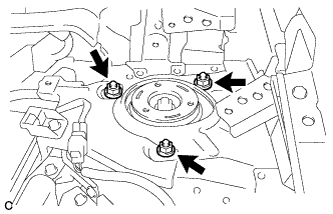
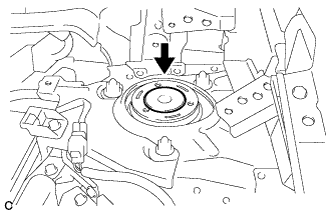
    C205591
  1. Install the front shock absorber with coil spring (upper side) with the 3 nuts.

    Torque:
    50 N*m{ 510 kgf*cm , 37 ft.*lbf }


    C205584
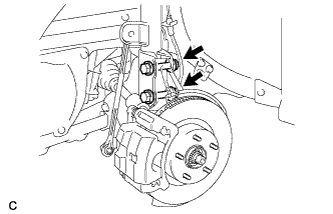
  1. Install the front shock absorber with coil spring (lower side) to the steering knuckle with the 2 bolts and 2 nuts.

    Torque:
    240 N*m{ 2447 kgf*cm , 177 ft.*lbf }

    NOTICE:
    While keeping the bolts from rotating, tighten the nuts.


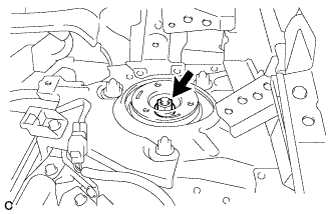
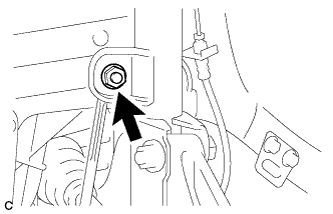
10. FULLY TIGHTEN FRONT SUPPORT TO FRONT SHOCK ABSORBER NUT


    C205589
  1. Fully tighten the front support to front shock absorber nut.

    Torque:
    47 N*m{ 479 kgf*cm , 35 ft.*lbf }


11. INSTALL FRONT SUSPENSION SUPPORT DUST COVER


    C208846
  1. Install the front suspension support dust cover.


12. INSTALL FRONT SPEED SENSOR


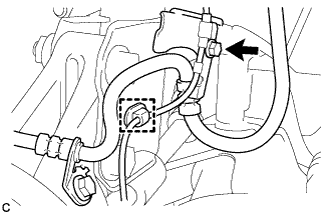
    C208843
  1. Install the front speed sensor and front flexible hose to the front shock absorber with the bolt and clamp.

    Torque:
    19 N*m{ 192 kgf*cm , 14 ft.*lbf }

    NOTICE:
    Do not twist the front speed sensor when installing it.

    HINT:
    Install the front flexible hose first and then the speed sensor harness bracket.


13. INSTALL FRONT STABILIZER LINK ASSEMBLY


    C205585
  1. Install the front stabilizer link assembly to the front shock absorber with coil spring with the nut.

    Torque:
    74 N*m{ 755 kgf*cm , 55 ft.*lbf }

    HINT:
    If the ball joint turns together with the nut, use a hexagon wrench (6 mm) to hold the stud bolt.


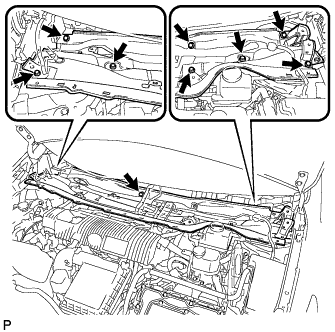
14. INSTALL OUTER COWL TOP PANEL SUB-ASSEMBLY (for LHD)


    C209144
  1. Install the outer cowl top panel sub-assembly with the 9 bolts.

    Torque:
    12 N*m{ 122 kgf*cm , 9 ft.*lbf }


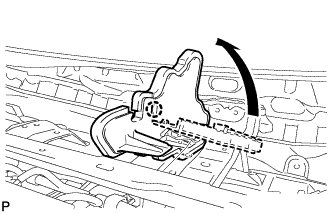
    C209145
  1. Bend the water guard plate RH and engage the claw.


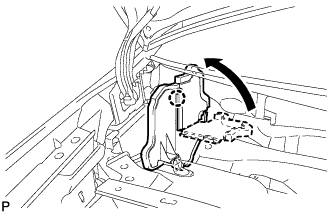
    C209147
  1. Bend the No. 1 heater air duct splash shield seal and engage the claw.


    C205696
  1. Engage the clamp to install the wire harness.


15. INSTALL OUTER COWL TOP PANEL SUB-ASSEMBLY (for RHD)


    C205557
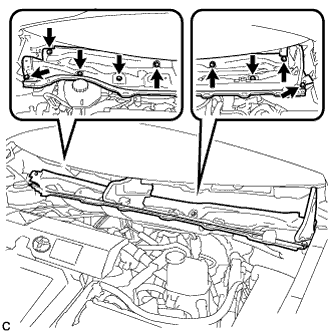
  1. Install the outer cowl top panel with the 9 bolts.

    Torque:
    12 N*m{ 122 kgf*cm , 9 ft.*lbf }


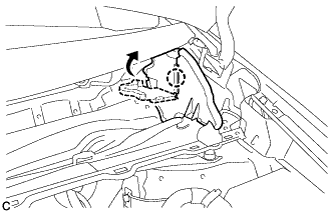
    C205561
  1. Bend the water guard plate RH and engage the claw.


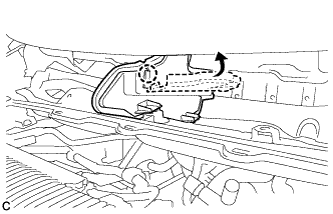
    C205559
  1. Bend the No. 1 heater air duct splash shield seal and engage the claw.


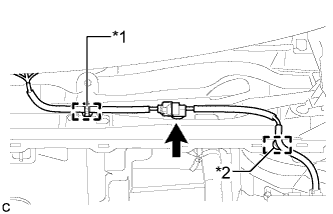
    C205555E01
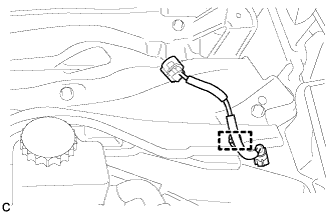
  1. Engage the clamp*2 of the wire harness.

  1. Engage the clamp*1 and connect the connector (w/ Windshield Deicer).


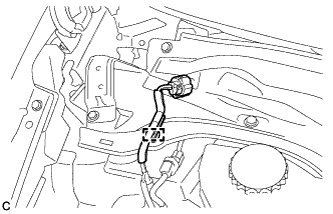
    C205556
  1. Engage the clamp of the wire harness.


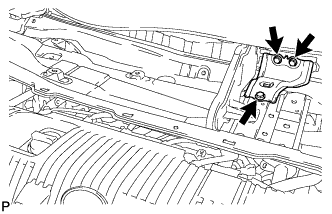
16. INSTALL COWL BODY MOUNTING REINFORCEMENT LH (for LHD)


    C209143
  1. Install the cowl body mounting reinforcement LH with the 3 bolts.

    Torque:
    12 N*m{ 122 kgf*cm , 9 ft.*lbf }


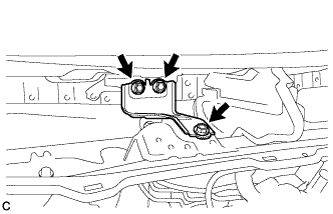
17. INSTALL COWL BODY MOUNTING REINFORCEMENT LH (for RHD)


    C205554
  1. Install the cowl body mounting reinforcement LH with the 3 bolts.

    Torque:
    12 N*m{ 122 kgf*cm , 9 ft.*lbf }


18. INSTALL WINDSHIELD WIPER MOTOR AND LINK ASSEMBLY

HINT:
Refer to the procedure from Install Windshield Wiper Motor and Link Assembly .


19. INSTALL FRONT WHEEL

Torque:
103 N*m{ 1050 kgf*cm , 76 ft.*lbf }


20. INSPECT AND ADJUST FRONT WHEEL ALIGNMENT

HINT:
Inspect and adjust the front wheel alignment (Click here).