Home › Suspension › FRONT SUSPENSION › FRONT LOWER BALL JOINT

FRONT LOWER BALL JOINT > REMOVAL

for Preparation Click here


HINT:
  1. Use the same procedure for the LH side and RH side.
  2. The procedure listed below is for the LH side.


1. REMOVE FRONT AXLE ASSEMBLY

HINT:
Refer to the procedure up to Remove Front Axle Assembly .


2. REMOVE FRONT LOWER BALL JOINT ASSEMBLY
  1. Secure the front axle assembly in a vise.

    NOTICE:
    When using a vise, do not overtighten it.


    C207005
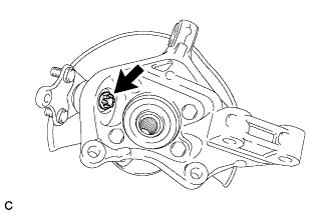
  1. Remove the clip and nut.


    C207007E01
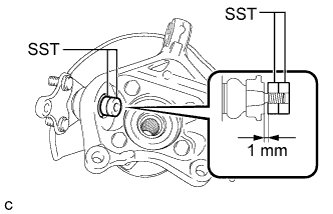
  1. Install SST to the front lower ball joint assembly as shown in the illustration.
    SST
    09960-20010   (09961-02050, 09961-02050)

    NOTICE:
    Check that the clearance measurement between SST and the front axle assembly is 1 mm (0.0394 in.).


    C207006E01
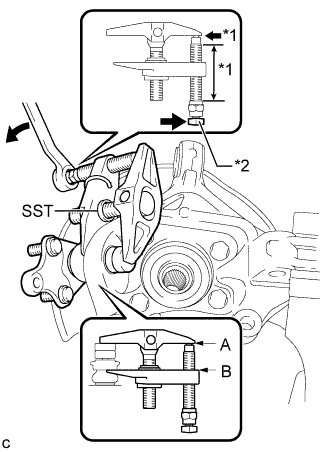
  1. Using SST, remove the front lower ball joint assembly from the front axle assembly as shown in the illustration.

    SST
    09960-20010   (09961-02010, 09961-02050, 09961-02050)
    Text in Illustration 
    *1
    Apply grease
    *2
    Place the wrench here.

    CAUTION:
    Apply grease to the threads and end of the SST bolt.

    NOTICE:
    1. Install SST so that A and B are parallel.
    2. Be sure to place the wrench on the part indicated in the illustration.
    3. Do not damage the front lower ball joint dust cover.