 |
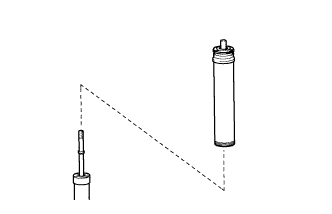
Install the rear No. 1 spring bumper to the rear shock absorber assembly.
REAR SHOCK ABSORBER > INSTALLATION |
| 1. INSTALL REAR NO. 1 SPRING BUMPER |
|
Install the rear No. 1 spring bumper to the rear shock absorber assembly.
| 2. TEMPORARILY TIGHTEN REAR SHOCK ABSORBER ASSEMBLY |
Insert the upper end of the rear shock absorber assembly with the rear No. 1 spring bumper to the vehicle body.
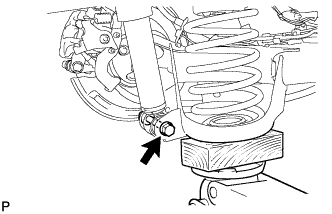 |
Temporarily tighten the rear shock absorber assembly to the rear axle beam assembly with the bolt and nut.
| 3. INSTALL REAR SUSPENSION SUPPORT |
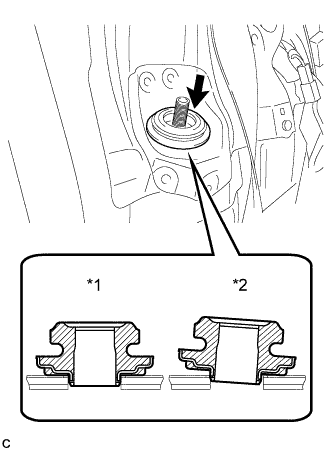 |
Install the rear suspension support.
| *1 | Correct |
| *2 | Incorrect |
| 4. INSTALL REAR NO. 1 SHOCK ABSORBER CUSHION WASHER |
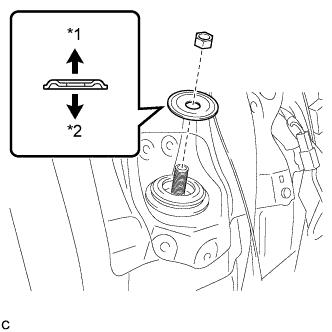 |
Apply a few drops of adhesive to the threads of a new nut.
| *1 | Upper Side |
| *2 | Lower Side |
Install the rear No. 1 shock absorber cushion washer.
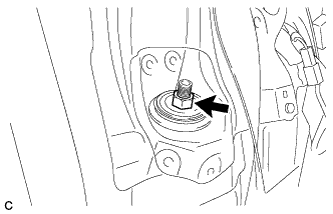 |
Using a union nut wrench, fully tighten the lock nut while holding the rod of the rear shock absorber assembly with a hexagon socket wrench.
| 5. INSTALL REAR HEIGHT CONTROL SENSOR SUB-ASSEMBLY RH (w/ Height Control Sensor) |
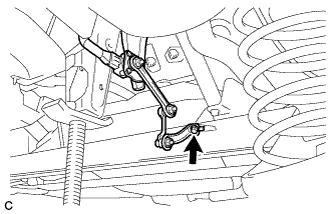 |
Install the rear height control sensor sub-assembly RH to the rear axle beam assembly with the bolt.
| 6. INSTALL DECK TRIM SIDE PANEL ASSEMBLY LH (for LH Side) |
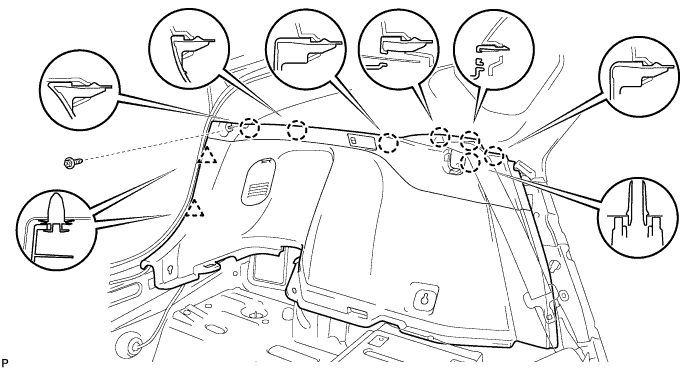
Connect the connector.
Engage the 7 claws and 2 clips.
Install the deck trim side panel assembly LH with the screw.
| 7. INSTALL TONNEAU COVER HOLDER CAP (for LH Side) |
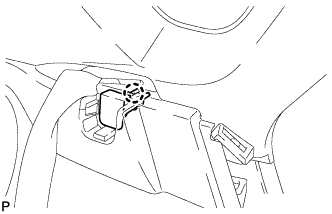 |
Engage the claw to install the tonneau cover holder cap.
| 8. INSTALL LUGGAGE HOLD BELT STRIKER ASSEMBLY (for LH Side) |
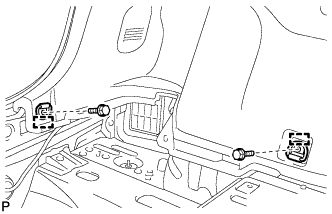 |
Engage the 2 guides.
Install the 2 luggage hold belt striker assemblies with the 2 bolts.
| 9. INSTALL REAR SIDE SEATBACK ASSEMBLY LH (for LH Side) |
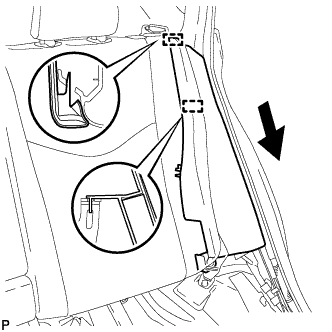 |
Engage the 2 guides as shown in the illustration.
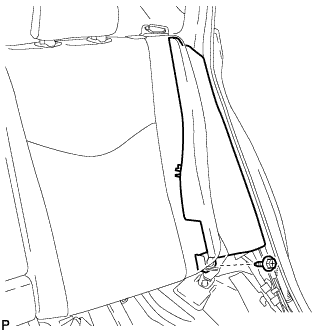 |
Install the rear side seatback assembly LH with the bolt.
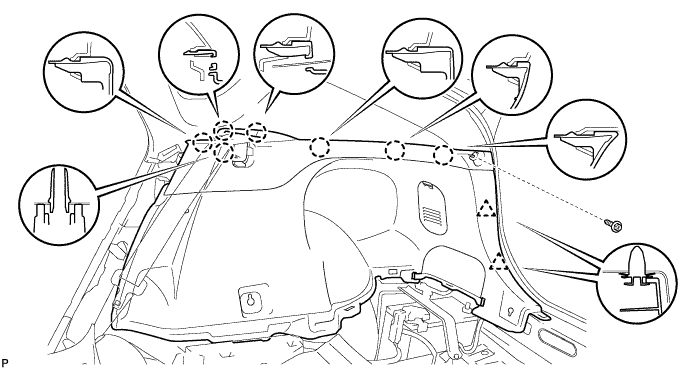
| 10. INSTALL DECK TRIM SIDE PANEL ASSEMBLY RH (for RH Side) |
Engage the 7 claws and 2 clips.
Install the deck trim side panel assembly RH with the screw.
| 11. INSTALL TONNEAU COVER HOLDER CAP (for RH Side) |
| 12. INSTALL LUGGAGE HOLD BELT STRIKER ASSEMBLY (for RH Side) |
| 13. INSTALL REAR SIDE SEATBACK ASSEMBLY RH (for RH Side) |
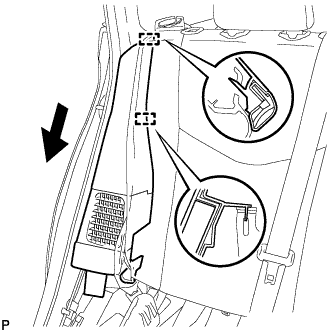 |
Engage the 2 guides as shown in the illustration.
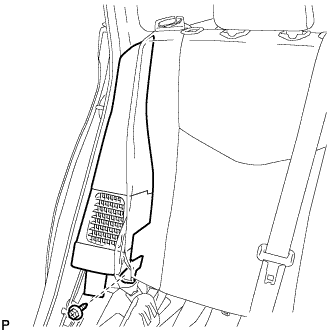 |
Install the rear side seatback assembly RH with the bolt.
| 14. INSTALL REAR SEAT CUSHION ASSEMBLY |
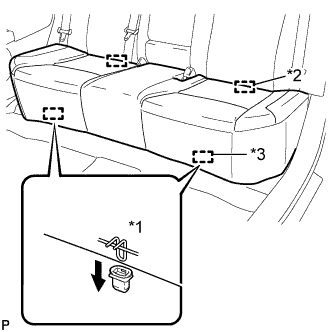 |
Engage the 2 guides of the seat cushion to the seatback.
| *1 | 100 mm (3.94 in.) or less |
| *2 | Guide |
| *3 | Hook |
Engage the 2 front hooks of the seat cushion to the vehicle body.
| 15. INSTALL REAR DOOR SCUFF PLATE LH (for LH Side) |
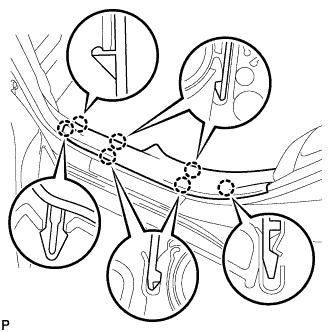 |
Engage the 7 claws to install the rear door scuff plate LH.
| 16. INSTALL REAR DOOR SCUFF PLATE RH (for RH Side) |
| 17. INSTALL REAR DECK TRIM COVER |
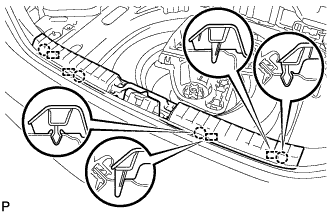 |
Engage the 4 claws and 4 guides to install the rear deck trim cover.
| 18. INSTALL DECK TRIM SERVICE HOLE COVER |
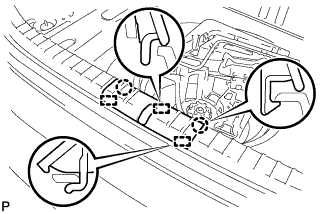 |
Engage the 3 guides.
Engage the 2 claws to install the deck trim service hole cover.
| 19. INSTALL REAR NO. 1 FLOOR BOARD |
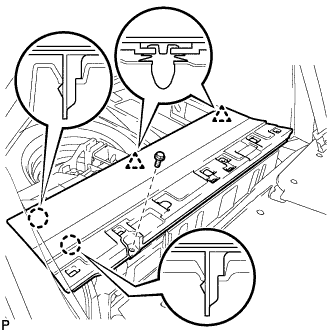 |
Engage the 2 claws and 2 clips.
Install the rear No. 1 floor board with the bolt.
| 20. INSTALL REAR NO. 2 FLOOR BOARD SUB-ASSEMBLY |
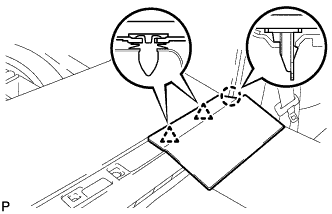 |
Engage the claw and 2 clips to install the rear No. 2 floor board sub-assembly.
| 21. INSTALL REAR NO. 1 FLOOR BOARD SUB-ASSEMBLY |
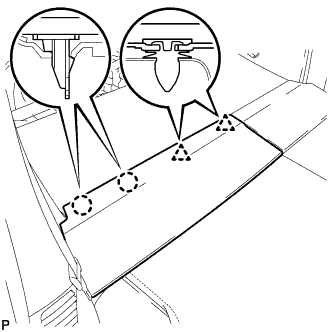 |
Engage the 2 claws and 2 clips to install the rear No. 1 floor board sub-assembly.
| 22. INSTALL DECK FLOOR BOX LH (for LH Side) |
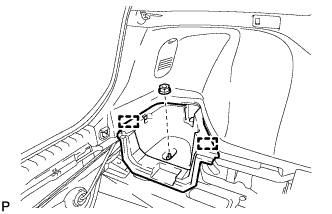 |
Engage the 2 guides.
Install the deck floor box LH with the clip.
| 23. INSTALL REAR NO. 4 FLOOR BOARD (for LH Side) |
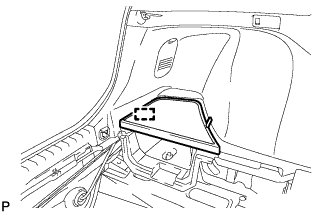 |
Engage the guide to install the rear No. 4 floor board.
| 24. INSTALL REAR NO. 3 FLOOR BOARD (for RH Side) |
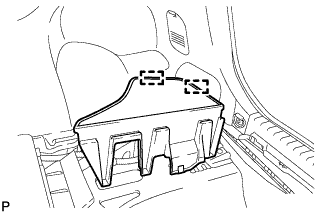 |
Engage the 2 guides to install the rear No. 3 floor board.
| 25. INSTALL REAR DECK FLOOR BOX |
Install the rear deck floor box.
| 26. INSTALL REAR NO. 2 FLOOR BOARD |
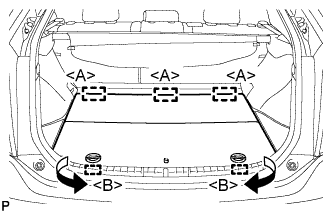 |
Engage the 3 guides <A>.
Engage the 2 guides <B> and install the rear No. 2 floor board as shown in the illustration.
| 27. INSTALL TONNEAU COVER ASSEMBLY (w/ Tonneau Cover) |
Install the tonneau cover assembly.
| 28. INSTALL REAR WHEEL |
| 29. STABILIZE SUSPENSION |
Lower the vehicle.
Bounce the vehicle up and down several times to stabilize the suspension.
| 30. FULLY TIGHTEN REAR SHOCK ABSORBER ASSEMBLY |
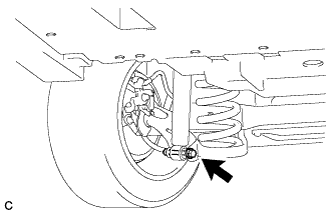 |
Fully tighten the bolt.
| 31. PERFORM INITIALIZATION (w/ Height Control Sensor) |