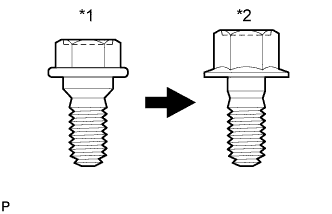
FRONT DOOR > ADJUSTMENT |

| *1 | Centering Bolt |
| *2 | Standard Bolt |
| 1. INSPECT FRONT DOOR |
Check that the clearance measurements of areas *1 through *11 are within each standard range.
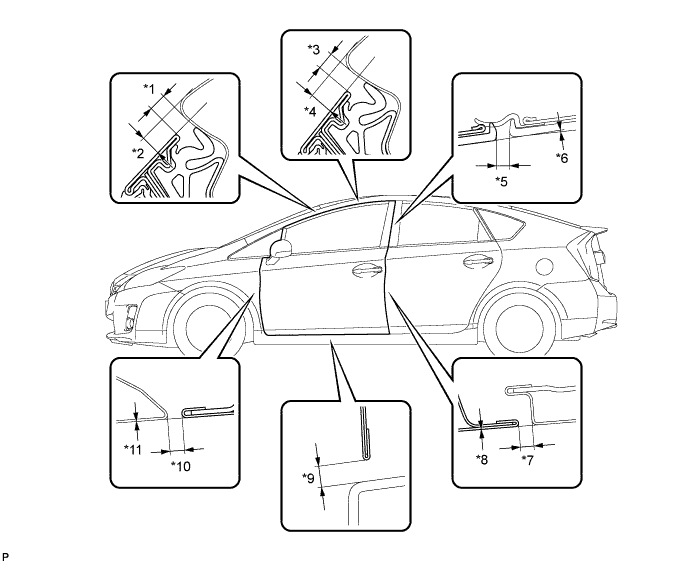
| Area | Measurement | Area | Measurement |
| *1 | 3.57 to 6.57 mm (0.141 to 0.259 in.) | *2 | 4.57 to 7.57 mm (0.180 to 0.298 in.) |
| *3 | 3.57 to 6.57 mm (0.141 to 0.259 in.) | *4 | 5.17 to 8.17 mm (0.204 to 0.322 in.) |
| *5 | 2.8 to 5.8 mm (0.110 to 0.228 in.) | *6 | -1.3 to 1.7 mm (-0.0512 to 0.0669 in.) |
| *7 | 2.7 to 5.7 mm (0.106 to 0.1224 in.) | *8 | -1.5 to 1.5 mm (-0.0591 to 0.0591 in.) |
| *9 | 4.15 to 7.15 mm (0.163 to 0.282 in.) | *10 | 2.8 to 5.8 mm (0.110 to 0.228 in.) |
| *11 | -1.5 to 1.5 mm (-0.0591 to 0.0591 in.) | - | - |
| 2. REMOVE REAR NO. 2 FLOOR BOARD |
![]() |
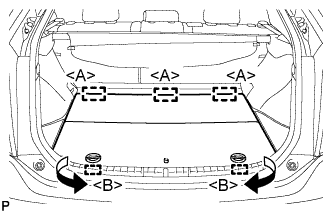
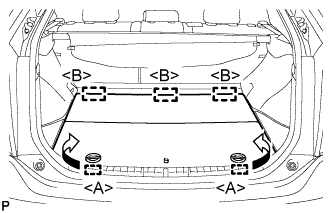
Disengage the 2 guides <A> as shown in the illustration.
Disengage the 3 guides <B> and remove the rear No. 2 floor board.
| 3. REMOVE REAR DECK FLOOR BOX |
Remove the rear deck floor box.
| 4. REMOVE REAR NO. 3 FLOOR BOARD |
![]() |
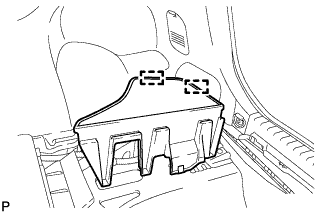
Disengage the 2 guides and remove the rear No. 3 floor board.
| 5. PRECAUTION (w/ Navigation System for HDD) |
| 6. DISCONNECT CABLE FROM NEGATIVE BATTERY TERMINAL |
| 7. ADJUST FRONT DOOR |
![]() |
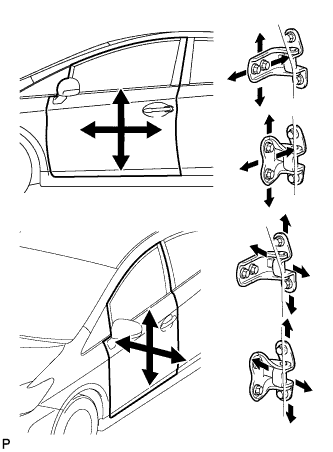
Using SST, loosen the hinge bolts on the vehicle body and adjust the door position.
Tighten the hinge bolts on the vehicle body after the adjustment.
Loosen the hinge bolts on the door and adjust the door position.
Tighten the hinge bolts on the door after the adjustment.
![]() |
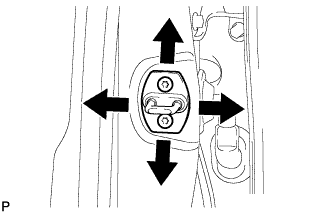
Using a T40 "TORX" socket wrench, slightly loosen the striker mounting screws.
Using a brass bar and a hammer, hit the striker to adjust its position.
Using a T40 "TORX" socket wrench, tighten the striker mounting screws after the adjustment.
| 8. CONNECT CABLE TO NEGATIVE BATTERY TERMINAL |
| 9. INSTALL REAR NO. 3 FLOOR BOARD |
![]() |
Engage the 2 guides to install the rear No. 3 floor board.
| 10. INSTALL REAR DECK FLOOR BOX |
Install the rear deck floor box.
| 11. INSTALL REAR NO. 2 FLOOR BOARD |
![]() |
Engage the 3 guides <A>.
Engage the 2 guides <B> and install the rear No. 2 floor board as shown in the illustration.
| 12. INSPECT SRS WARNING LIGHT |