Pass the hood lock control cable assembly into the engine compartment.
| *1 | Hood Lock Control Cable | *2 | Grommet |
| *3 | Hood Cable Grommet | - | - |
HOOD LOCK CONTROL CABLE ASSEMBLY > INSTALLATION |
| 1. INSTALL HOOD LOCK CONTROL CABLE ASSEMBLY (for LHD) |
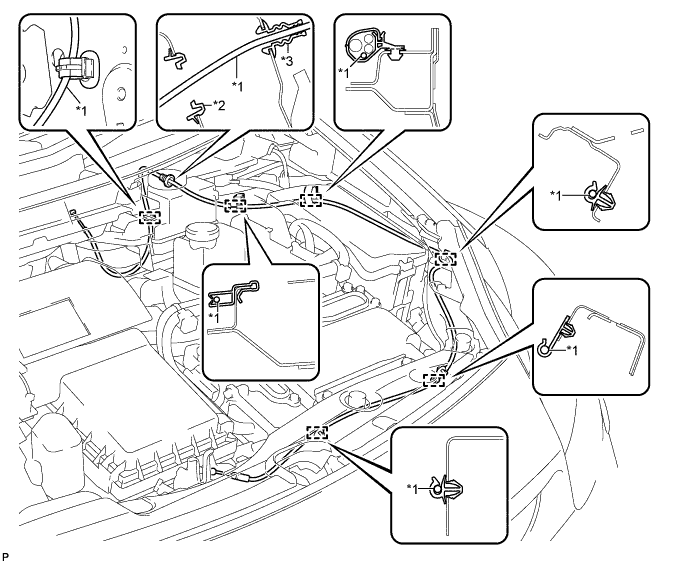
Pass the hood lock control cable assembly into the engine compartment.
| *1 | Hood Lock Control Cable | *2 | Grommet |
| *3 | Hood Cable Grommet | - | - |
Pass the cable through the upper radiator support.
Engage each clamp shown in the illustration.
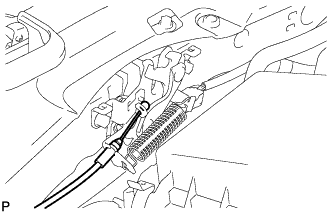 |
Connect the hood lock control cable assembly.
| 2. INSTALL HOOD LOCK CONTROL CABLE ASSEMBLY (for RHD) |
Pass the hood lock control cable assembly into the engine compartment.
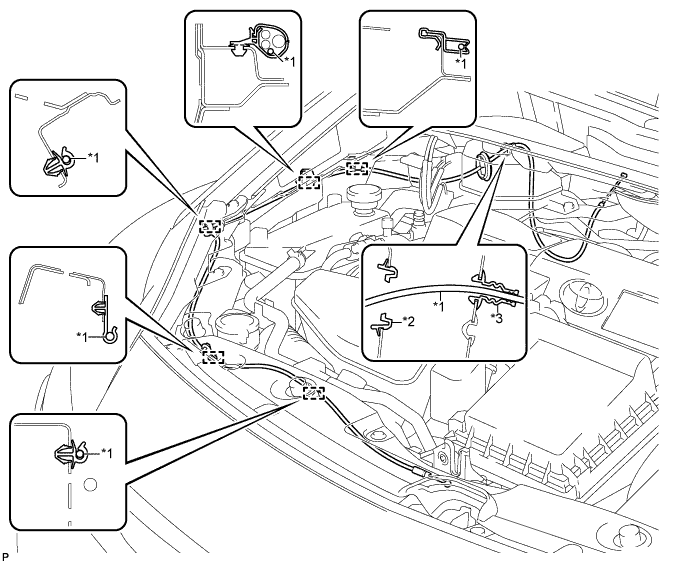
| *1 | Hood Lock Control Cable | *2 | Grommet |
| *3 | Hood Cable Grommet | - | - |
Pass the cable through the upper radiator support.
Engage each clamp shown in the illustration.
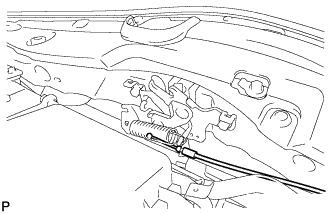 |
Connect the hood lock control cable assembly.
| 3. INSTALL HOOD LOCK CONTROL LEVER SUB-ASSEMBLY |
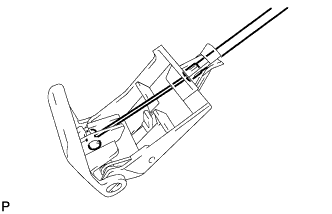 |
Connect the hood lock control cable assembly to install the hood lock control lever sub-assembly.
| 4. INSTALL LOWER INSTRUMENT PANEL FINISH PANEL ASSEMBLY |
Connect each connector.
Engage the clamp.
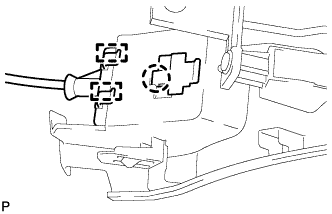 |
Engage the 2 guides and claw to connect the hood lock control cable.
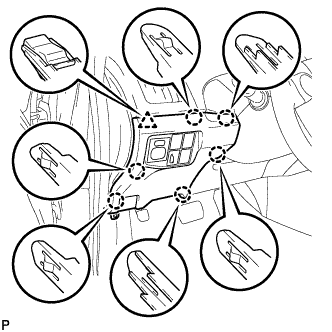 |
Engage the 6 claws and clip.
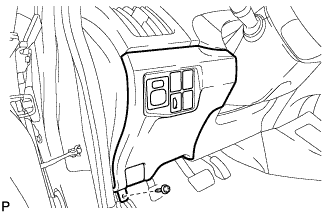 |
Install the lower instrument panel finish panel assembly with the screw <C>.
| 5. INSTALL COWL SIDE TRIM SUB-ASSEMBLY |
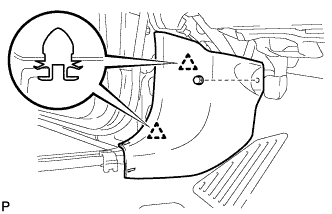 |
Engage the 2 clips.
Install the cowl side trim board LH with the clip.
| 6. INSTALL FRONT DOOR SCUFF PLATE |
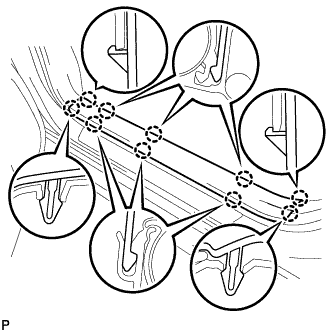 |
Engage the 10 claws to install the front door scuff plate LH.
| 7. INSTALL FRONT FENDER LINER LH (for LHD) |
| 8. INSTALL FRONT FENDER LINER RH (for RHD) |
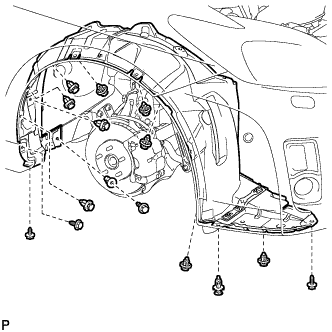 |
Install a new grommet and the 4 screws.
Install the 10 clips.
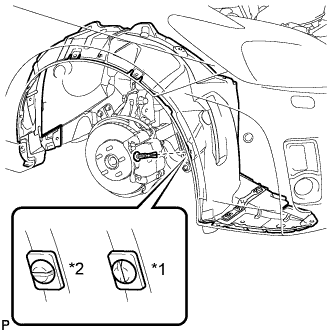 |
Install the pin hold clip as shown in the illustration.
| *1 | Correct |
| *2 | Incorrect |
| 9. INSTALL FRONT WHEEL LH (for LHD) |
| 10. INSTALL FRONT WHEEL RH (for RHD) |