AIR CONDITIONING UNIT > REASSEMBLY |
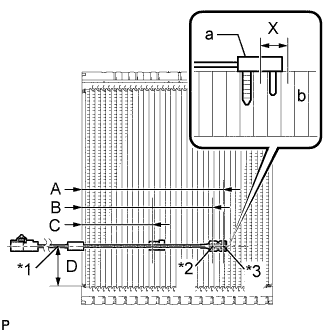
| 1. INSTALL NO. 1 COOLER THERMISTOR |
![]() |
Install the No. 1 cooler thermistor as shown in the illustration.
| Part | Length | |
| A | 175 mm | 6.89 in. |
| B | 161.6 mm | 6.36 in. |
| C | 87.9 mm | 3.46 in. |
| D | 50 mm | 1.99 in. |
| *1 | From Tank |
| *2 | Fixed Part |
| *3 | Sensor Part |
| 2. INSTALL COOLER EVAPORATOR SUB-ASSEMBLY |
![]() |
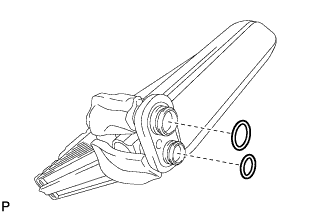
Sufficiently apply compressor oil to 2 new O-rings and the fitting surfaces.
Install the 2 O-rings to the cooler evaporator sub-assembly.
![]() |
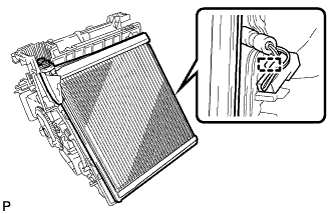
Engage the clamp and install the cooler evaporator sub-assembly with the No. 1 cooler thermistor.
![]() |
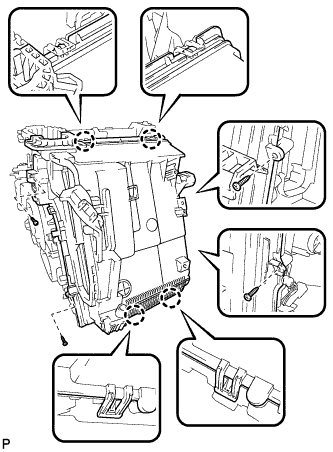
Engage the 4 claws.
Install the lower heater case with the 4 screws.
![]() |
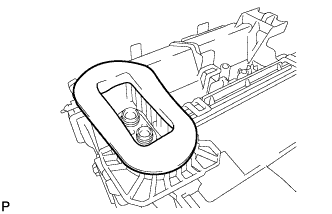
Install the packing.
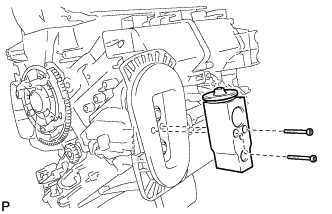
| 3. INSTALL COOLER EXPANSION VALVE |
![]() |
Using a 4 mm hexagon wrench, install the cooler expansion valve with the 2 hexagon bolts.
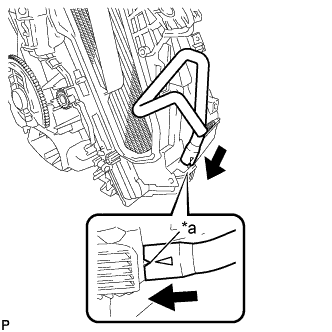
| 4. INSTALL DRAIN COOLER HOSE |
![]() |
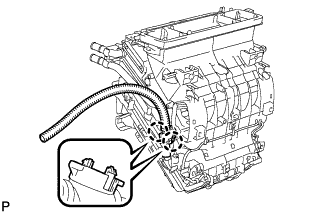
Install the drain cooler hose as shown in the illustration.
| *a | Matchmark |
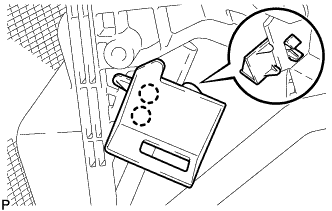
| 5. INSTALL CONSOLE MOUNTING BRACKET RH |
![]() |
Engage the 2 claws and install the console mounting bracket RH.
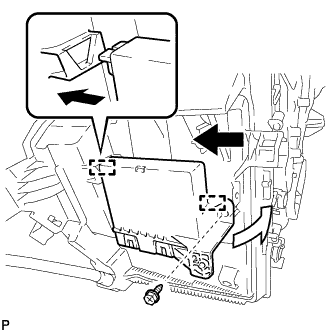
| 6. INSTALL AIR CONDITIONING AMPLIFIER ASSEMBLY |
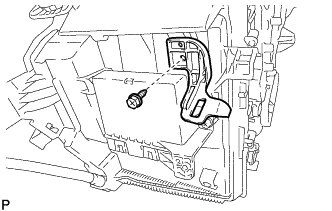
![]() |
Engage the 2 guides to install the air conditioning amplifier assembly as shown in the illustration.
Install the screw.
| 7. INSTALL CONSOLE MOUNTING BRACKET LH |
![]() |
Install the console mounting bracket LH with the screw.
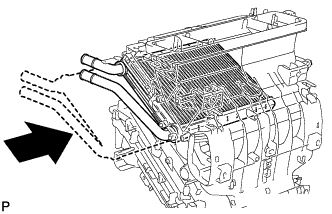
| 8. INSTALL HEATER RADIATOR UNIT SUB-ASSEMBLY |
![]() |
Install the heater radiator unit sub-assembly as shown in the illustration.
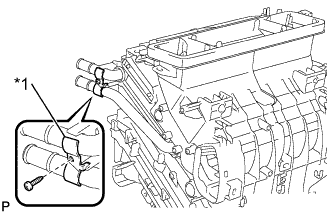
![]() |
Install the clamp with the screw.
| *1 | Clamp |
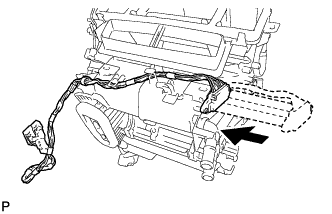
| 9. INSTALL QUICK HEATER ASSEMBLY (w/ PTC Heater) |
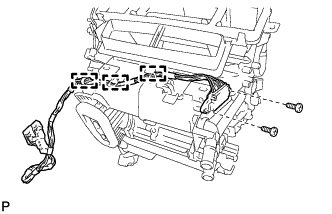
![]() |
Install the quick heater assembly as shown in the illustration.
![]() |
Install the 2 screws.
Engage each clamp.
| 10. INSTALL AIR MIX CONTROL SERVO MOTOR SUB-ASSEMBLY |
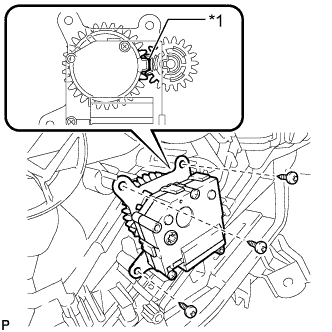
![]() |
Using the reference point, install the air mix control servo motor sub-assembly with the 3 screws.
| *1 | Reference Point |
| 11. INSTALL AIR OUTLET CONTROL SERVO MOTOR SUB-ASSEMBLY |
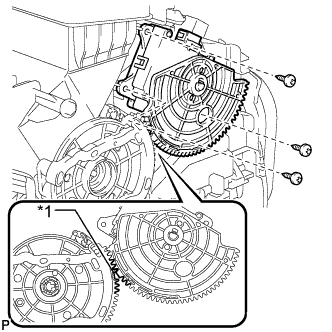
![]() |
Using the reference point, install the air outlet control servo motor sub-assembly with the 3 screws.
| *1 | Reference Point |
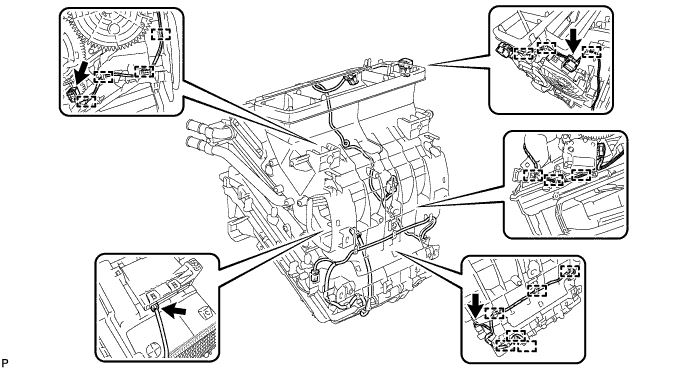
| 12. INSTALL AIR CONDITIONING HARNESS ASSEMBLY |
Connect each connector.
Engage each clamp to install the air conditioning harness assembly.

| 13. INSTALL AIR CONDITIONING DUCT SUB-ASSEMBLY |
![]() |
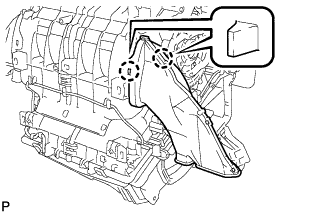
Engage the 2 claws and install the air conditioning duct sub-assembly.
| 14. INSTALL NO. 1 AIR DUCT SUB-ASSEMBLY |
![]() |
Engage the 2 claws to install the No. 1 air duct sub-assembly.
| 15. INSTALL BLOWER ASSEMBLY |
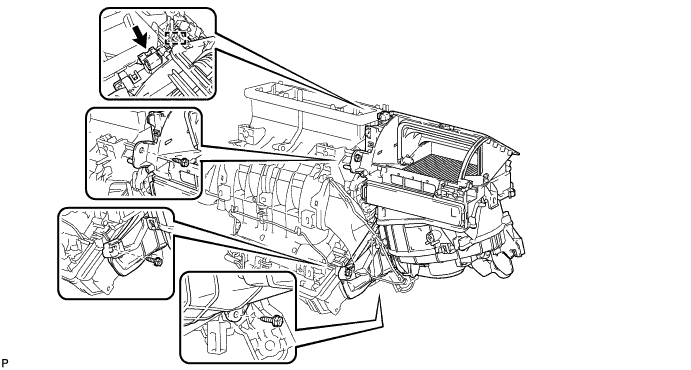
w/o PTC Heater:
Engage the guide.
Install the blower assembly with the 3 screws.
Connect the connector.

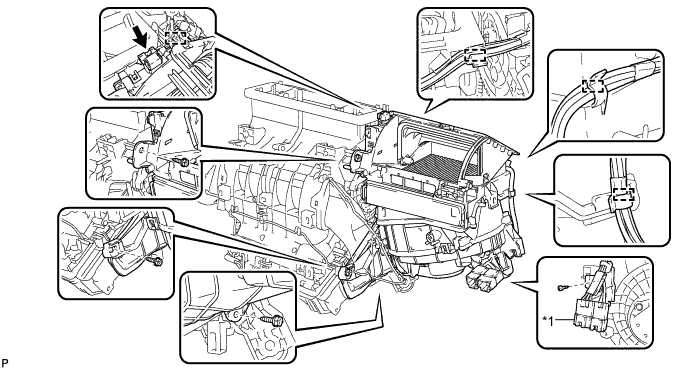
w/ PTC Heater:
Engage the guide.
Install the blower assembly with the 3 screws.
Connect the connector.
Engage each clamps.
Install the screw and connect the quick heater connector.

| *1 | Quick Heater Connector | - | - |