 |
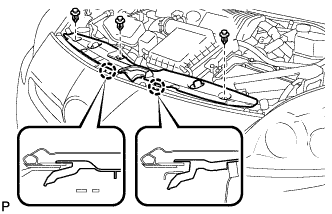
Remove the 3 clips.
HEADLIGHT CLEANER MOTOR > REMOVAL |
| 1. REMOVE RADIATOR SUPPORT OPENING COVER |
|
Remove the 3 clips.
Disengage the 2 claws and remove the radiator support opening cover.
| 2. REMOVE FRONT BUMPER ASSEMBLY |
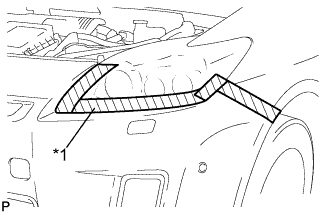 |
Put protective tape around the front bumper assembly.
| *1 | Protective Tape |
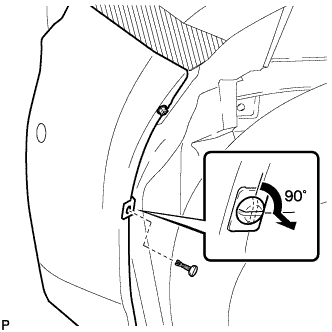 |
Using a screwdriver, turn the pins 90 degrees and remove the pin hold clip.
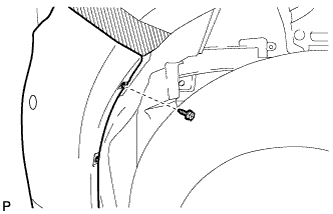 |
Remove the screw.
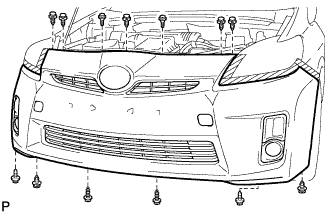 |
Remove the 2 bolts and 4 screws.
Using a clip remover, remove the 7 clips.
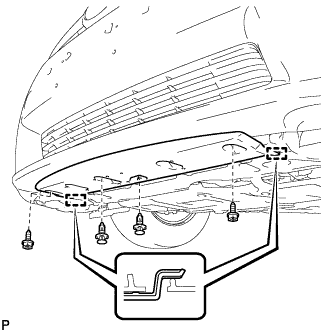 |
Using a clip remover, remove the 2 clips. (w/ Front Spoiler)
Remove the 2 screws. (w/ Front Spoiler)
Disengage the 2 guides and remove the front spoiler cover. (w/ Front Spoiler)
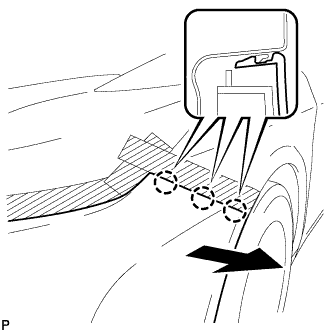 |
Disengage the 3 claws and remove the front bumper assembly.
Disconnect each connector.
Disconnect the headlight cleaner hose and drain the washer fluid. (w/ Headlight Cleaner System)
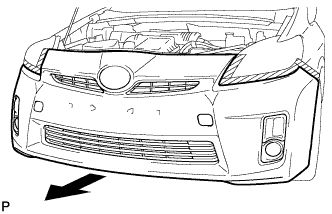 |
Remove the front bumper assembly as shown in the illustration.
| 3. DRAIN WASHER FLUID |
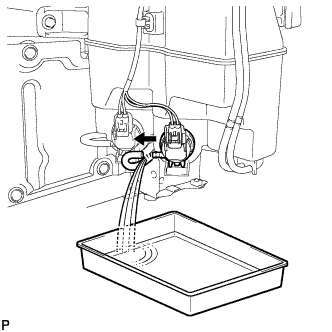 |
Disconnect the washer hose from the rear washer motor and pump assembly, and drain the washer fluid.
| 4. REMOVE HEADLIGHT CLEANER MOTOR AND PUMP ASSEMBLY |
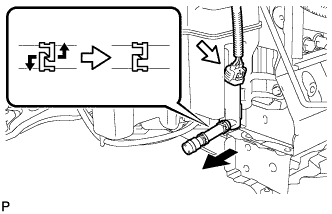 |
Loosen the clip and disconnect the headlight cleaner hose from the headlight cleaner motor and pump assembly as shown in the illustration.
Disconnect the connector and remove the headlight cleaner motor and pump assembly.