 |
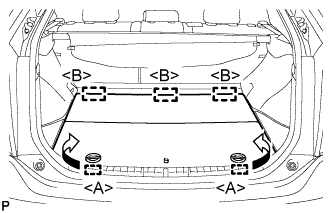
Disengage the 2 guides <A> as shown in the illustration.
HEADLIGHT ASSEMBLY > REMOVAL |
| 1. PRECAUTION (w/ Navigation System for HDD) |
| 2. REMOVE REAR NO. 2 FLOOR BOARD |
|
Disengage the 2 guides <A> as shown in the illustration.
Disengage the 3 guides <B> and remove the rear No. 2 floor board.
| 3. REMOVE REAR DECK FLOOR BOX |
Remove the rear deck floor box.
| 4. REMOVE REAR NO. 3 FLOOR BOARD |
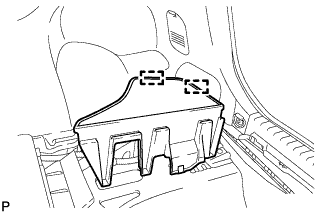 |
Disengage the 2 guides and remove the rear No. 3 floor board.
| 5. DISCONNECT CABLE FROM AUXILIARY BATTERY NEGATIVE TERMINAL |
| 6. REMOVE FRONT BUMPER ASSEMBLY |
| 7. REMOVE HEADLIGHT ASSEMBLY |
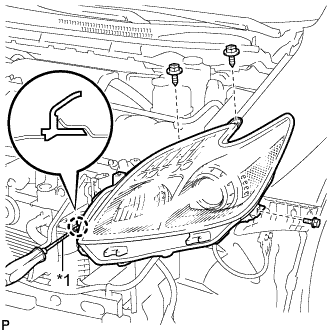 |
Remove the bolt and 2 screws.
Using a screwdriver wrapped with protective tape, disengage the claw.
| *1 | Protective Tape |
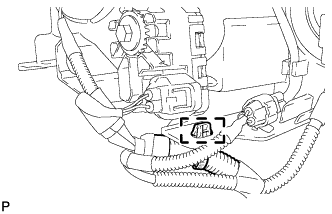 |
Disengage the clamp.
Disconnect each connector and remove the headlight assembly.