 |
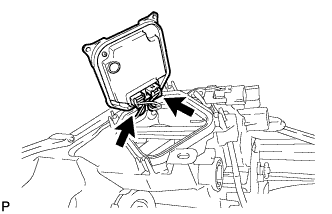
Connect the 2 connectors.
HEADLIGHT ASSEMBLY > REASSEMBLY |
| 1. INSTALL HEADLIGHT GASKET (for LED Headlight) |
Install a new headlight gasket.
| 2. INSTALL HEADLIGHT LIGHT CONTROL ECU SUB-ASSEMBLY (for LED Headlight) |
|
Connect the 2 connectors.
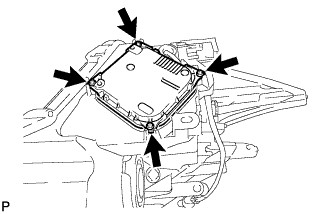 |
Install the headlight light control ECU sub-assembly with the 4 screws.
| 3. INSTALL HEADLIGHT LEVELING MOTOR BASE PACKING |
Install a new headlight leveling motor base packing.
| 4. INSTALL HEADLIGHT LEVELING MOTOR |
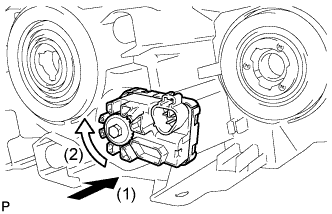 |
Insert the headlight leveling motor in the direction indicated by the arrow (1) shown in the illustration.
Turn the aiming screw of the headlight leveling motor in the direction indicated by the arrow (2) shown in the illustration to engage the shaft.
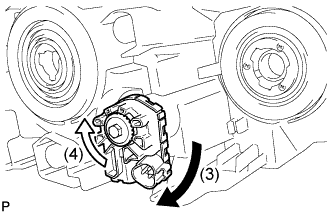 |
Turn the headlight leveling motor in the direction indicated by the arrow (3) shown in the illustration.
Turn the aiming screw of the headlight leveling motor in the direction indicated by the arrow (4) shown in the illustration to install it.
| 5. INSTALL HEADLIGHT CORD (for Halogen Headlight) |
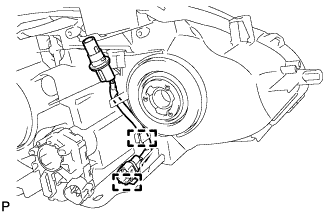 |
Engage the 2 clamps and install the headlight cord.
| 6. INSTALL CLEARANCE LIGHT BULB |
Install the clearance light bulb to the headlight cord.
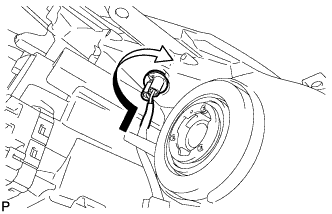 |
Turn the clearance light bulb and headlight cord in the direction indicated by the arrow shown in the illustration and install them as a unit.
| 7. INSTALL NO. 2 HEADLIGHT BULB (for Halogen Headlight) |
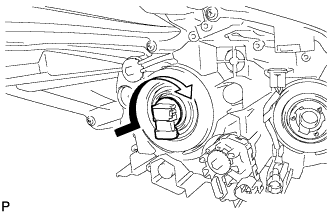 |
Turn the No. 2 headlight bulb in the direction indicated by the arrow shown in the illustration to install it.
| 8. INSTALL NO. 1 HEADLIGHT BULB |
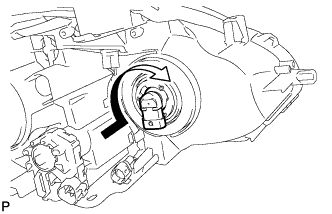 |
Turn the No. 1 headlight bulb in the direction indicated by the arrow shown in the illustration to install it.