 |
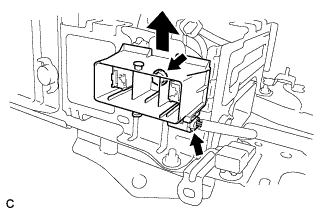
Disconnect the connector.
HV BATTERY THERMISTOR > REMOVAL |
| 1. REMOVE BATTERY SMART UNIT |
| 2. REMOVE NO. 1 HYBRID VEHICLE BATTERY CARRIER BRACKET SUB-ASSEMBLY |
|
Disconnect the connector.
Remove the bolt and electric vehicle battery plug assembly as shown in the illustration.
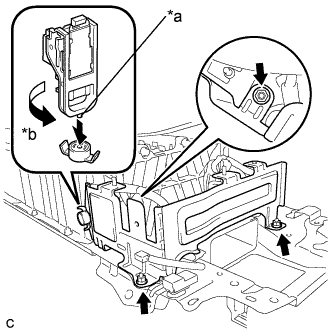 |
Using the service plug grip, remove the battery cover lock striker.
| *a | Projection |
| *b | Turn |
Remove the 3 nuts and No. 1 hybrid vehicle battery carrier bracket sub-assembly.
| 3. REMOVE NO. 4 HYBRID VEHICLE BATTERY CARRIER BRACKET SUB-ASSEMBLY |
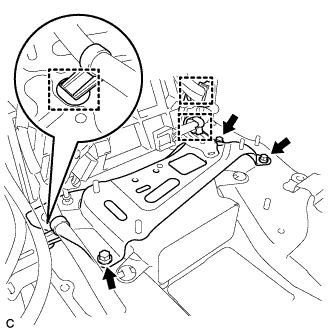 |
Disconnect the 3 wire harness clamps.
Remove the 3 bolts and No. 4 hybrid vehicle battery carrier bracket sub-assembly.
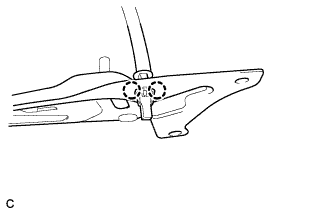 |
Disengage the 2 claws and remove the HV battery thermistor.
| 4. REMOVE UPPER HYBRID BATTERY COVER SUB-ASSEMBLY |
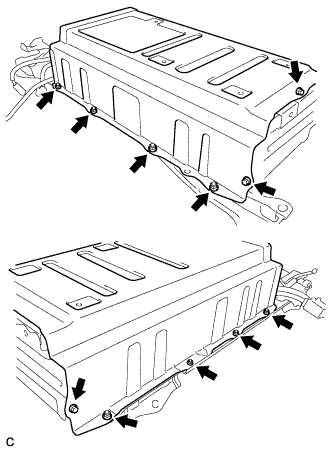 |
Remove the 3 bolts, 8 nuts and upper hybrid battery cover sub-assembly with the No. 1 hybrid battery shield sub-assembly.
| 5. REMOVE HYBRID BATTERY THERMISTOR |
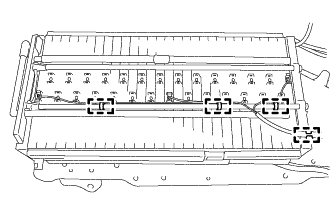 |
Remove the 4 clamps.
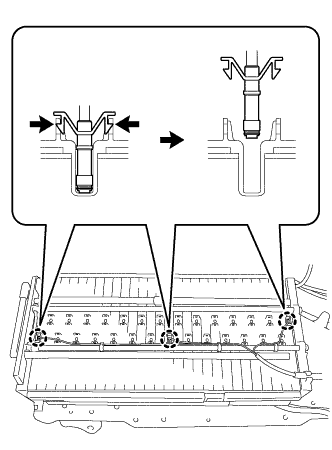 |
Disengage the claws of each hybrid battery thermistor (sensor portion) and remove the hybrid battery thermistor from the hybrid battery.