 |
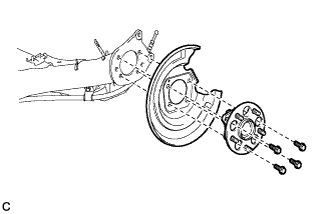
Install the rear axle hub and bearing assembly and rear disc brake dust cover to the rear axle beam assembly with the 4 bolts.
- Torque:
- 90 N*m{ 918 kgf*cm , 66 ft.*lbf }
REAR AXLE HUB > INSTALLATION |
| 1. INSTALL REAR AXLE HUB AND BEARING ASSEMBLY |
|
Install the rear axle hub and bearing assembly and rear disc brake dust cover to the rear axle beam assembly with the 4 bolts.
| 2. INSPECT REAR AXLE HUB BEARING LOOSENESS |
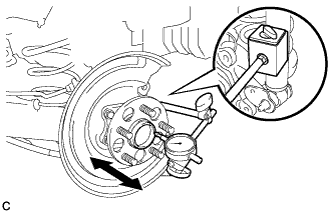 |
Using a dial indicator, check for looseness near the center of the axle hub.
| 3. INSPECT REAR AXLE HUB RUNOUT |
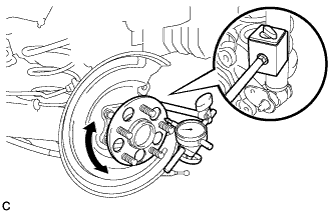 |
Using a dial indicator, check for runout on the surface of the axle hub outside the rear axle hub bolt.
| 4. INSTALL REAR DISC |
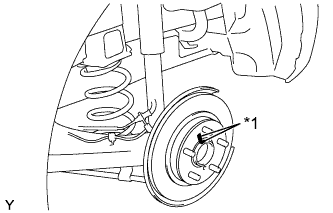 |
Align the matchmarks of the disc and axle hub, and install the disc.
| *1 | Matchmark |
| 5. INSTALL REAR DISC BRAKE CALIPER ASSEMBLY |
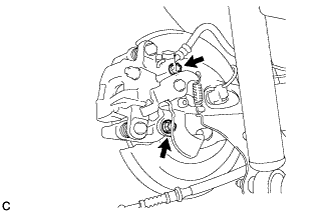 |
Install the rear disc brake caliper assembly with the 2 bolts.
| 6. CONNECT NO. 3 PARKING BRAKE CABLE ASSEMBLY |
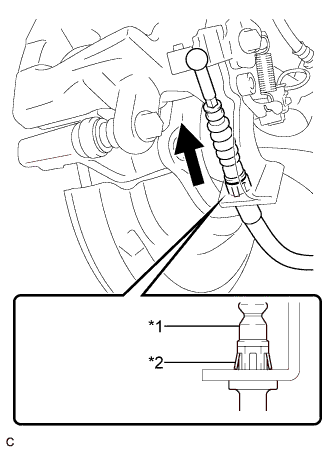 |
Install the No. 3 parking brake cable assembly to the rear disc brake cylinder assembly.
| *1 | No. 3 Parking Brake Cable Assembly |
| *2 | Clip |
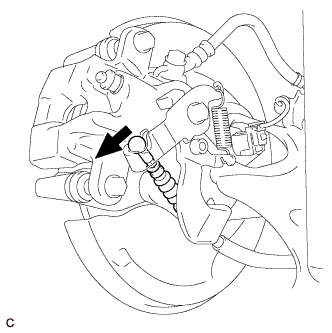 |
Connect the No. 3 parking brake cable assembly to the rear disc brake cylinder assembly.
| 7. CONNECT REAR SPEED SENSOR WIRE |
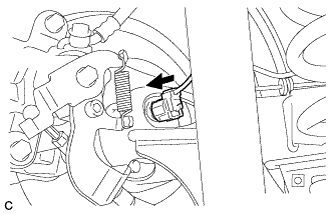 |
Connect the rear speed sensor wire connector to the rear speed sensor.
| 8. ADJUST PARKING BRAKE |
| 9. INSTALL LOWER INSTRUMENT PANEL FINISH PANEL ASSEMBLY (for LHD) |
Connect each connector.
Engage the clamp.
Engage the 2 guides and claw to connect the hood lock control cable.
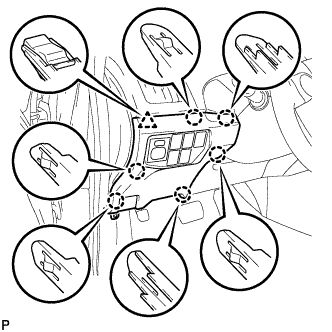 |
Engage the 6 claws and clip.
Install the lower instrument panel finish panel assembly with the screw <C>.
| 10. INSTALL COWL SIDE TRIM SUB-ASSEMBLY LH (for LHD) |
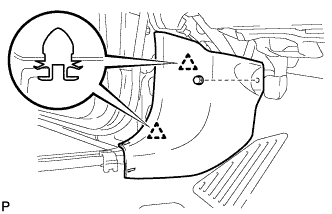 |
Engage the 2 clips.
Install the cowl side trim board LH with the clip.
| 11. INSTALL FRONT DOOR SCUFF PLATE LH (for LHD) |
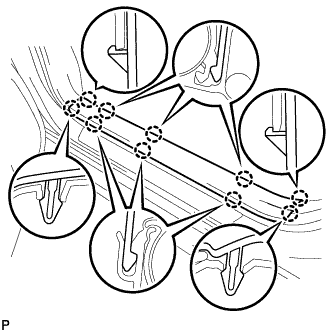 |
Engage the 10 claws to install the front door scuff plate LH.
| 12. INSTALL NO. 1 INSTRUMENT PANEL UNDER COVER SUB-ASSEMBLY (for RHD) |
Connect each connector.
Engage the guide and 2 claws.
Install the No. 1 instrument panel under cover sub-assembly with the screw <D>.
| 13. INSTALL REAR WHEEL |
| 14. CONNECT CABLE TO NEGATIVE BATTERY TERMINAL |
Connect the cable to the negative (-) battery terminal.
Connect the reservoir level switch connector.
Clear the DTCs (Click here).
| 15. INSTALL REAR NO. 3 FLOOR BOARD |
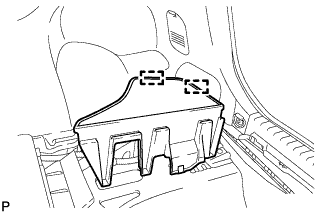 |
Engage the 2 guides to install the rear No. 3 floor board.
| 16. INSTALL REAR DECK FLOOR BOX |
Install the rear deck floor box.
| 17. INSTALL REAR NO. 2 FLOOR BOARD |
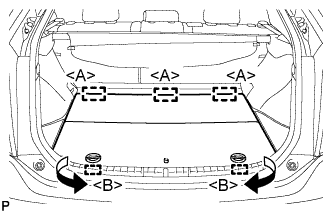 |
Engage the 3 guides <A>.
Engage the 2 guides <B> and install the rear No. 2 floor board as shown in the illustration.
| 18. CHECK FOR SPEED SENSOR SIGNAL |