 |
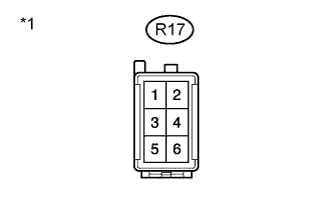
Disconnect the connector from the rear combination light assembly LH.
REAR COMBINATION LIGHT ASSEMBLY > ON-VEHICLE INSPECTION |
| 1. INSPECT REAR COMBINATION LIGHT ASSEMBLY LH |
|
Disconnect the connector from the rear combination light assembly LH.
Measure the voltage according to the value(s) in the table below.
| Tester Connection | Condition | Specified Condition |
| R17-1 - R17-5 | Light control switch off | Below 1 V |
| Light control switch in tail position | 11 to 14 V | |
| R17-2 - R17-5 | Brake pedal released | Below 1 V |
| Brake pedal depressed | 11 to 14 V | |
| R17-3 - R17-5 | Turn signal switch in neutral position | Below 1 V |
| Power switch on (IG) and turn signal switch in left turn position | 11 to 14 V (60 to 120 times per minute) |
| *1 | Front view of wire harness connector (to Rear Combination Light Assembly LH) |
| 2. INSPECT REAR COMBINATION LIGHT ASSEMBLY RH |
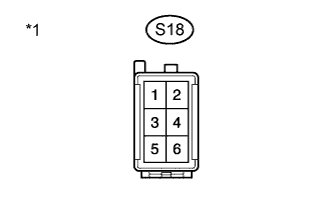 |
Disconnect the connector from the rear combination light assembly RH.
Measure the voltage according to the value(s) in the table below.
| Tester Connection | Condition | Specified Condition |
| S18-1 - S18-5 | Light control switch off | Below 1 V |
| Light control switch in tail position | 11 to 14 V | |
| S18-2 - S18-5 | Brake pedal released | Below 1 V |
| Brake pedal depressed | 11 to 14 V | |
| S18-3 - S18-5 | Turn signal switch in neutral position | Below 1 V |
| Power switch on (IG) and turn signal switch in right turn position | 11 to 14 V (60 to 120 times per minute) |
| *1 | Front view of wire harness connector (to Rear Combination Light Assembly RH) |