 |
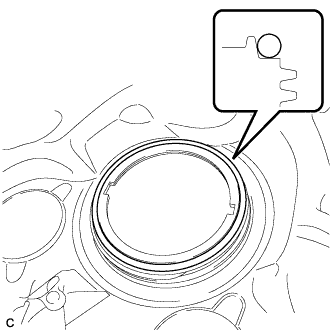
Install a new gasket onto the fuel tank.
FUEL PUMP > INSTALLATION |
| 1. INSTALL FUEL SUCTION TUBE ASSEMBLY WITH PUMP AND GAUGE |
|
Install a new gasket onto the fuel tank.
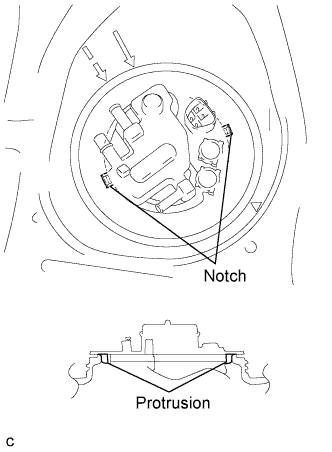 |
Set the fuel suction tube assembly with pump and gauge to the fuel tank.
Align the protrusions of the fuel suction tube assembly with pump and gauge with the notchs of the fuel tank.
| 2. INSTALL FUEL PUMP GAUGE RETAINER |
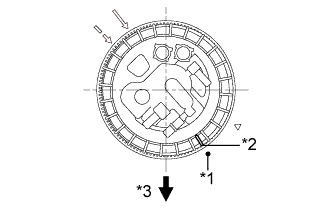 |
While holding the fuel suction tube assembly with pump and gauge by hand to prevent it from tilting, align the mark on the new fuel pump gauge retainer with the start mark on the fuel tank and tighten the fuel pump gauge retainer 180° by hand.
| *1 | Start Mark |
| *2 | Mark |
| *3 | Front Side |
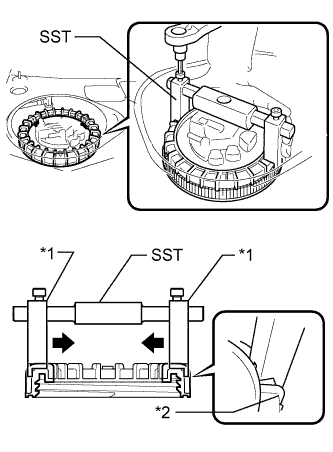 |
Using a 6 mm socket hexagon wrench, set SST to the fuel pump gauge retainer.
| *1 | Claw |
| *2 | Rib |
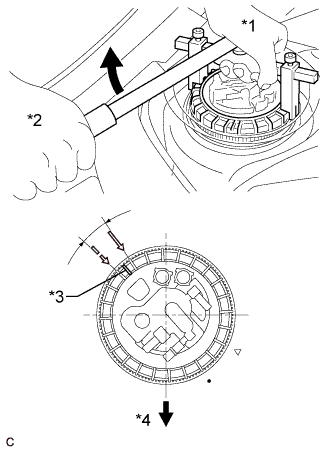 |
Tighten the fuel pump gauge retainer approximately 360° so that the mark on the retainer comes within the range shown in the illustration.
| *1 | Hold |
| *2 | Turn |
| *3 | Mark |
| *4 | Front Side |
| 3. CONNECT FUEL TANK EVAPORATION TUBE |
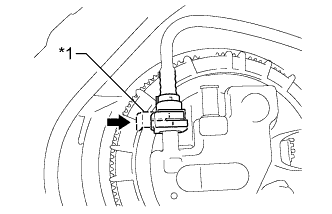 |
Connect the fuel tank evaporation tube to the fuel suction tube assembly.
| *1 | Retainer |
| 4. CONNECT NO. 1 CHARCOAL CANISTER OUTLET HOSE |
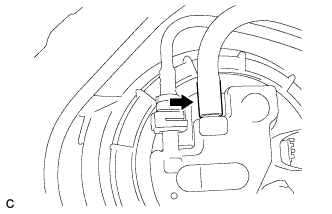 |
Connect the No. 1 charcoal canister outlet hose to the fuel suction tube assembly.
| 5. CONNECT NO. 1 FUEL EVAPORATION TUBE SUB-ASSEMBLY |
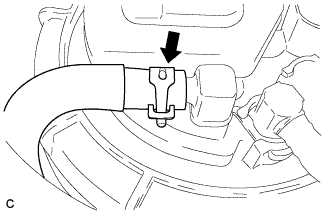 |
Connect the No. 1 fuel evaporation tube sub-assembly to the fuel suction tube assembly with the clip.
| 6. CONNECT FUEL TANK MAIN TUBE SUB-ASSEMBLY |
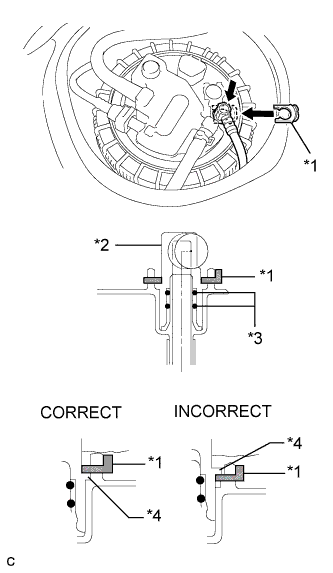 |
Push the fuel tube joint in the plug of the fuel suction plate, then install the tube joint clip.
| *1 | Tube Joint Clip |
| *2 | Fuel Tube Joint |
| *3 | O-ring |
| *4 | Collars |
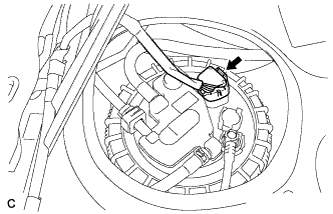 |
Connect the fuel pump connector.
| 7. CONNECT CABLE TO NEGATIVE BATTERY TERMINAL |
| 8. INSPECT FOR FUEL LEAK |
Check fuel pump operation.
Connect the intelligent tester to the DLC3.
Turn the power switch on (IG).
Turn the intelligent tester on.
Enter the following menus: Powertrain / Engine and ECT / Active Test / Control the Fuel Pump /Speed.
Check for pressure in the fuel inlet tube from the fuel line. Check that sounds of fuel flowing from the fuel tank can be heard. If no sounds can be heard, check the integration relay, fuel pump, ECM and wiring connectors.
Inspect for fuel leaks.
Check that there is no fuel leakage after performing maintenance anywhere on the fuel system. If there is a fuel leak, repair or replace parts as necessary.
Turn the power switch off.
Disconnect the intelligent tester from the DLC3.
| 9. INSTALL REAR FLOOR SERVICE HOLE COVER |
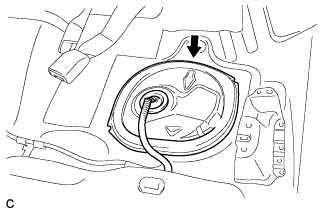 |
Install the rear floor service hole cover with new butyl tape.
| 10. INSTALL REAR SEAT CUSHION ASSEMBLY |
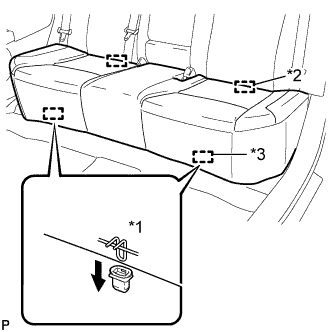 |
Engage the 2 guides of the seat cushion to the seatback.
| *1 | 100 mm (3.94 in.) or less |
| *2 | Guide |
| *3 | Hook |
Engage the 2 front hooks of the seat cushion to the vehicle body.
| 11. INSTALL REAR NO. 3 FLOOR BOARD |
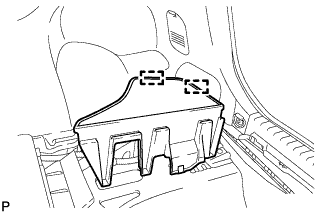 |
Engage the 2 guides to install the rear No. 3 floor board.
| 12. INSTALL REAR DECK FLOOR BOX |
Install the rear deck floor box.
| 13. INSTALL REAR NO. 2 FLOOR BOARD |
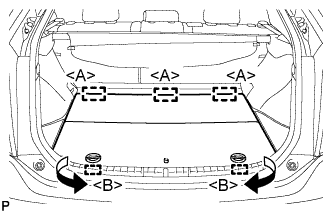 |
Engage the 3 guides <A>.
Engage the 2 guides <B> and install the rear No. 2 floor board as shown in the illustration.