 |
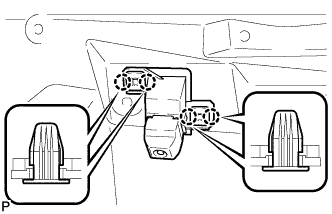
Engage the 4 claws to temporarily install the rear television camera assembly.
BACK DOOR > REASSEMBLY |
| 1. INSTALL REAR TELEVISION CAMERA ASSEMBLY (w/ Rear Monitor) |
|
Engage the 4 claws to temporarily install the rear television camera assembly.
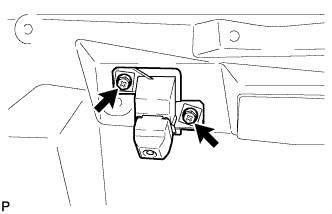 |
Install the rear television camera assembly with the 2 screws.
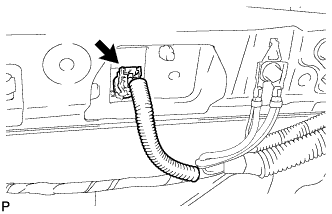 |
Connect the connector.
| 2. INSTALL REAR WIPER MOTOR ASSEMBLY |
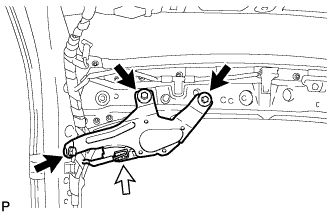 |
Install the rear wiper motor assembly with the 3 bolts.
Connect the connector.
| 3. INSTALL REAR WIPER MOTOR GROMMET |
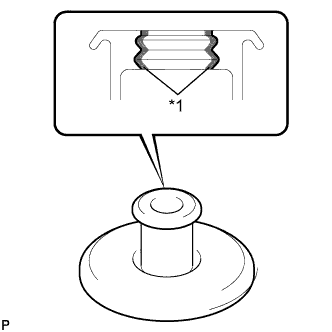 |
Apply MP grease to the entire surface of the rear wiper motor grommet lip.
| *1 | MP grease |
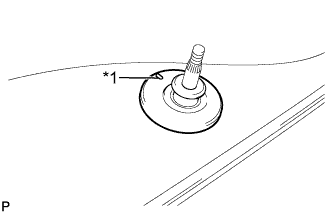 |
Install the rear wiper motor grommet.
| *1 | Alignment Mark |
| 4. INSTALL REAR WIPER ARM AND BLADE ASSEMBLY |
Operate the wiper and stop the windshield wiper motor at the automatic stop position.
When reusing the rear wiper arm and blade assembly:
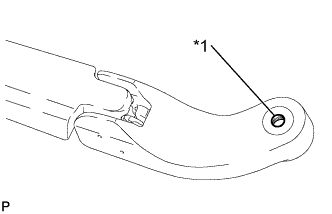 |
Clean the wiper arm serrations.
| *1 | Wiper Arm Serration |
When reusing the rear wiper motor assembly:
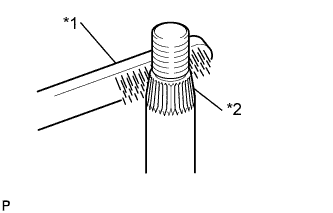 |
Clean the wiper pivot serrations with a wire brush.
| *1 | Wire Brush |
| *2 | Wiper Pivot Serration |
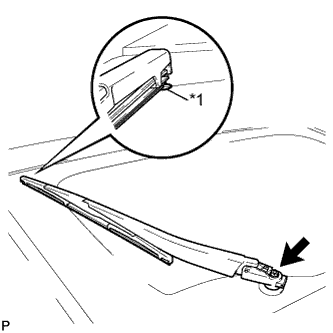 |
Install the rear wiper arm and blade assembly with the nut to the position shown in the illustration.
| *1 | Ceramic Dot |
Operate the rear wiper while spraying washer fluid onto the back door glass. Make sure that the rear wiper functions properly and the wiper does not come into contact with the vehicle body.
w/ Steel Wiper Arm:
Close the rear wiper arm head cap.
| 5. INSTALL REAR WIPER ARM HEAD CAP (w/ Resin Wiper Arm) |
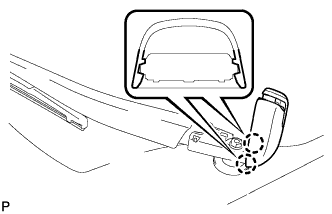 |
Engage the 2 claws to install the rear wiper arm head cap.
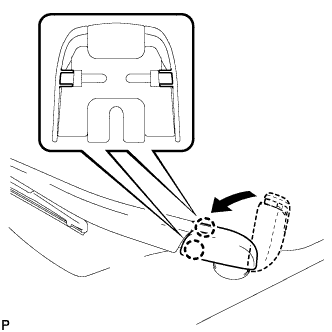 |
Engage the 2 claws to close the rear wiper arm head cap as shown in the illustration.
| 6. INSTALL REAR WASHER NOZZLE |
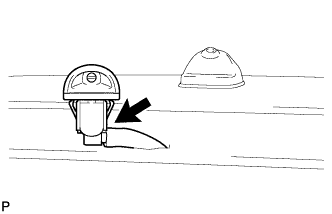 |
Connect the washer hose.
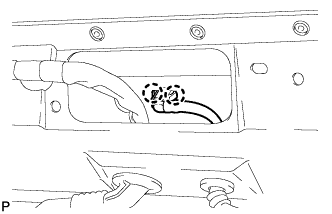 |
Engage the 2 claws to install the rear washer nozzle.
| 7. INSPECT REAR WASHER NOZZLE |
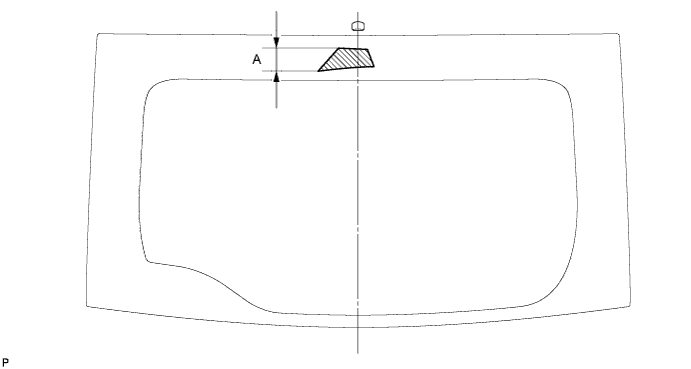
With the engine running, check that the center stream of washer fluid sprays on the windshield within the hatched area shown in the illustration.
| Area | Measurement |
| A | 48.7 mm (1.92 in.) |
| 8. ADJUST REAR WASHER NOZZLE |
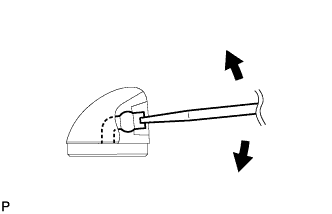 |
Using a screwdriver, adjust the direction of the rear washer nozzle.
| 9. INSTALL REAR SPOILER ASSEMBLY |
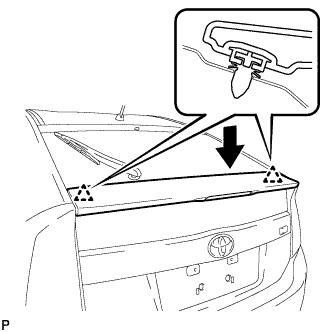 |
Engage the 2 clips to install the rear spoiler assembly.
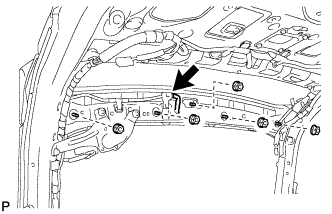 |
Install the 5 nuts.
Connect the connector.
| 10. INSTALL LICENSE PLATE LIGHT ASSEMBLY LH |
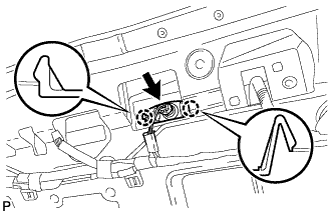 |
Engage the 2 claws to install the license plate light assembly.
Connect the connector.
| 11. INSTALL LICENSE PLATE LIGHT ASSEMBLY RH |
| 12. INSTALL BACK DOOR OUTSIDE GARNISH SUB-ASSEMBLY |
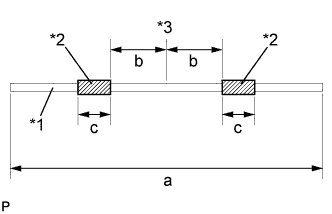 |
Wind double-sided tape around a string as shown in the illustration.
| *1 | String |
| *2 | Double-sided Tape |
| *3 | Center line |
| a | 1600.0 mm (62.992 in.) |
| b | 50.0 to 75.0 mm (1.969 to 2.953 in.) |
| c | 30.0 mm (1.181 in.) |
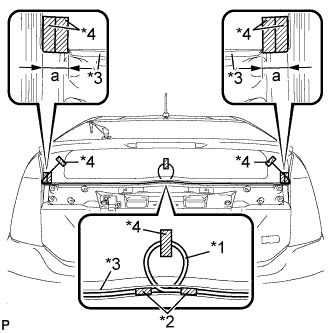 |
Lift the ends of the No. 2 back window molding lower, and attach each end to the back door glass with tape.
| *1 | String |
| *2 | Double-sided Tape |
| *3 | No. 2 back window lower moulding |
| *4 | Tape |
| a | 40.0 mm (1.575 in.) |
Make a loop in the center of the string, and attach it to the back of the No. 2 back window lower moulding with the double-sided tape on the string.
Attach the loop and ends of the string to the back door glass with tape as shown in the illustration.
Install the 4 new gaskets to the back door outside garnish sub-assembly.
Install 11 new clips (back door outside garnish clip) to the back door outside garnish sub-assembly.
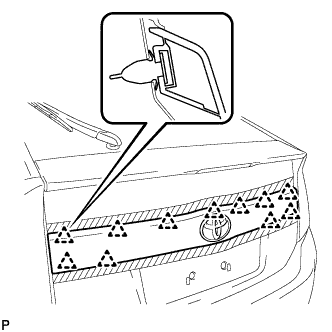 |
Engage the 11 clips to install the back door outside garnish sub-assembly.
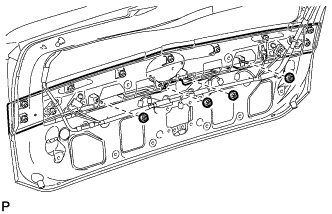 |
Install the 4 nuts.
Apply soapy water to the No. 2 back window molding lower.
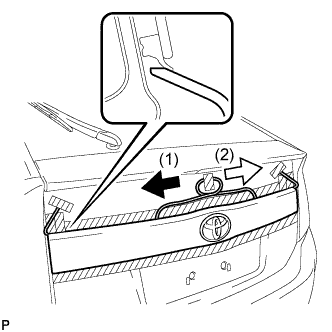 |
Remove the string by slowly pulling out toward each end from the center toward the sides of the vehicle as shown in the illustration.
Check that the No. 2 back window molding lower is not pinched between the back door and the back door outside garnish sub-assembly.
Remove the tape.
| 13. INSTALL BACK DOOR STAY BOLT LH |
Clean the threaded portion on the vehicle body with a non-residue solvent.
Apply adhesive to the threads of the back door stay bolt.
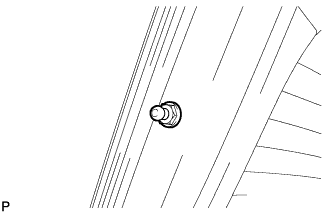 |
Install the back door stay bolt.
| 14. INSTALL BACK DOOR STAY BOLT RH |
| 15. INSTALL BACK DOOR STAY ASSEMBLY LH |
When reusing the back door stay assembly:
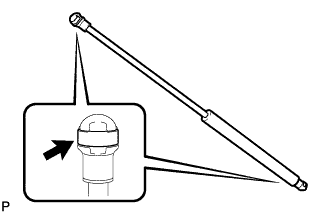 |
Install the 2 stop rings to the back door stay assembly.
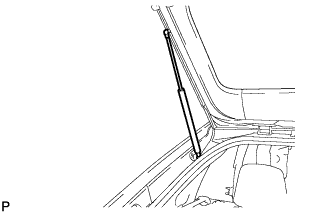 |
Install the back door stay assembly.
Check that the back door stay assembly is engaged in the ball joint and that the back door stay assembly cannot be pulled out.
| 16. INSTALL BACK DOOR STAY ASSEMBLY RH |
| 17. INSTALL LOWER BACK DOOR STOPPER LH |
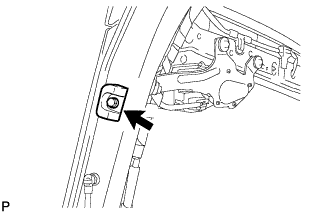 |
Install the lower back door stopper LH with the bolt.
| 18. INSTALL LOWER BACK DOOR STOPPER RH |
| 19. INSTALL BACK DOOR LOCK STRIKER ASSEMBLY |
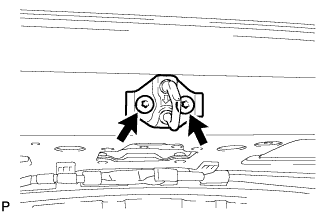 |
Using a T40 "TORX" socket wrench, install the back door lock striker assembly with the 2 screws.
| 20. INSTALL LOWER BACK DOOR STOPPER CUSHION |
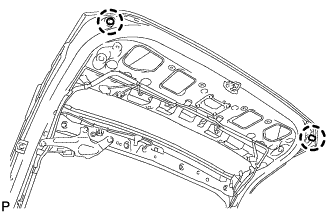 |
Engage the claws to install the 2 new lower back door stopper cushions.
| 21. INSTALL BACK DOOR LOCK STRIKER COVER |
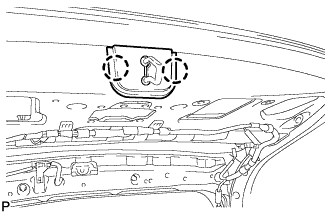 |
Engage the 2 claws to install the back door lock striker cover.
| 22. INSTALL BACK DOOR TRIM BOARD |
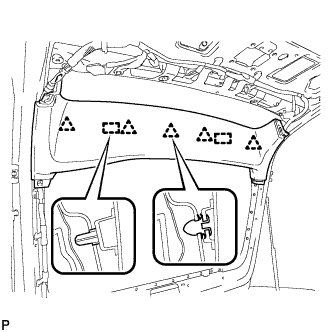 |
Engage the 5 clips and 2 guides to install the back door trim board.
| 23. INSTALL BACK DOOR TRIM BOARD ASSEMBLY |
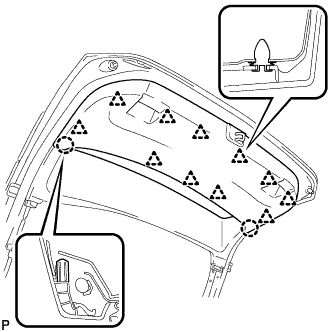 |
Engage the 11 clips and 2 claws to install the back door panel trim assembly.
| 24. INSTALL BACK DOOR SIDE GARNISH LH |
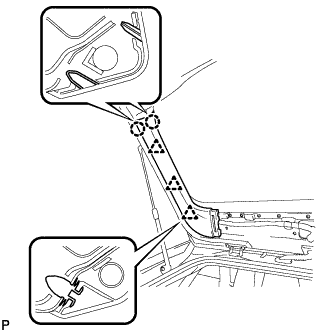 |
Engage the 3 clips and 2 claws to install the back door side garnish LH.
| 25. INSTALL BACK DOOR SIDE GARNISH RH |
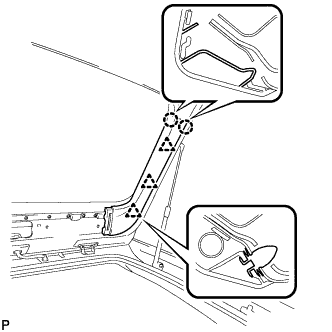 |
Engage the 3 clips and 2 claws to install the back door side garnish RH.
| 26. INSTALL UPPER BACK DOOR TRIM PANEL ASSEMBLY |
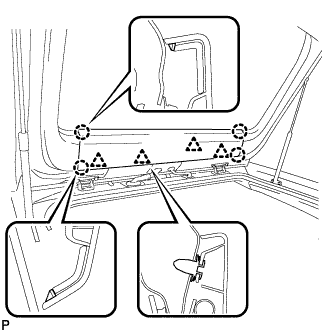 |
Engage the 4 clips and 4 claws to install the upper back door trim panel assembly.