EXHAUST MANIFOLD > INSTALLATION |
| 1. INSTALL NO. 2 EXHAUST MANIFOLD HEAT INSULATOR |
Install the No. 2 exhaust manifold heat insulator with the 3 bolts.
| 2. INSTALL EXHAUST MANIFOLD |
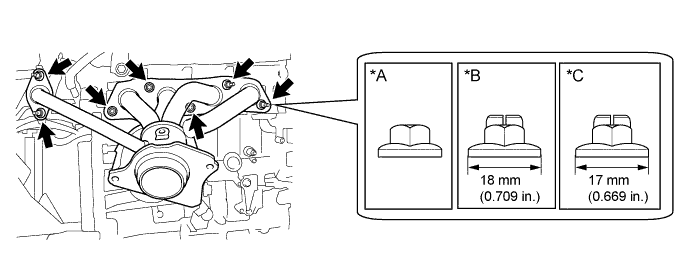
w/ EGR System:
Install 2 new gaskets and exhaust manifold with the 7 nuts.

| *A | Type A | *B | Type B |
| *C | Type C | - | - |
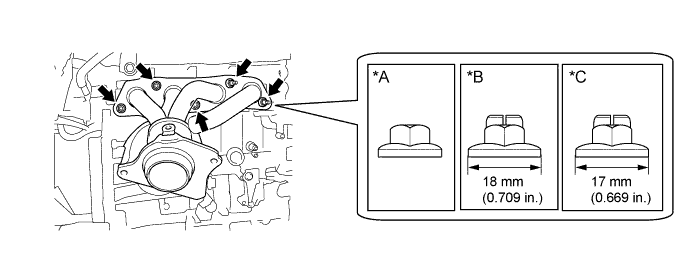
w/o EGR System:
Install a new gasket and exhaust manifold with the 5 nuts.

| *A | Type A | *B | Type B |
| *C | Type C | - | - |
| 3. INSTALL MANIFOLD STAY |
Install the manifold stay with the 3 bolts.
| 4. INSTALL AIR FUEL RATIO SENSOR |
![]() |
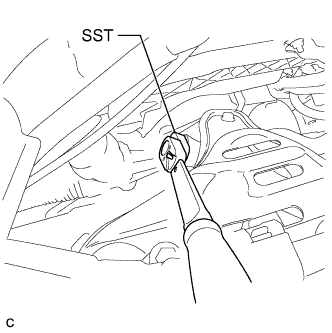
Using SST, install the air fuel ratio sensor.
![]() |
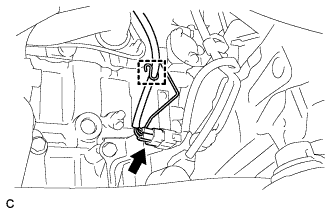
Connect the air fuel ratio sensor connector and clamp.
| 5. INSTALL NO. 1 EXHAUST MANIFOLD HEAT INSULATOR |
Install the No. 1 exhaust manifold heat insulator with the 3 bolts.
| 6. INSTALL FRONT NO. 1 FLOOR HEAT INSULATOR |
Install the front No. 1 floor heat insulator with the 3 nuts.
| 7. INSTALL FRONT EXHAUST PIPE ASSEMBLY (TWC: Front and Rear Catalyst (w/ Exhaust Heat Recirculation System)) |
![]() |
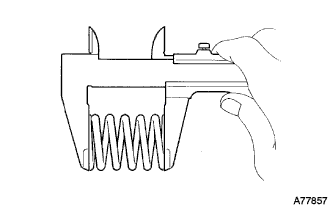
Using a vernier caliper, measure the free length of the compression springs.
| Minimum (front) | 41.5 mm (1.63 in.) |
| Minimum (rear) | 38.5 mm (1.52 in.) |
Temporarily install 2 new gaskets to the exhaust manifold and front exhaust pipe assembly (TWC: Front and Rear Catalyst).
![]() |
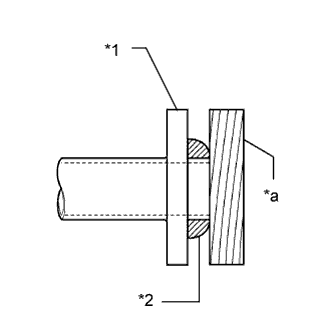
Using a plastic hammer and wooden block, tap in each gasket until its surface is flush with the exhaust manifold and front exhaust pipe assembly (TWC: Front and Rear Catalyst).
| *1 | Exhaust Manifold and Front Exhaust Pipe Assembly (TWC: Front and Rear Catalyst) |
| *2 | Gasket |
| *a | Wooden Block |
Connect the front exhaust pipe assembly (TWC: Front and Rear Catalyst) to the 3 exhaust pipe supports.
Install the front exhaust pipe assembly (TWC: Front and Rear Catalyst) with the 4 bolts and 4 compression springs.
Connect the 2 heater water hoses.
Connect the 3 clamps and oxygen sensor connector.
| 8. INSTALL FRONT EXHAUST PIPE ASSEMBLY (TWC: Front and Rear Catalyst (w/o Exhaust Heat Recirculation System)) |
![]() |
Using a vernier caliper, measure the free length of the compression springs.
| Minimum (front) | 41.5 mm (1.63 in.) |
| Minimum (rear) | 38.5 mm (1.52 in.) |
Temporarily install 2 new gaskets to the exhaust manifold and front exhaust pipe assembly (TWC: Front and Rear Catalyst).
![]() |
Using a plastic hammer and wooden block, tap in each gasket until its surface is flush with the exhaust manifold and front exhaust pipe assembly (TWC: Front and Rear Catalyst).
| *1 | Exhaust Manifold and Front Exhaust Pipe Assembly (TWC: Front and Rear Catalyst) |
| *2 | Gasket |
| *a | Wooden Block |
Connect the front exhaust pipe assembly (TWC: Front and Rear Catalyst) to the 3 exhaust pipe supports.
Install the front exhaust pipe assembly (TWC: Front and Rear Catalyst) with the 4 bolts and 4 compression springs.
| 9. ADD COOLANT (for Engine with Exhaust Heat Recirculation System) |
Tighten the radiator drain cock plug.
Remove the reservoir tank cap.
![]() |
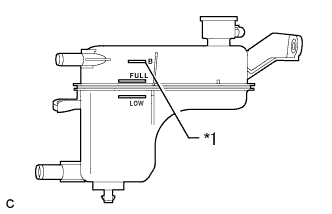
Add coolant to B line of the reservoir tank.
| *1 | B Line |
| Item | Capacity |
| Engine coolant | w/ Exhaust Heat Recirculation System: 7.2 liters (7.6 US qts, 6.3 lmp. qts) |
| w/o Exhaust Heat Recirculation System: 6.5 liters (6.8 US qts, 5.7 lmp. qts) |
Squeeze the inlet and outlet radiator hoses several times by hand, and then check the level of the coolant.
If the coolant level is low, add coolant.
Install the reservoir tank cap.
Put the engine in inspection mode (Click here).
Bleed air from the cooling system.
Warm up the engine until the thermostat opens. While the thermostat is open, allow the coolant to circulate for several minutes.
Squeeze the inlet and outlet radiator hoses several times by hand to bleed air from the system.
![]() |
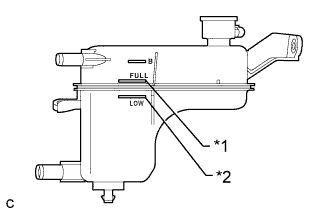
After the engine has cooled down, check that the coolant level is between full and low.
| *1 | Full Line |
| *2 | Low Line |
| 10. INSPECT FOR COOLANT LEAK (for Engine with Exhaust Heat Recirculation System) |
Remove the reservoir tank cap.
![]() |
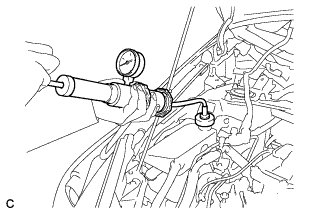
Fill the radiator and reservoir with coolant, and then attach a radiator cap tester.
Put the engine in inspection mode (Click here).
Warm up the engine.
Using the reservoir cap tester, increase the pressure inside the radiator to 108 kPa (1.1 kgf/cm2, 16 psi), and check that the pressure does not drop. If the pressure drops, check the hoses, radiator, front exhaust pipe assembly and the heater hose around and engine water pump assembly for leaks. If no external leaks are found, check the heater core, cylinder block and cylinder head.
Remove the radiator cap tester.
Install the reservoir tank cap.
| 11. INSTALL FRONT CENTER FLOOR BRACE |
![]() |
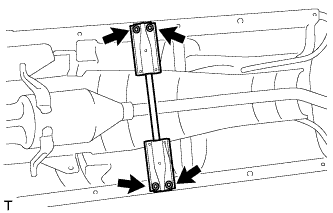
Install the front center floor brace with the 4 bolts.
| 12. INSTALL FRONT NO. 3 ENGINE UNDER COVER |
![]() |
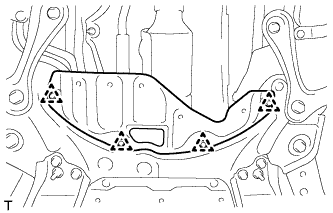
Install the front No. 3 engine under cover with the 4 clips.
| 13. INSTALL NO. 2 ENGINE UNDER COVER |
| 14. INSTALL NO. 1 ENGINE UNDER COVER |
| 15. INSTALL OUTER COWL TOP PANEL SUB-ASSEMBLY (for LHD) |
![]() |
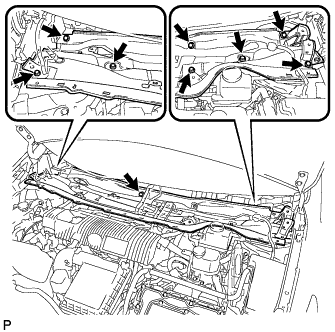
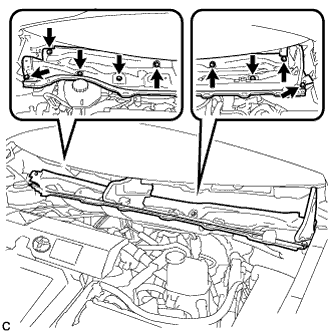
Install the outer cowl top panel sub-assembly with the 9 bolts.
![]() |
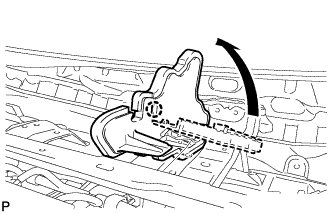
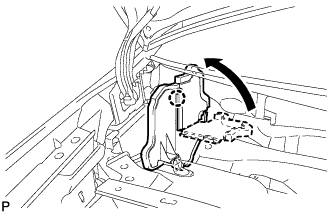
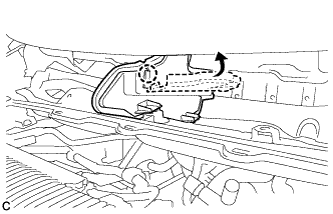
Bend the water guard plate RH and engage the claw.
![]() |
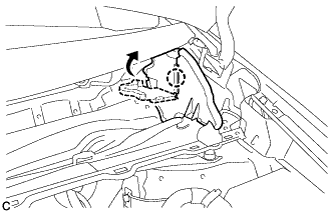
Bend the No. 1 heater air duct splash shield seal and engage the claw.
![]() |
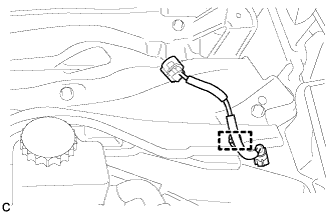
Engage the clamp to install the wire harness.
| 16. INSTALL OUTER COWL TOP PANEL SUB-ASSEMBLY (for RHD) |
![]() |
Install the outer cowl top panel with the 9 bolts.
![]() |
Bend the water guard plate RH and engage the claw.
![]() |
Bend the No. 1 heater air duct splash shield seal and engage the claw.
![]() |
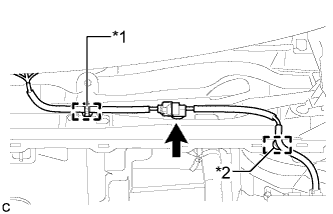
Engage the clamp*2 of the wire harness.
Engage the clamp*1 and connect the connector (w/ Windshield Deicer).
![]() |
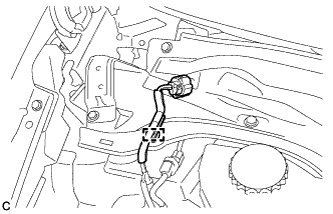
Engage the clamp of the wire harness.
| 17. INSTALL COWL BODY MOUNTING REINFORCEMENT LH (for LHD) |
![]() |
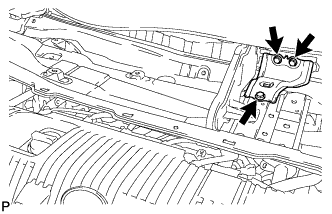
Install the cowl body mounting reinforcement LH with the 3 bolts.
| 18. INSTALL COWL BODY MOUNTING REINFORCEMENT LH (for RHD) |
![]() |
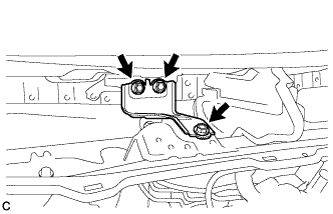
Install the cowl body mounting reinforcement LH with the 3 bolts.
| 19. INSTALL WINDSHIELD WIPER MOTOR AND LINK ASSEMBLY |
| 20. INSPECT FOR EXHAUST GAS LEAK |