 |
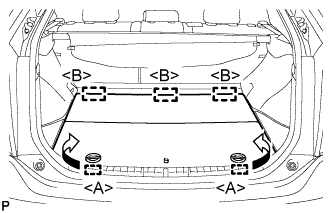
Disengage the 2 guides <A> as shown in the illustration.
CONDENSER > REMOVAL |
| 1. PRECAUTION (w/ Navigation System for HDD) |
| 2. RECOVER REFRIGERANT FROM REFRIGERATION SYSTEM |
Turn the A/C switch on.
Operate the A/C with the setting temperature at 25°C (77°F) and the blower level at LO for 10 minutes to circulate the refrigerant. This causes most of the compressor oil from the various components of the A/C system to collect in the A/C compressor.
Turn the power switch off.
Recover the refrigerant from the A/C system using a refrigerant recovery unit.
| 3. REMOVE REAR NO. 2 FLOOR BOARD |
|
Disengage the 2 guides <A> as shown in the illustration.
Disengage the 3 guides <B> and remove the rear No. 2 floor board.
| 4. REMOVE REAR DECK FLOOR BOX |
Remove the rear deck floor box.
| 5. REMOVE REAR NO. 3 FLOOR BOARD |
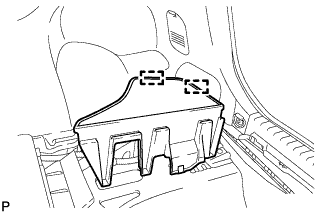 |
Disengage the 2 guides and remove the rear No. 3 floor board.
| 6. DISCONNECT CABLE FROM NEGATIVE BATTERY TERMINAL |
| 7. REMOVE RADIATOR SUPPORT OPENING COVER |
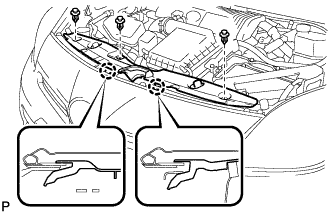 |
Remove the 3 clips.
Disengage the 2 claws and remove the radiator support opening cover.
| 8. REMOVE FRONT BUMPER ASSEMBLY |
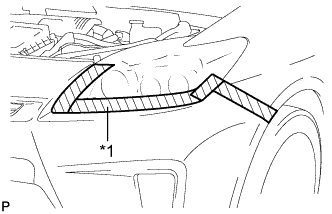 |
Put protective tape around the front bumper assembly.
| *1 | Protective Tape |
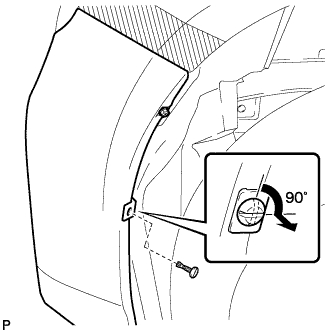 |
Using a screwdriver, turn the pin 90 degrees and remove the pin hold clip.
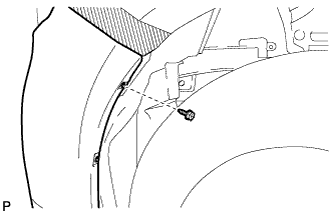 |
Remove the screw.
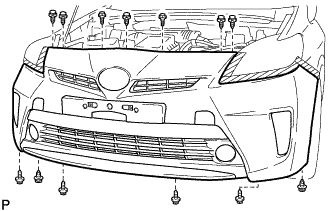 |
Remove the 2 bolts and 4 screws.
Using a clip remover, remove the 7 clips.
w/ Front Spoiler:
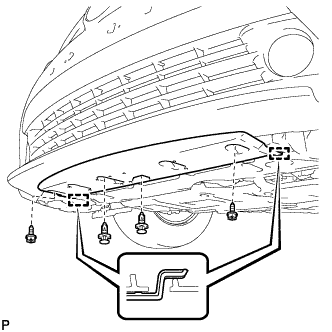 |
Using a clip remover, remove the 2 clips.
Remove the 2 screws.
Disengage the 2 guides and remove the front spoiler cover.
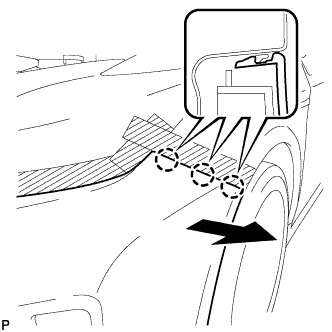 |
Disengage the 3 claws and remove the front bumper assembly.
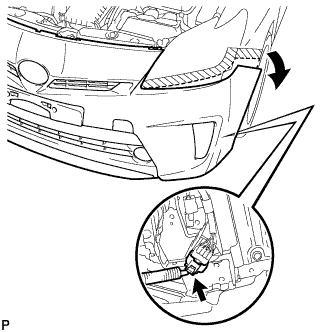 |
Pull back the side of the front bumper assembly as shown in the illustration and disconnect the connector.
w/ Headlight Cleaner System:
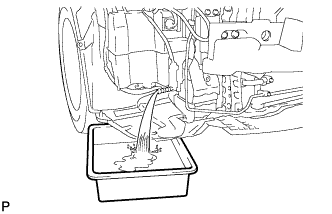 |
Disconnect the headlight cleaner hose and drain the washer fluid.
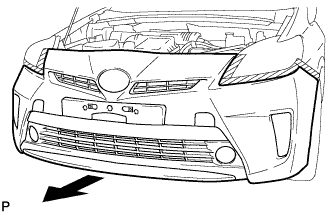 |
Remove the front bumper assembly as shown in the illustration.
| 9. REMOVE MILLIMETER WAVE RADAR SENSOR ASSEMBLY (w/ Dynamic Radar Cruise Control System) |
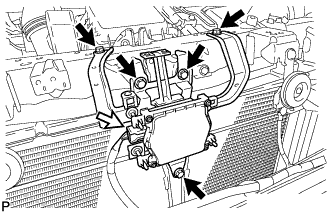 |
Disconnect the connector.
Remove the 5 bolts and millimeter wave radar sensor assembly.
| 10. REMOVE MILLIMETER WAVE RADAR SENSOR BRACKET (w/ Dynamic Radar Cruise Control System) |
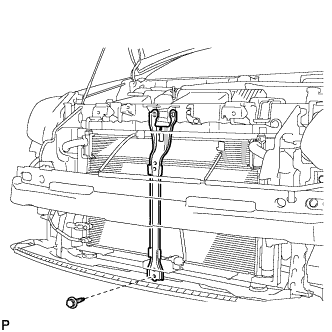 |
Remove the bolt and millimeter wave radar sensor bracket.
| 11. DISCONNECT DISCHARGE HOSE SUB-ASSEMBLY |
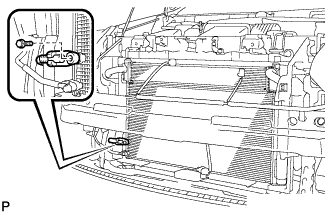 |
Remove the bolt and disconnect the discharge hose sub-assembly.
Remove the O-ring from the discharge hose sub-assembly.
| 12. DISCONNECT AIR CONDITIONING TUBE AND ACCESSORY ASSEMBLY |
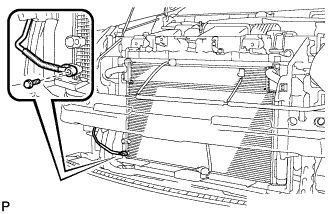 |
Remove the bolt and disconnect the air conditioning tube and accessory assembly.
Remove the O-ring from the air conditioning tube and accessory assembly.
| 13. DISCONNECT NO. 5 INVERTER COOLING HOSE |
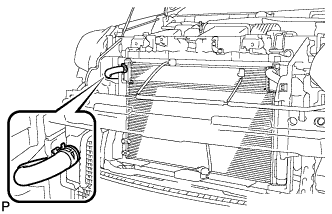 |
Using pliers, grip the claws of the clip and slide the clip to disconnect the No. 5 inverter cooling hose.
| 14. DISCONNECT NO. 7 INVERTER COOLING HOSE |
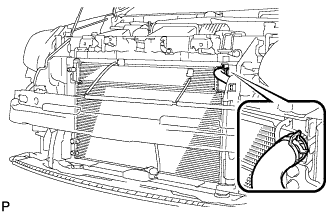 |
Using pliers, grip the claws of the clip and slide the clip to disconnect the No. 7 inverter cooling hose.
| 15. REMOVE NO. 1 INVERTER BRACKET |
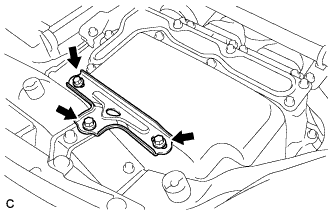 |
Remove the 3 bolts and No. 1 inverter bracket.
| 16. REMOVE HOOD LOCK SUPPORT SUB-ASSEMBLY |
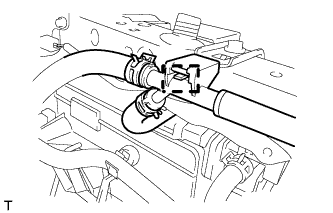 |
Disconnect the water by-pass hose clamp from the radiator support RH.
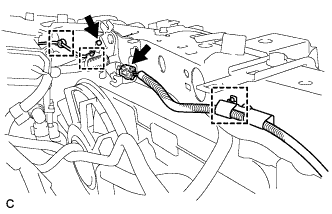 |
Disconnect the hood lock connector and hood lock control cable wire.
Disconnect the 3 wire harness clamps.
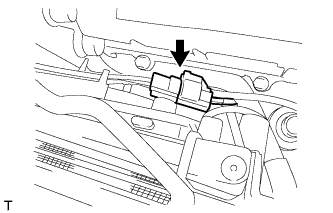 |
Disconnect the connector from the No. 2 cooling fan motor.
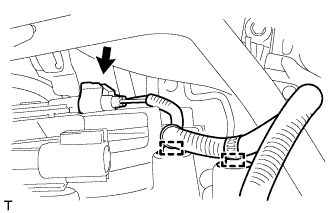 |
Disconnect the 2 wire harness clamps and connector from the fan shroud and cooling fan motor.
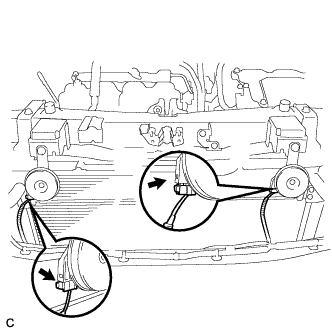 |
Disconnect the 2 horn connectors.
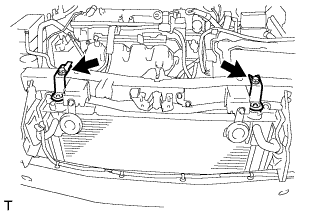 |
Remove the 2 bolts, radiator support RH and radiator support LH with the 2 cushions from the upper radiator support.
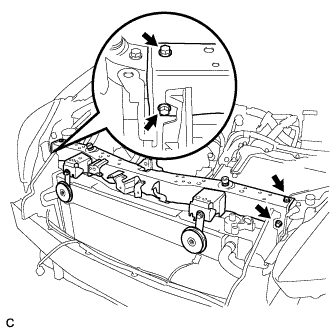 |
Remove the 4 bolts and upper radiator support.
| 17. REMOVE NO. 2 FAN SHROUD |
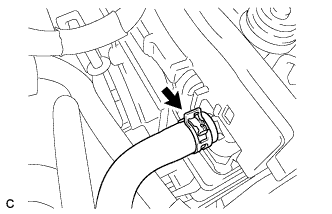 |
Disconnect the No. 1 water by-pass hose from the radiator assembly.
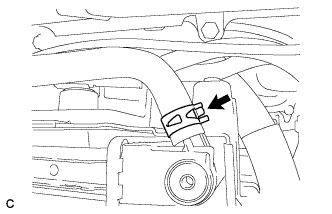 |
Disconnect the water by-pass hose from the radiator assembly.
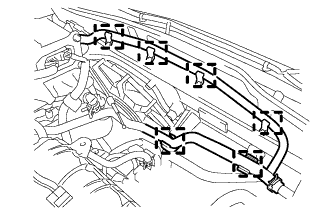 |
Disconnect the 6 water by-pass hose clamps from the No. 2 fan shroud.
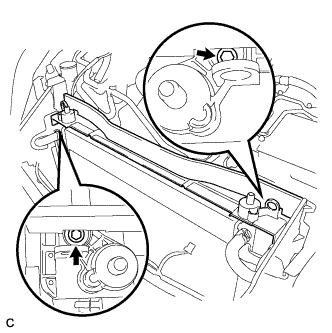 |
Remove the 2 bolts and No. 2 fan shroud from the radiator assembly.
| 18. REMOVE COOLER CONDENSER ASSEMBLY |
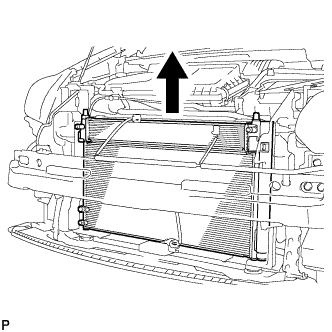 |
Remove the cooler condenser assembly with hybrid radiator assembly.
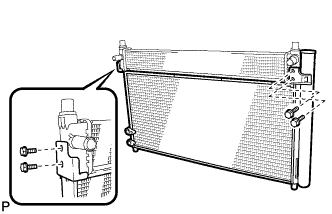 |
Remove the 4 bolts and cooler condenser assembly from the hybrid radiator assembly.