Home › Vehicle Exterior › EXTERIOR PANELS / TRIM › BACK DOOR OUTSIDE GARNISH

BACK DOOR OUTSIDE GARNISH > INSTALLATION

for Preparation Click here


1. INSTALL NO. 1 LUGGAGE COMPARTMENT DOOR NAME PLATE
  1. Clean the vehicle body surface.

    1. Using a heat light, heat the vehicle body surface.

    2. Remove any double-sided tape from the vehicle body.

    3. Wipe off any tape adhesive residue with cleaner.


  1. Install a new No. 1 luggage compartment door name plate.

    1. Using a heat light, heat the vehicle body and the No. 1 luggage compartment door name plate.

    2. Remove the release paper from the No. 1 luggage compartment door name plate.

      HINT:
      After removing the release paper, keep the exposed adhesive free from foreign matter.


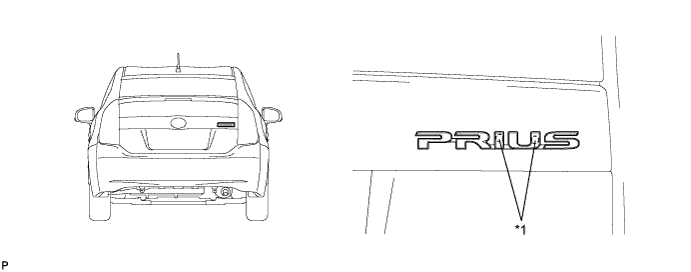
    3. Install the No. 1 luggage compartment door name plate as shown in the illustration.
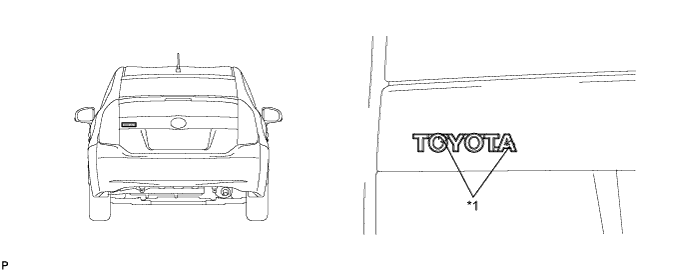

      B229372E01


      Text in Illustration 
      *1
      Location Pin
      -
      -


2. INSTALL NO. 2 BACK DOOR NAME PLATE
  1. Clean the vehicle body surface.

    1. Using a heat light, heat the vehicle body surface.

    2. Remove any double-sided tape from the vehicle body.

    3. Wipe off any tape adhesive residue with cleaner.


  1. Install a new No. 2 back door name plate.

    1. Using a heat light, heat the vehicle body and the No. 2 back door name plate.

    2. Remove the release paper from the No. 2 back door name plate.

      HINT:
      After removing the release paper, keep the exposed adhesive free from foreign matter.


    3. Install the No. 2 back door name plate as shown in the illustration.


      B229376E01


      Text in Illustration 
      *1
      Location Pin
      -
      -


3. INSTALL LUGGAGE COMPARTMENT DOOR EMBLEM


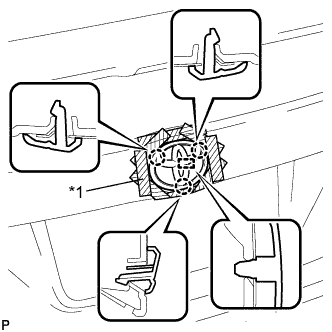
    B229369E01
  1. Install the luggage compartment door emblem with the pin and 3 claws.
    Text in Illustration 
    *1
    Protective Tape

    NOTICE:
    Be careful not to damage the vehicle body.


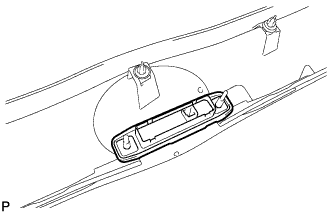
4. INSTALL BACK DOOR OPENER SWITCH ASSEMBLY


    B227912
  1. Install the back door opener switch assembly.


5. INSTALL BACK DOOR OUTSIDE GARNISH SUB-ASSEMBLY


    B247809E01
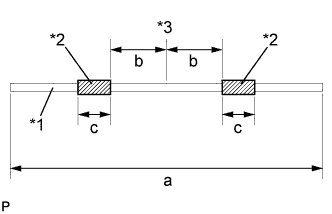
  1. Wind double-sided tape around a string as shown in the illustration.

    HINT:
    The string is used to prevent the edge of the No. 2 back window lower moulding from being tucked under the back door outside garnish sub-assembly during installation.

    Text in Illustration 
    *1
    String
    *2
    Double-sided Tape
    *3
    Center line
    Standard Dimension 
    a
    1600.0 mm (62.992 in.)
    b
    50.0 to 75.0 mm (1.969 to 2.953 in.)
    c
    30.0 mm (1.181 in.)


    B247810E01
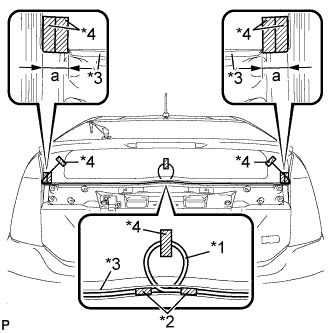
  1. Lift the ends of the No. 2 back window molding lower, and attach each end to the back door glass with tape.
    Text in Illustration 
    *1
    String
    *2
    Double-sided Tape
    *3
    No. 2 back window lower moulding
    *4
    Tape
    Standard Dimension 
    a
    40.0 mm (1.575 in.)

  1. Make a loop in the center of the string, and attach it to the back of the No. 2 back window lower moulding with the double-sided tape on the string.

  1. Attach the loop and ends of the string to the back door glass with tape as shown in the illustration.

  1. Install the 4 new gaskets to the back door outside garnish sub-assembly.

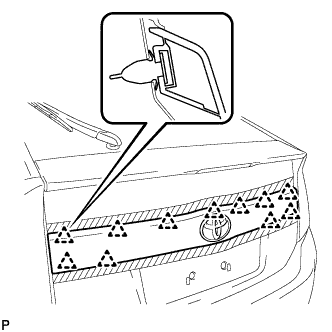
  1. Install 11 new clips (back door outside garnish clip) to the back door outside garnish sub-assembly.


    B229357
  1. Engage the 11 clips to install the back door outside garnish sub-assembly.

    HINT:
    Make sure that the string does not get pulled out from the back of the No. 2 back window molding lower.


    B229355
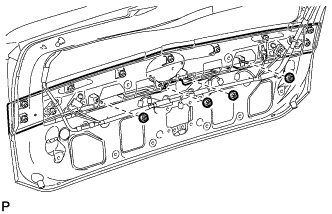
  1. Install the 4 nuts.

  1. Apply soapy water to the No. 2 back window molding lower.


    B247812E01
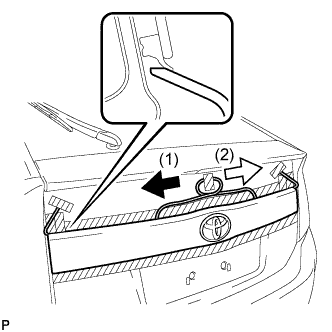
  1. Remove the string by slowly pulling out toward each end from the center toward the sides of the vehicle as shown in the illustration.

    NOTICE:
    Do not damage the No. 2 back window lower moulding.

  1. Check that the No. 2 back window molding lower is not pinched between the back door and the back door outside garnish sub-assembly.

  1. Remove the tape.


6. INSTALL BACK DOOR TRIM BOARD ASSEMBLY


    B227902
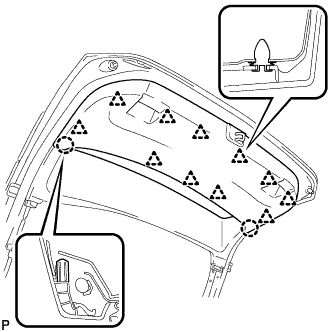
  1. Engage the 11 clips and 2 claws to install the back door panel trim assembly.