 |
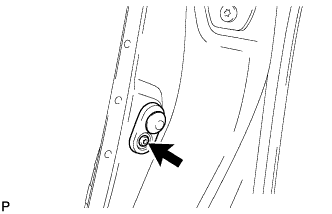
Using a T30 "TORX" socket wrench, install the front door courtesy light switch assembly with the bolt.
- Torque:
- 6.3 N*m{ 64 kgf*cm , 56 in.*lbf }
FRONT DOOR COURTESY SWITCH > INSTALLATION |
| 1. INSTALL FRONT DOOR COURTESY LIGHT SWITCH ASSEMBLY |
|
Using a T30 "TORX" socket wrench, install the front door courtesy light switch assembly with the bolt.
Connect the connector.
| 2. INSTALL CENTER PILLAR LOWER GARNISH |
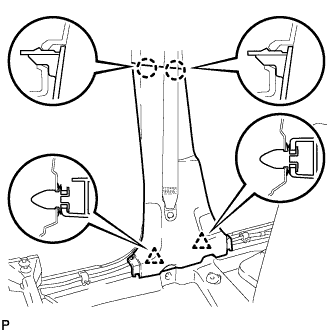 |
Engage the 2 claws and 2 clips to install the center pillar lower garnish LH.
| 3. CONNECT REAR DOOR OPENING TRIM WEATHERSTRIP |
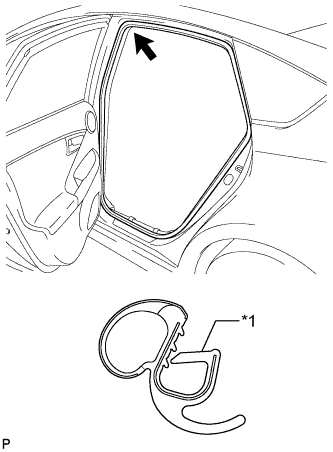 |
Align the alignment mark (Red) on the weatherstrip with the protruding portion on the body indicated by the arrow in the illustration, and install the rear door opening trim weatherstrip LH.
| *1 | Alignment Mark (Red) |
| 4. CONNECT FRONT DOOR OPENING TRIM WEATHERSTRIP |
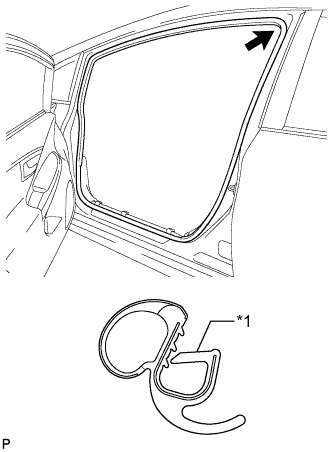 |
Align the alignment mark (Yellow) on the weatherstrip with the protruding portion on the body indicated by the arrow in the illustration, and install the front door opening trim weatherstrip LH.
| *1 | Alignment Mark (Yellow) |
| 5. INSTALL REAR DOOR SCUFF PLATE |
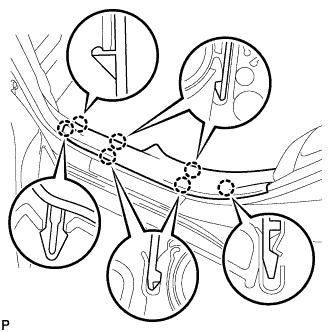 |
Engage the 7 claws to install the rear door scuff plate LH.
| 6. INSTALL FRONT DOOR SCUFF PLATE |
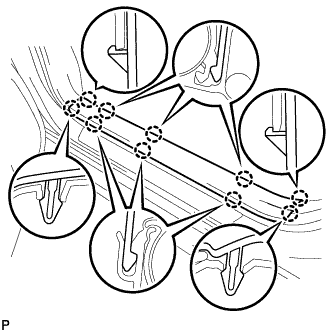 |
Engage the 10 claws to install the front door scuff plate LH.