 |
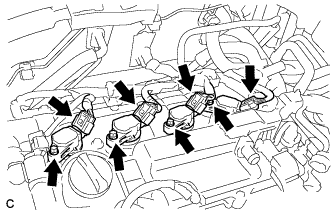
Install the 4 ignition coils with the 4 bolts.
- Torque:
- 10 N*m{ 102 kgf*cm , 7 ft.*lbf }
- NOTICE:
- When installing each ignition coil, do not damage the plug cap on the engine head cover opening or the upper edge of the spark plug tube.
ENGINE UNIT > INSTALLATION |
| 1. INSTALL IGNITION COIL ASSEMBLY |
|
Install the 4 ignition coils with the 4 bolts.
Connect the 4 ignition coil connectors.
| 2. INSTALL VENTILATION HOSE |
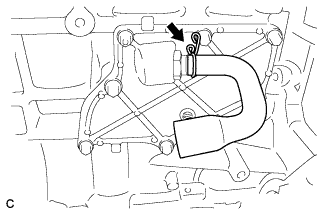 |
Install the ventilation hose to the ventilation valve.
| 3. INSTALL EXHAUST MANIFOLD |
w/ EGR System:
Install 2 new gaskets and exhaust manifold with the 7 nuts.
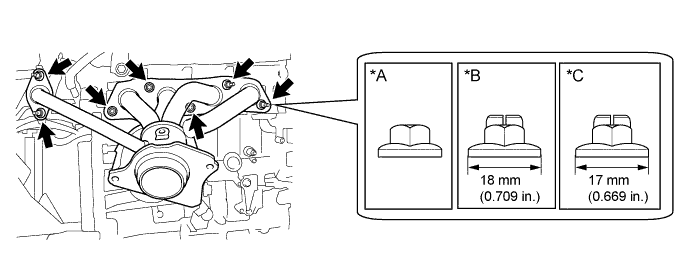
| *A | Type A | *B | Type B |
| *C | Type C | - | - |
w/o EGR System:
Install a new gasket and exhaust manifold with the 5 nuts.
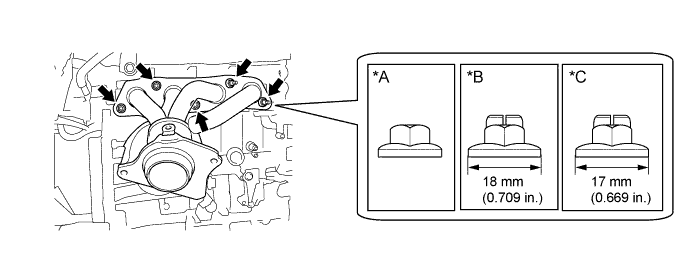
| *A | Type A | *B | Type B |
| *C | Type C | - | - |
| 4. INSTALL MANIFOLD STAY |
Install the manifold stay with the 3 bolts.
| 5. INSTALL NO. 1 EXHAUST MANIFOLD HEAT INSULATOR |
Install the No. 1 exhaust manifold heat insulator with the 3 bolts.
| 6. INSTALL FUEL INJECTOR ASSEMBLY |
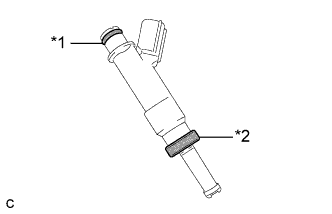 |
Install a new injector vibration insulator and O-ring to each fuel injector assembly.
| *1 | O-ring |
| *2 | Injector Vibration Insulator |
Apply a light coat of gasoline or spindle oil to the contact surfaces of the new O-ring on each fuel injector assembly.
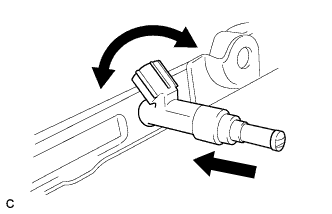 |
While turning the fuel injector assembly left and right, install it onto the fuel delivery pipe sub-assembly.
| 7. INSTALL NO. 1 DELIVERY PIPE SPACER |
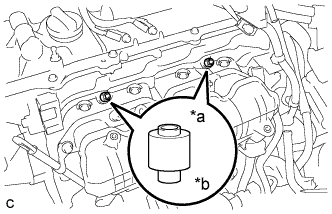 |
Install the 2 No. 1 delivery pipe spacers onto the cylinder head.
| *a | Delivery Pipe Side |
| *b | Cylinder Head Side |
| 8. INSTALL FUEL DELIVERY PIPE SUB-ASSEMBLY |
Install the fuel delivery pipe sub-assembly with the 4 fuel injector assemblies and install the 2 bolts.
Install the bolt to secure the fuel delivery pipe sub-assembly.
| 9. INSTALL FUEL VAPOR FEED PIPE |
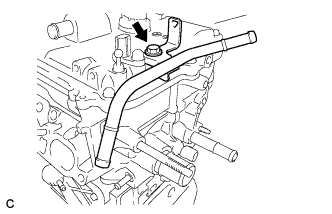 |
Install the fuel vapor feed pipe with the bolt.
| 10. INSTALL INTAKE MANIFOLD |
w/ Stud Bolt:
Using an E6 "TORX" socket wrench, install the 2 stud bolts to the intake manifold.
Install a new No. 1 intake manifold to head gasket to the intake manifold.
Install the intake manifold with the 2 bolts and 2 nuts.
Connect the fuel vapor feed hose and ventilation hose to the intake manifold.
Install a new O-ring to the engine oil level dipstick guide sub-assembly.
Apply a light coat of engine oil to the O-ring.
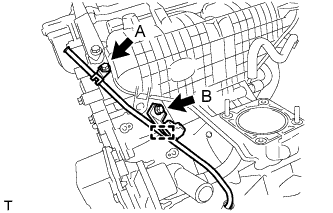 |
Install the engine oil level dipstick guide sub-assembly with the 2 bolts and connect the wire harness clamp.
Install the engine oil level dipstick.
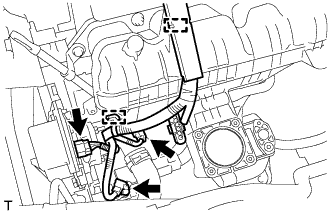 |
Connect the 2 wire harness clamps and 3 connectors.
w/o EGR System:
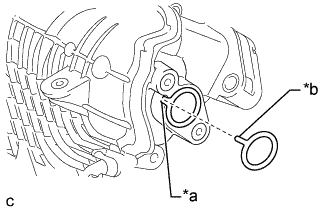 |
Install a new gasket to the intake manifold.
| *a | Groove |
| *b | Protrusion |
Install the surge tank cover to the intake manifold with the 2 bolts.
Install the wire harness support to the surge tank cover with the bolt.
Connect the 2 wire harness clamps.
| 11. INSTALL NO. 1 WATER BY-PASS PIPE (w/o EGR System) |
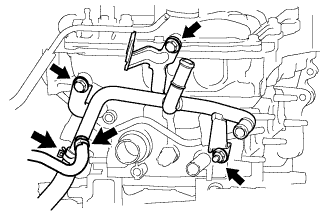 |
Using an E8 "TORX" socket wrench, install the stud bolt to the cylinder head sub-assembly .
Install the No. 1 water by-pass pipe to the cylinder head sub-assembly with the 2 bolts and nut.
Connect the 2 water hoses to the No. 1 water by-pass pipe.
| 12. INSTALL EGR COOLER SUB-ASSEMBLY (w/ EGR System) |
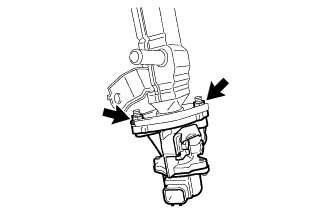 |
Temporarily install a new gasket and EGR valve assembly to the EGR with cooler pipe sub-assembly with the 2 nuts.
Install a new gasket and set the EGR valve with cooler assembly in place.
Using an E8 "TORX" socket wrench, install the 4 stud bolts.
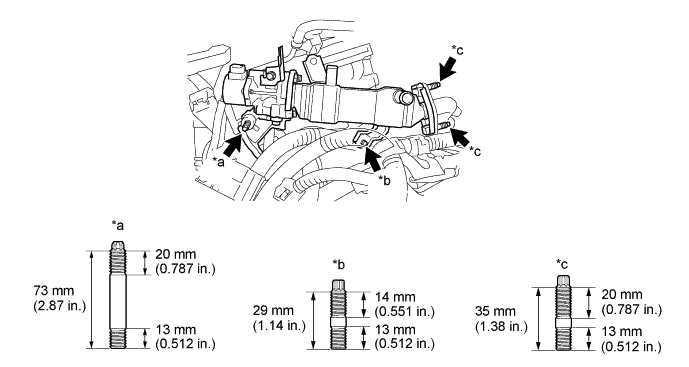
| *a | Stud Bolt A | *b | Stud Bolt B |
| *c | Stud Bolt C | - | - |
Temporarily install the 2 nuts (B), 2 nuts (C) and bolt.
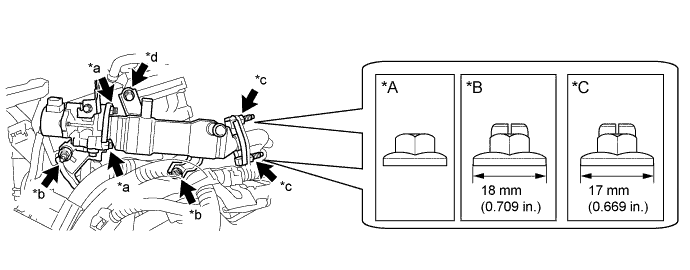
| *A | Type A | *B | Type B |
| *C | Type C | - | - |
| *a | Nut A | *b | Nut B |
| *c | Nut C | *d | Bolt |
Tighten the 2 nuts (A).
Tighten the 2 nuts (B) and bolt.
Tighten the 2 nuts (C).
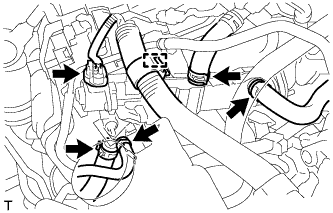 |
Connect the EGR valve with cooler assembly connector and engage the wire harness clamp.
Connect the 4 water hoses to the EGR valve assembly and slide the 4 clips to secure them.
| 13. INSTALL EGR VALVE ASSEMBLY (w/ EGR System) |
|
Temporarily install a new gasket and EGR valve assembly to the EGR with cooler pipe sub-assembly with the 2 nuts.
Install a new gasket and set the EGR valve with cooler assembly in place.
Using an E8 "TORX" socket wrench, install the 4 stud bolts.
| *a | Stud Bolt A | *b | Stud Bolt B |
| *c | Stud Bolt C | - | - |
Temporarily install the 2 nuts (B), 2 nuts (C) and bolt.
| *A | Type A | *B | Type B |
| *C | Type C | - | - |
| *a | Nut A | *b | Nut B |
| *c | Nut C | *d | Bolt |
Tighten the 2 nuts (A).
Tighten the 2 nuts (B) and bolt.
Tighten the 2 nuts (C).
|
Connect the EGR valve with cooler assembly connector and engage the wire harness clamp.
Connect the 4 water hoses to the EGR valve assembly and slide the 4 clips to secure them.
| 14. INSTALL EGR PIPE ASSEMBLY (w/ EGR System) |
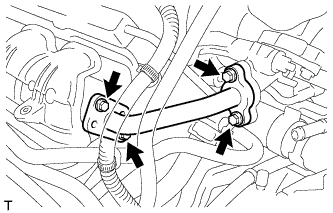 |
Install 2 new gaskets and EGR pipe assembly with the 4 bolts.
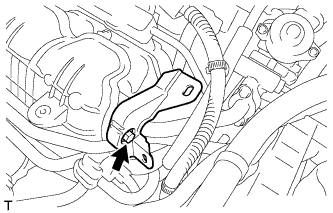 |
Install the wire harness support with the bolt.
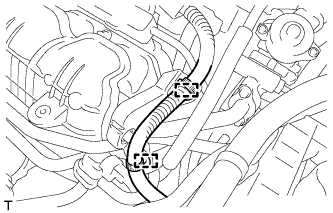 |
Connect the 2 wire harness clamps.
| 15. INSTALL ENGINE OIL LEVEL DIPSTICK GUIDE |
Apply a light coat of engine oil to a new O-ring.
Install the O-ring to the engine oil level dipstick guide.
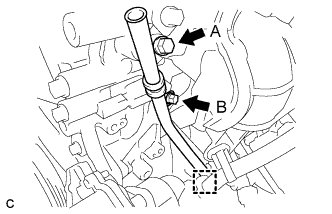 |
Install the engine oil level dipstick guide with the 2 bolts.
Connect the clamp to the engine oil level dipstick guide.
Install the engine oil level dipstick.
| 16. INSTALL THROTTLE BODY ASSEMBLY |
Type A:
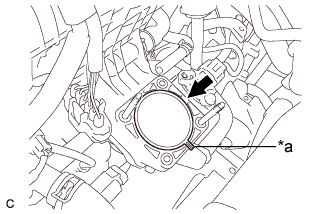 |
Install a new gasket onto the intake manifold.
| *a | Protrusion |
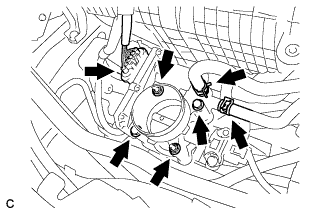 |
Install the throttle body assembly with the 2 bolts and 2 nuts.
Connect the No. 2 water by-pass hose.
Connect the No. 1 water by-pass hose and connector.
Type B:
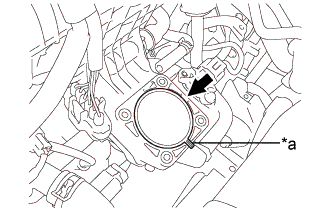 |
Install a new gasket onto the intake manifold.
| *a | Protrusion |
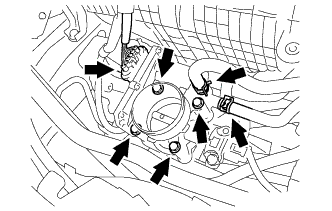 |
Install the throttle body assembly with the 4 bolts.
Connect the No. 2 water by-pass hose.
Connect the No. 1 water by-pass hose and connector.
| 17. INSTALL ENGINE HANGERS |
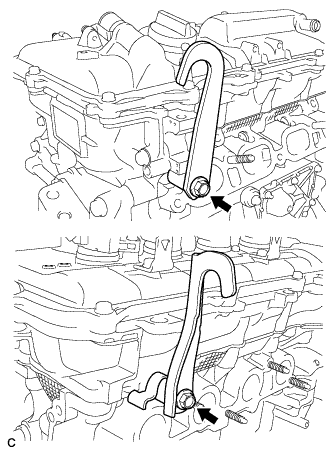 |
Install the 2 engine hangers with the 2 bolts.
| Part Name | Part No. |
| No. 1 engine hanger | 12281-37021 |
| No. 2 engine hanger | 12282-37011 |
| Bolt | 91552-81050 |
| 18. REMOVE ENGINE FROM ENGINE STAND |
Remove the bolts and engine from the engine stand.