 |
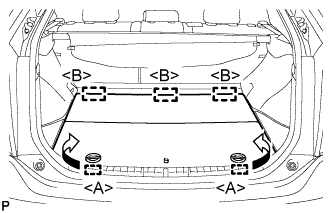
Disengage the 2 guides <A> as shown in the illustration.
STEREO COMPONENT AMPLIFIER > REMOVAL |
| 1. PRECAUTION (w/ Navigation System for HDD) |
| 2. REMOVE REAR NO. 2 FLOOR BOARD |
|
Disengage the 2 guides <A> as shown in the illustration.
Disengage the 3 guides <B> and remove the rear No. 2 floor board.
| 3. REMOVE REAR DECK FLOOR BOX |
Remove the rear deck floor box.
| 4. REMOVE REAR NO. 3 FLOOR BOARD |
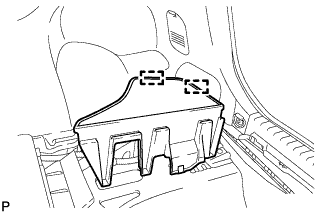 |
Disengage the 2 guides and remove the rear No. 3 floor board.
| 5. DISCONNECT CABLE FROM NEGATIVE BATTERY TERMINAL |
| 6. REMOVE FRONT SEAT HEADREST ASSEMBLY RH |
| 7. REMOVE OUTER SEAT TRACK COVER RH |
| 8. REMOVE INNER SEAT TRACK COVER RH |
| 9. REMOVE FRONT SEAT ASSEMBLY RH |
| 10. REMOVE AUDIO AMPLIFIER COVER |
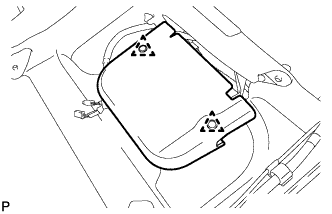 |
Using a clip remover, remove the 2 clips and audio amplifier cover.
| 11. REMOVE STEREO COMPONENT AMPLIFIER ASSEMBLY WITH BRACKET |
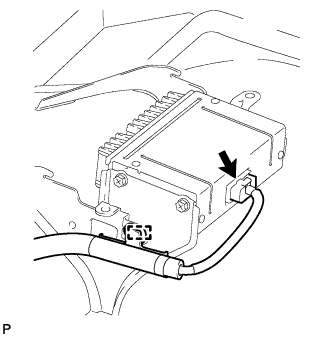 |
Disconnect the connector.
Disengage the clamp and disconnect the wire harness.
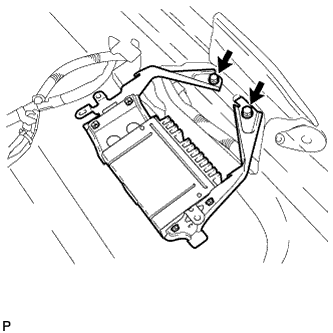 |
Remove the 2 bolts and stereo component amplifier assembly with bracket.
| 12. REMOVE NO. 2 AMPLIFIER OUTER BRACKET |
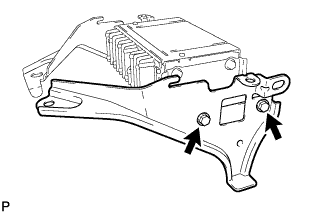 |
Remove the 2 screws and No. 2 amplifier outer bracket.
| 13. REMOVE NO. 2 AMPLIFIER INNER BRACKET |
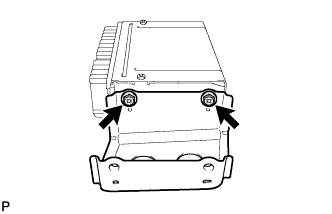 |
Remove the 2 screws and No. 2 amplifier inner bracket.
| 14. REMOVE NO. 1 AMPLIFIER BRACKET |
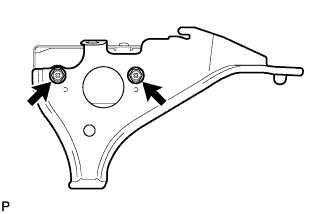 |
Remove the 2 screws and No. 1 amplifier bracket.
| 15. REMOVE STEREO COMPONENT AMPLIFIER ASSEMBLY |