 |
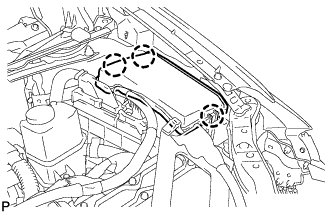
Disengage the 3 claws and remove the No. 1 relay block cover.
INTEGRATION RELAY > REMOVAL |
| 1. PRECAUTION (w/ Navigation System for HDD) |
| 2. DISCONNECT CABLE FROM NEGATIVE BATTERY TERMINAL |
| 3. REMOVE NO. 1 RELAY BLOCK COVER |
|
Disengage the 3 claws and remove the No. 1 relay block cover.
| 4. REMOVE NO. 1 INTEGRATION RELAY |
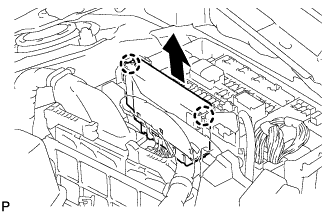 |
Disengage the 2 claws and pull up the No. 1 integration relay as shown in the illustration.
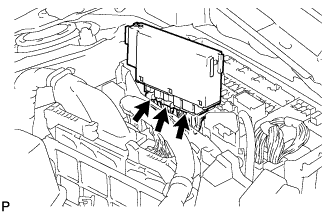 |
Disconnect the 3 connectors and remove the No. 1 integration relay.