 |
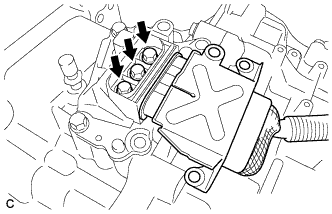
Install the generator cable to the hybrid transaxle assembly with the 3 bolts.
- Torque:
- 10 N*m{ 102 kgf*cm , 7 ft.*lbf }
- NOTICE:
- Keep the sealing surface of the generator cable and the connector terminal joint free of foreign matter.
GENERATOR CABLE > INSTALLATION |
| 1. INSTALL GENERATOR CABLE |
|
Install the generator cable to the hybrid transaxle assembly with the 3 bolts.
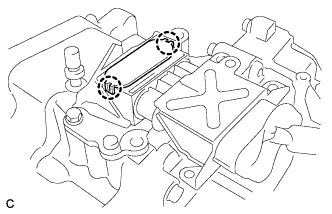 |
Engage the 2 claws to install a new terminal cap.
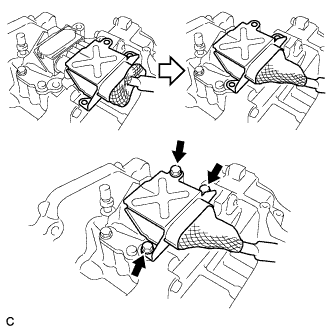 |
Place the generator cable connector shell in position and install it with the 3 bolts.
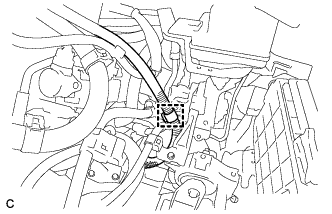 |
Connect the generator cable clamp to the motor cable bracket.
| 2. INSTALL RADIATOR PIPE |
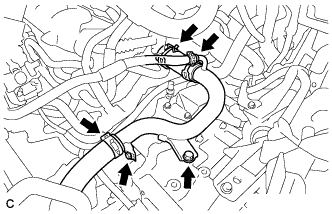 |
Install the radiator pipe with the 2 bolts.
Connect the No. 3 radiator hose, No. 4 water by-pass hose and No. 1 radiator hose with the clamps.
| 3. INSTALL INVERTER TRAY BRACKET |
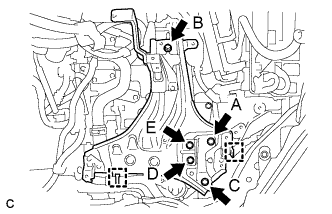 |
Position the inverter tray bracket as shown in the illustration.
Temporarily install bolt B to the inverter tray bracket.
Tighten the 5 bolts to the inverter tray bracket in the order the bolt A, bolt C, bolt D, bolt E and bolt B.
Connect the 2 clamps to the inverter tray bracket.
| 4. INSTALL INVERTER RESERVE TANK ASSEMBLY |
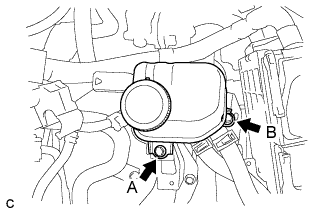 |
Temporarily install bolt A to the inverter reserve tank assembly.
Tighten the 2 bolts to the inverter reserve tank assembly in the order the bolt B and bolt A.
| 5. INSTALL INVERTER WITH CONVERTER ASSEMBLY |
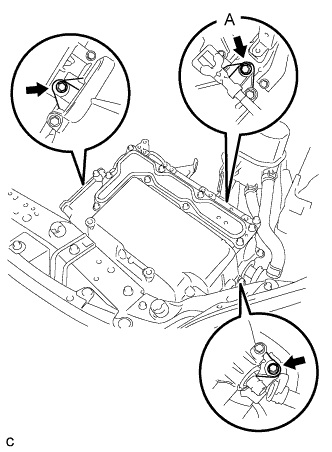 |
Temporarily install the inverter with converter assembly with the 3 bolts.
Tighten the bolt A.
Tighten the 2 bolts.
| 6. CONNECT WATER HOSE |
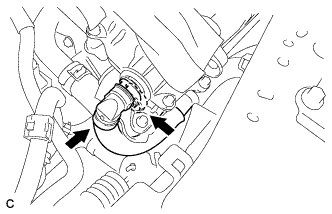 |
Connect the water hose to the inverter with converter assembly and lock the hose with the retainer.
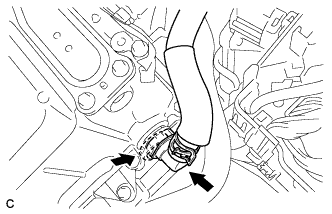 |
Connect the water hose to the inverter with converter assembly and lock the hose with the retainer.
| 7. CONNECT NO. 2 ENGINE ROOM WIRE |
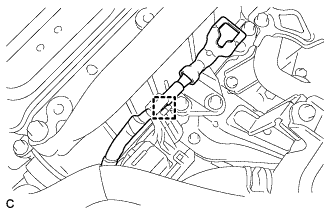 |
Disconnect the No. 2 engine room wire from the protector.
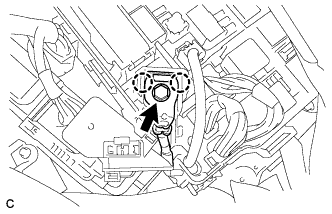 |
Connect the No. 2 engine room wire with the bolt and 2 claws.
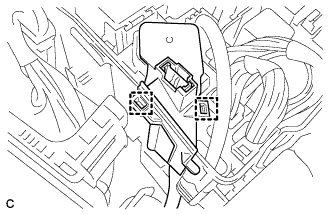 |
Install the No. 1 relay block cover and 2 clamps.
Install the relay block cover.
| 8. REMOVE INVERTER TERMINAL COVER |
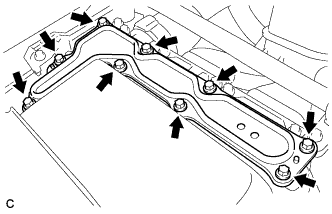 |
Remove the 9 bolts and inverter terminal cover.
| 9. CONNECT NO. 2 ENGINE WIRE |
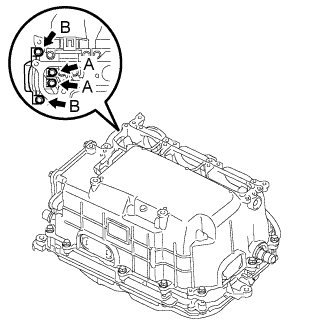 |
Connect the No. 2 engine wire (high voltage cables of the air conditioning) with the 4 bolts to the inverter with converter assembly.
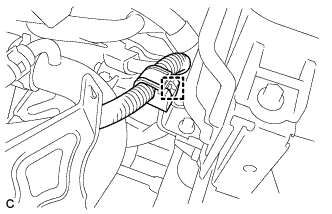 |
Connect the harness clamp.
| 10. CONNECT HIGH VOLTAGE CABLE OF FRONT TRANSAXLE |
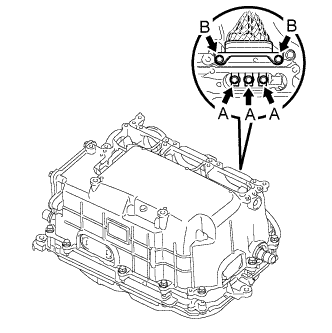 |
Connect the high voltage cable of the motor (MG2) with 5 bolts to the inverter with converter assembly.
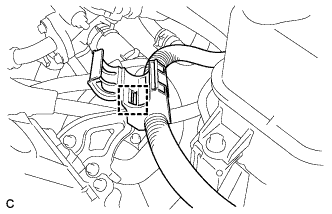 |
Connect the harness clamp.
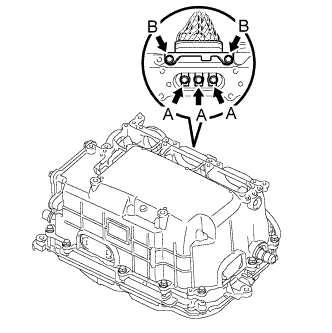 |
Connect the high voltage cable of the generator (MG1) with the 5 bolts to the inverter with converter assembly.
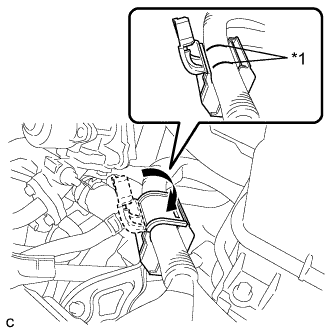 |
Install the cable and cover.
| *1 | Align Mark |
| 11. CONNECT FRAME WIRE |
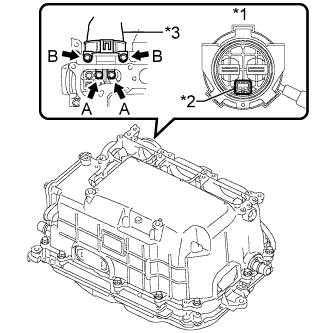 |
Connect the frame wire (high voltage cables of the hybrid battery) with the 4 bolts to the inverter with converter assembly.
| *1 | Front view of frame wire connector |
| *2 | Interlock |
| *3 | High voltage cables of the hybrid battery |
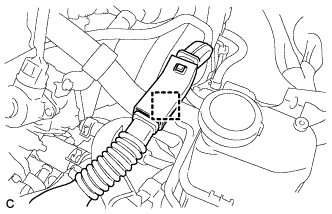 |
Connect the harness clamp.
| 12. CHECK HIGH VOLTAGE CABLE CONNECTION |
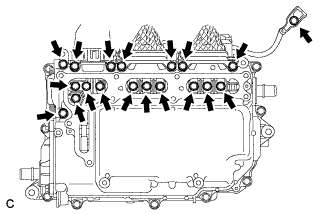 |
Check that each connector and terminal is firmly installed.
| 13. INSTALL INVERTER TERMINAL COVER |
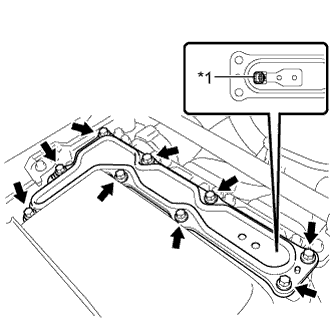 |
Install the inverter terminal cover with the 9 bolts to the inverter with converter assembly.
| *1 | Interlock |
| 14. INSTALL ENGINE ROOM MAIN WIRE |
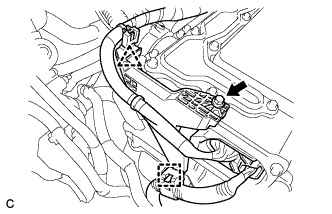 |
Install the bolt, clamp and clip, and connect the engine room main ware.
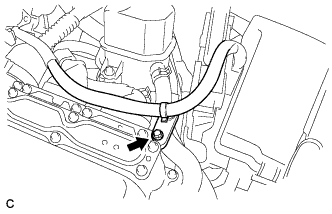 |
Install the bolt.
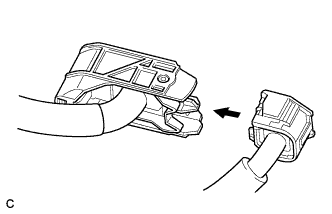 |
Connect the engine wire to the engine room main wire.
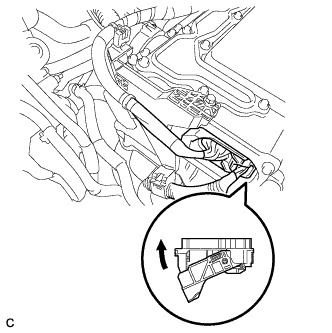 |
Connect the connector to the inverter with converter assembly and lock the connector with the lock lever.
| 15. INSTALL NO. 1 INVERTER BRACKET |
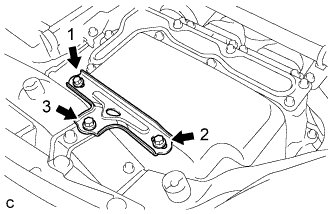 |
Temporarily install the No. 1 inverter bracket with the 3 bolts.
Tighten the 3 bolts in the order shown in the illustration.
| 16. INSTALL SERVICE PLUG GRIP |
Wear insulated gloves and install the service plug grip in the order shown in the illustration.
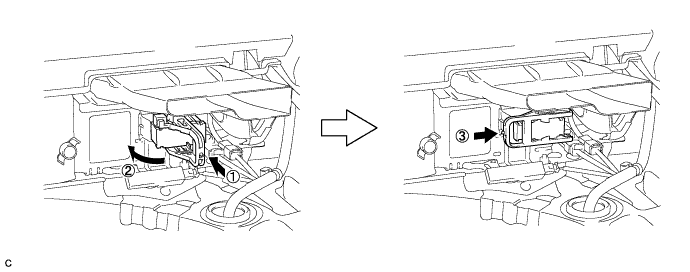
Rotate the handle of the service plug grip 90° toward the battery and slide it in the direction shown by the arrow until a click sound is heard.
| 17. CONNECT CABLE TO NEGATIVE BATTERY TERMINAL |
| 18. INSTALL REAR NO. 3 FLOOR BOARD |
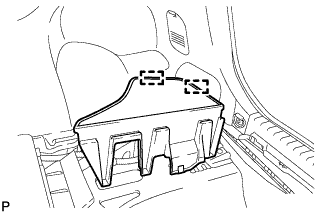 |
Engage the 2 guides to install the rear No. 3 floor board.
| 19. INSTALL REAR DECK FLOOR BOX |
Install the rear deck floor box.
| 20. INSTALL REAR NO. 2 FLOOR BOARD |
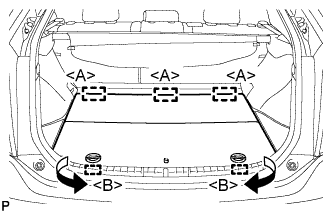 |
Engage the 3 guides <A>.
Engage the 2 guides <B> and install the rear No. 2 floor board as shown in the illustration.
| 21. ADD COOLANT (for Inverter) |
| DTC Code | Detection Item |
| P0A01-726 | Motor Electronics Coolant Temperature Sensor Circuit Range / Performance |
| P0A04-725 | Motor Electronics Coolant Temperature Sensor Circuit Intermittent |
| P0A08-264 | DC / DC Converter Status Circuit |
| P0A78-284 | Drive Motor "A" Inverter Performance |
| P0A78-286 | Drive Motor "A" Inverter Performance |
| P0A7A-322 | Generator Inverter Performance |
| P0A7A-324 | Generator Inverter Performance |
| P0A93-346 | Inverter Cooling System Performance |
| P0A94-553 | DC / DC Converter Performance |
| P0A94-557 | DC / DC Converter Performance |
| P0AEE-277 | Motor Inverter Temperature Sensor "A" Circuit Range / Performance |
| P0AF1-276 | Drive Motor Inverter Temperature Sensor "A" Circuit Intermittent / Erratic |
| P0BCD-315 | Generator Inverter Temperature Sensor Circuit Range / Performance |
| P0BD0-314 | Generator Inverter Temperature Sensor Circuit Intermittent / Erratic |
| P0C39-626 | DC / DC Converter Temperature Sensor "A" Range / Performance |
| P0C3C-625 | DC / DC Converter Temperature Sensor "A" Intermittent / Erratic |
| P0C3E-628 | DC / DC Converter Temperature Sensor "B" Range / Performance |
| P0C41-627 | DC / DC Converter Temperature Sensor "B" Intermittent / Erratic |
| P0C73-776 | Motor Electronics Coolant Pump "A" Control Performance |
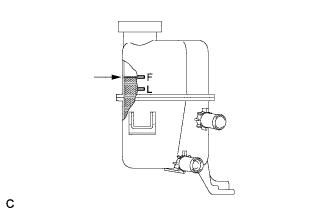 |
Slowly pour coolant into the reserve tank until it reaches the F line.
When using the intelligent tester:
Connect the intelligent tester to the DLC3.
Turn the power switch on (IG).
On the intelligent tester, enter the following menus: Powertrain / Hybrid Control / Active Test / Activate the Water Pump.
Keep the coolant at the F line in the reserve tank to compensate for the drop in coolant level when the air bleeds.
When not using the intelligent tester:
Turn the power switch on (READY). [*1]
Turn the power switch off and add coolant to the F line because the coolant level drops as the air bleeds. [*2]
Repeat steps [*1] and [*2] until air bleeding from the cooling system is completed.
After the air is completely bled from the cooling system, tighten the reserve tank cap.
|
Add coolant to the F line of the reserve tank.
| 22. ADD COOLANT (for Engine) |
Tighten the radiator drain cock plug.
Remove the reservoir tank cap.
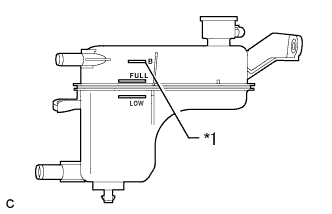 |
Add coolant to B line of the reservoir tank.
| *1 | B Line |
| Item | Capacity |
| Engine coolant | w/ Exhaust Heat Recirculation System: 7.2 liters (7.6 US qts, 6.3 lmp. qts) |
| w/o Exhaust Heat Recirculation System: 6.5 liters (6.8 US qts, 5.7 lmp. qts) |
Squeeze the inlet and outlet radiator hoses several times by hand, and then check the level of the coolant.
If the coolant level is low, add coolant.
Install the reservoir tank cap.
Put the engine in inspection mode (Click here).
Bleed air from the cooling system.
Warm up the engine until the thermostat opens. While the thermostat is open, allow the coolant to circulate for several minutes.
Squeeze the inlet and outlet radiator hoses several times by hand to bleed air from the system.
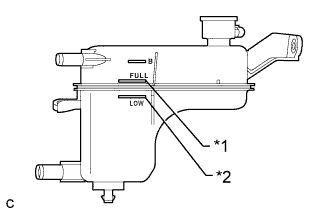 |
After the engine has cooled down, check that the coolant level is between full and low.
| *1 | Full Line |
| *2 | Low Line |
| 23. INSPECT FOR COOLANT LEAK (for Inverter) |
Remove the reserve tank cap.
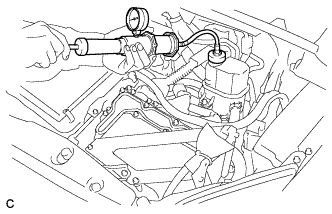 |
Install the radiator cap tester.
Pump the radiator cap tester to 122 kPa (1.2 kgf/ cm2, 17.7 psi), and then check that the pressure does not drop.
Reinstall the reserve tank cap.
| 24. INSPECT FOR COOLANT LEAK (for Engine) |
Remove the reservoir tank cap.
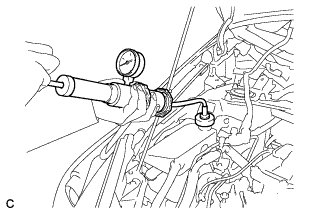 |
Fill the radiator and reservoir with coolant, and then attach a radiator cap tester.
Put the engine in inspection mode (Click here).
Warm up the engine.
Using the reservoir cap tester, increase the pressure inside the radiator to 108 kPa (1.1 kgf/cm2, 16 psi), and check that the pressure does not drop. If the pressure drops, check the hoses, radiator, front exhaust pipe assembly and the heater hose around and engine water pump assembly for leaks. If no external leaks are found, check the heater core, cylinder block and cylinder head.
Remove the radiator cap tester.
Install the reservoir tank cap.
| 25. INSTALL NO. 1 ENGINE UNDER COVER |
| 26. INSTALL FRONT LOWER BUMPER ABSORBER (w/ Cover) |
| 27. INSTALL FRONT SPOILER COVER (w/ Front Spoiler) |
| 28. INSTALL RADIATOR SUPPORT OPENING COVER |
Engage the 2 claws and install the radiator support opening cover.
Install the 3 clips.