Engage the 4 guides.
FRONT SEAT ASSEMBLY (for Power Seat) > REASSEMBLY |
| 1. INSTALL FRONT SEAT SIDE AIRBAG ASSEMBLY |
Install the front seat side airbag assembly with 2 new nuts.
Engage the 2 clamps.
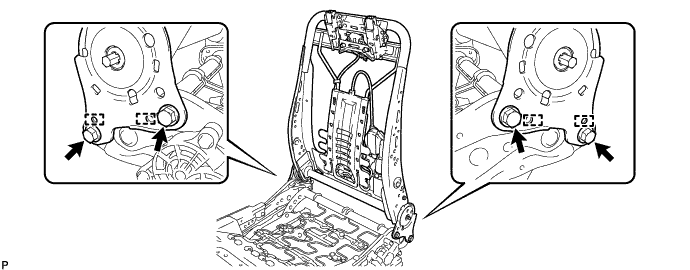
| 2. INSTALL SEPARATE TYPE FRONT SEATBACK SPRING ASSEMBLY |
Engage the 4 guides.
Install the separate type front seatback spring assembly to the separate type front seat cushion spring assembly with the 4 bolts.
| 3. INSTALL NO. 2 FRONT SEAT CUSHION PROTECTOR |
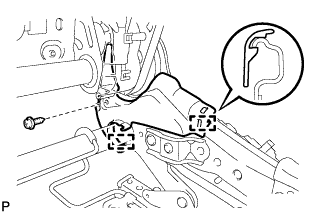 |
Engage the 2 guides to install the No. 2 front seat cushion protector to the separate type front seatback spring assembly.
Install the screw.
| 4. INSTALL NO. 1 FRONT SEAT CUSHION PROTECTOR |
| 5. INSTALL FRONT SEAT LOWER CUSHION SHIELD LH |
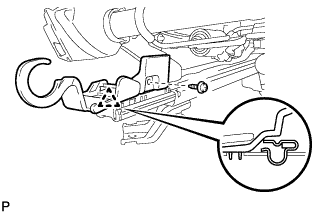 |
Engage the clip to install the front seat lower cushion shield LH to the separate type front seat cushion spring assembly.
Install the screw.
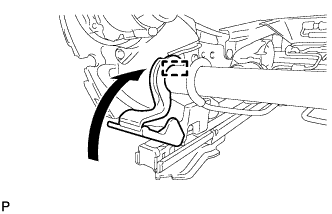 |
Engage the hook as shown in the illustration.
| 6. INSTALL FRONT SEAT LOWER CUSHION SHIELD RH |
| 7. INSTALL RECLINING ADJUSTER INSIDE COVER LH |
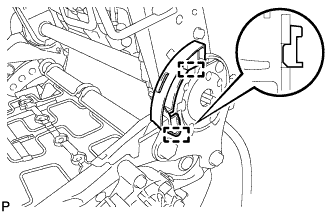 |
Engage the 2 guides to install the reclining adjuster inside cover LH to the separate type front seatback spring assembly.
| 8. INSTALL RECLINING ADJUSTER INSIDE COVER RH |
| 9. INSTALL NO. 2 FRONT SEAT WIRE |
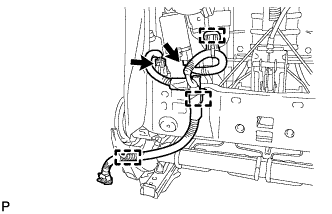 |
Engage the 3 clamps to install the No. 2 front seat wire to the separate type front seatback spring assembly.
Connect the 2 connectors.
| 10. INSTALL SEPARATE TYPE FRONT SEATBACK COVER |
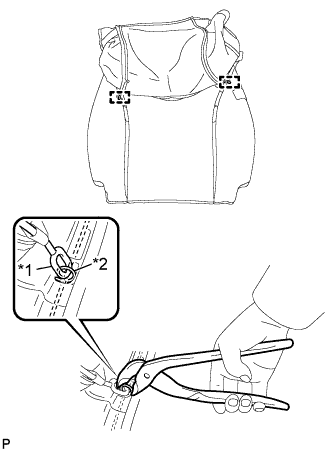 |
Using hog ring pliers, connect the fastening rubber to the separate type front seatback pad with 2 new hog rings.
| *1 | Fastening Rubber |
| *2 | Hog Ring |
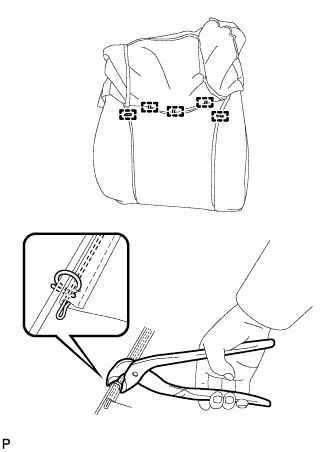 |
Using hog ring pliers, install the separate type front seatback cover to the separate type front seatback pad with 5 new hog rings
| 11. INSTALL SEPARATE TYPE FRONT SEATBACK COVER WITH PAD |
Temporarily install the separate type front seatback cover with pad to the front seatback spring sub-assembly.
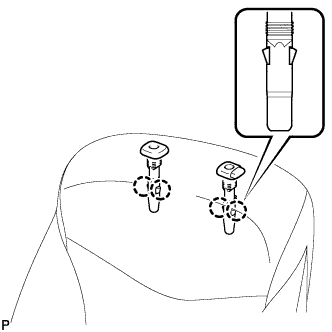 |
Engage the 4 claws and install the 2 front seat headrest supports.
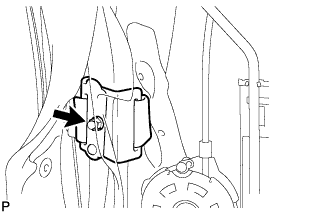 |
Install the separate type front seatback cover bracket with the nut.
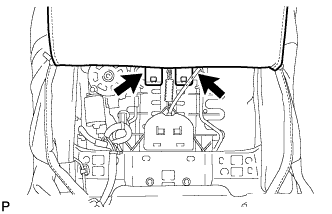 |
Engage the 2 hooks.
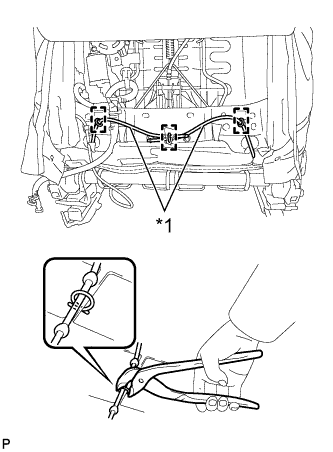 |
Using hog ring pliers, install the fastening rubber to the front seatback spring with 3 new hog rings.
| *1 | Fastening Rubber |
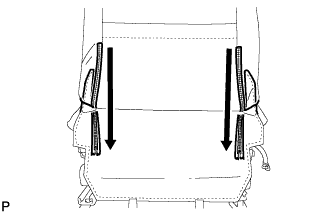 |
Close the 2 fasteners.
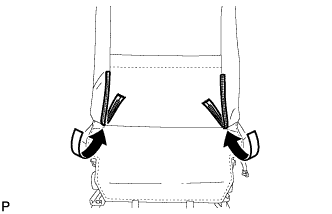 |
Push in the lower part of 2 fasteners to the separate type front seatback cover as shown in the illustration.
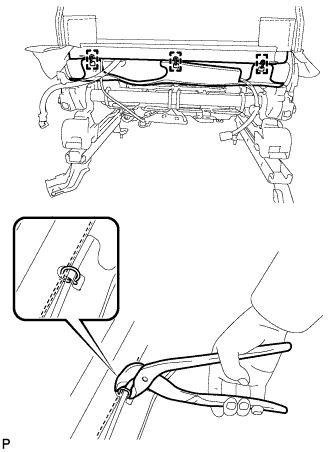 |
Using hog ring pliers, install 3 new hog rings.
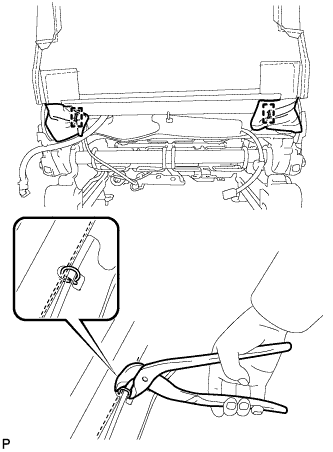 |
Using hog ring pliers, install 2 new hog rings.
| 12. INSTALL SEPARATE TYPE FRONT SEAT CUSHION COVER |
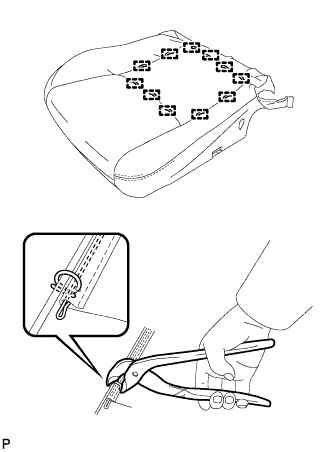 |
Using hog ring pliers, install the separate type front seat cushion cover to the separate type front seat cushion pad with 11 new hog rings.
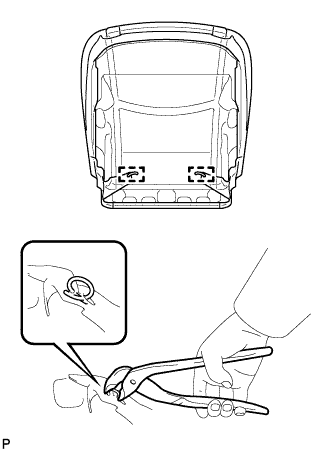 |
Using hog ring pliers, install 2 new hog rings.
| 13. INSTALL SEPARATE TYPE FRONT SEAT CUSHION COVER WITH PAD |
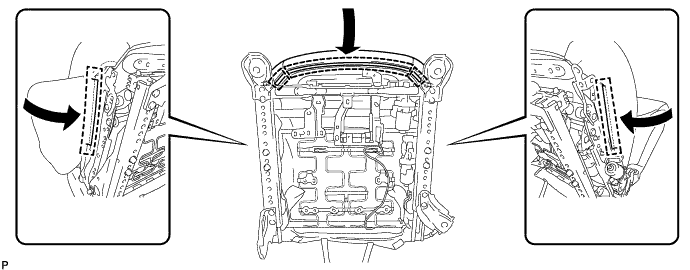
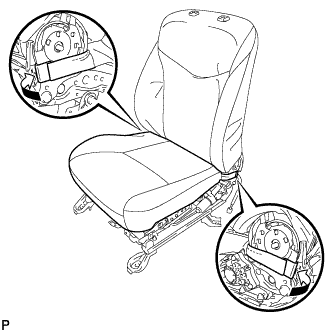
Engage each hook to install the separate type front seat cushion cover with pad to the front seat cushion spring sub-assembly as shown in the illustration.
 |
Engage the 2 hooks as shown in the illustration.
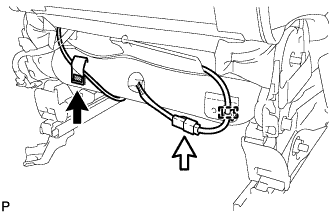 |
Engage the fastener to connect the side airbag wire harness.
Connect the connector and engage the clamp to connect the seat heater wire harness.
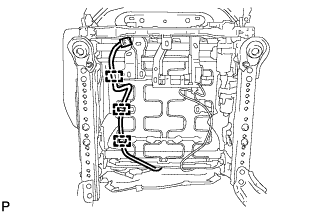 |
Engage the 3 clamps to connect the seat heater wire harness.
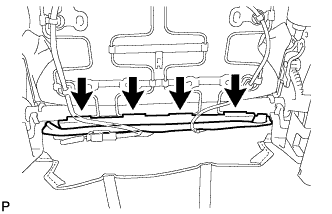 |
Engage the 4 hooks.
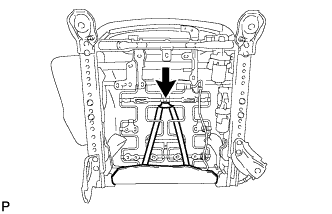 |
Connect the rubber band.
| 14. INSTALL FRONT INNER SEAT CUSHION SHIELD |
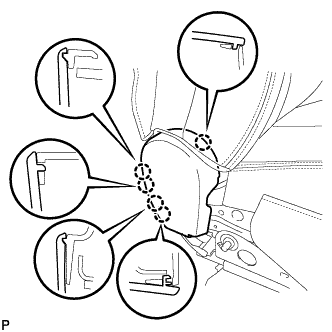 |
Engage the 5 claws to install the front inner seat cushion shield.
| 15. INSTALL NO. 1 FRONT SEAT WIRE |
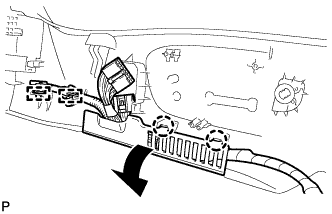 |
Engage the 2 claws and 2 clamps to install the No. 1 front seat wire to the front seat cushion shield.
| 16. INSTALL LUMBAR SWITCH (POWER SEAT SWITCH ASSEMBLY) |
Engage the 4 claws to install the lumbar switch (power seat switch assembly).
| 17. INSTALL FRONT POWER SEAT SWITCH |
Install the front power seat switch with the 3 screws.
| 18. INSTALL RECLINING POWER SEAT SWITCH KNOB |
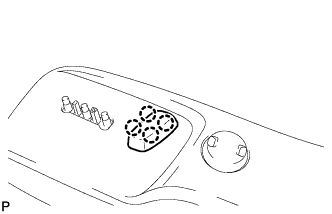 |
Engage the 4 claws to install the reclining power seat switch knob.
| 19. INSTALL SLIDE AND VERTICAL POWER SEAT SWITCH KNOB |
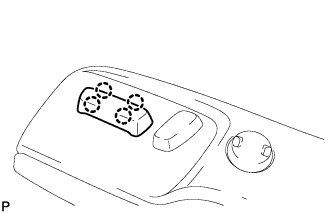 |
Engage the 4 claws to install the slide and vertical power seat switch knob.
| 20. INSTALL FRONT SEAT CUSHION SHIELD ASSEMBLY |
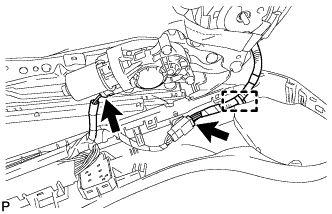 |
Connect the 2 connectors.
Engage the clamp.
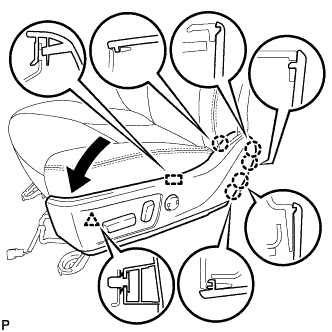 |
Engage the guide and 5 claws.
Engage the clip to install the front seat cushion shield assembly.
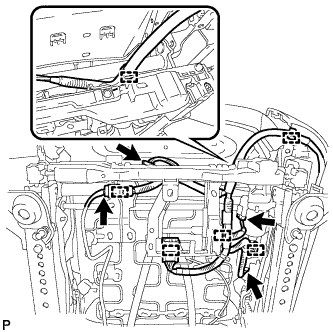 |
Engage the 6 clamps.
Connect the 4 connectors.
| 21. INSTALL FRONT INNER NO. 1 SEAT CUSHION SHIELD |
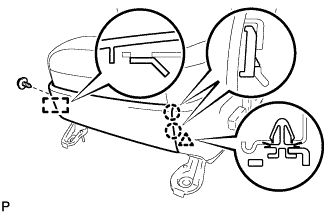 |
Engage the 2 claws and clip.
Engage the guide to install the front inner No. 1 seat cushion shield to the front seat cushion shield with the screw.
| 22. INSTALL FRONT SEAT INNER BELT ASSEMBLY |
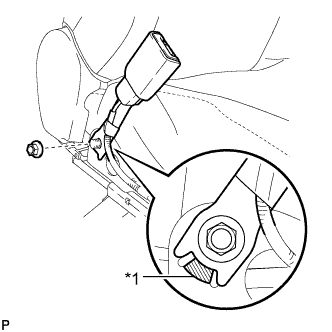 |
Install the front seat inner belt assembly with the nut.
| *1 | Protruding Part |
Connect each connector.
Engage each clamp.
| 23. INSTALL SEAT ADJUSTER COVER CAP |
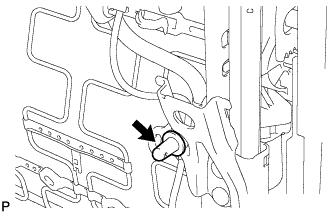 |
Install the seat adjuster cover cap.