 |
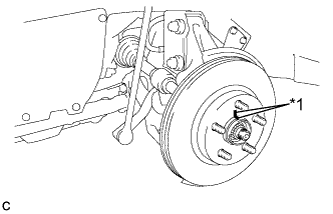
Align the matchmarks of the disc and axle hub, and install the disc.
| *1 | Matchmark |
- NOTICE:
- When replacing the disc with a new one, select the installation position where the front disc has minimal runout.
FRONT BRAKE > INSTALLATION |
| 1. INSTALL FRONT DISC |
|
Align the matchmarks of the disc and axle hub, and install the disc.
| *1 | Matchmark |
| 2. INSTALL FRONT DISC BRAKE CYLINDER MOUNTING |
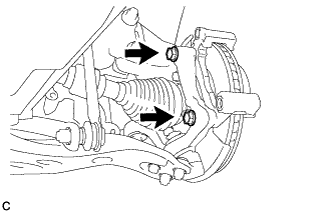 |
Install the front disc brake cylinder mounting to the steering knuckle with the 2 bolts.
| 3. INSTALL FRONT DISC BRAKE BUSHING DUST BOOT |
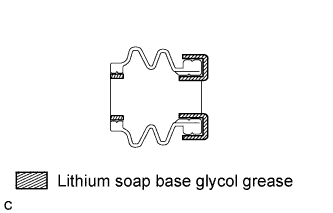 |
Apply a light layer of lithium soap base glycol grease to the entire circumference of 2 new front disc brake bushing dust boots.
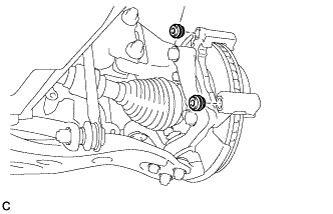 |
Install the 2 front disc brake bushing dust boots to the front disc brake cylinder mounting.
| 4. INSTALL FRONT NO. 2 DISC BRAKE CYLINDER SLIDE PIN |
w/ Front Disc Brake Cylinder Slide Bushing:
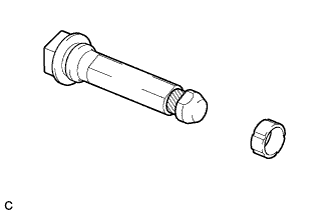 |
Apply a light layer of lithium soap base glycol grease to the contact surface of the front No. 2 disc brake cylinder slide pin.
 | Lithium Soap Base Glycol Grease |
Install a new front disc brake cylinder slide bushing to the front No. 2 disc brake cylinder slide pin.
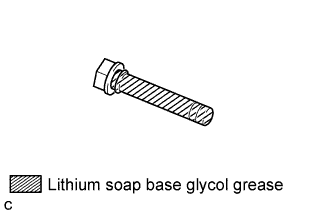 |
Apply a light layer of lithium soap base glycol grease to the sliding part and the seal surface of the front No. 2 disc brake cylinder slide pin.
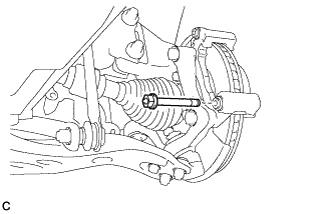 |
Install the front No. 2 disc brake cylinder slide pin to the front disc brake cylinder mounting.
Push the front No. 2 disc brake cylinder slide pin into the front disc brake bushing dust boot to align them.
| 5. INSTALL FRONT NO. 1 DISC BRAKE CYLINDER SLIDE PIN |
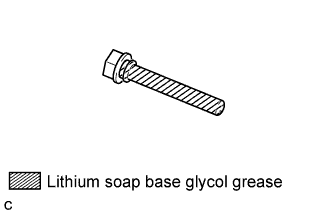 |
Apply a light layer of lithium soap base glycol grease to the sliding part and the seal surface of the front No. 1 disc brake cylinder slide pin.
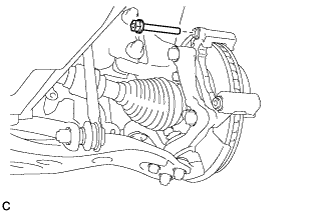 |
Install the front No. 1 disc brake cylinder slide pin to the front disc brake cylinder mounting.
Push the front No. 1 disc brake cylinder slide pin into the front disc brake bushing dust boot to align them.
| 6. INSTALL FRONT DISC BRAKE PAD SUPPORT PLATE |
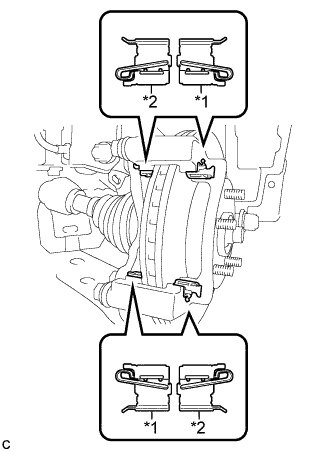 |
Install the 2 front No. 1 disc brake pad support plates and 2 front No. 2 disc brake pad support plates to the front disc brake cylinder mounting.
| *1 | Front No. 1 Disc Brake Pad Support Plate |
| *2 | Front No. 2 Disc Brake Pad Support Plate |
| 7. INSTALL FRONT ANTI-SQUEAL SHIM |
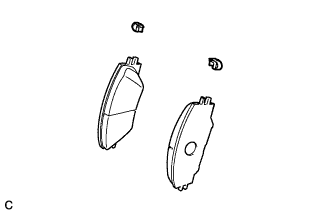 |
Install the pad wear indicator plate to each front disc brake pad.
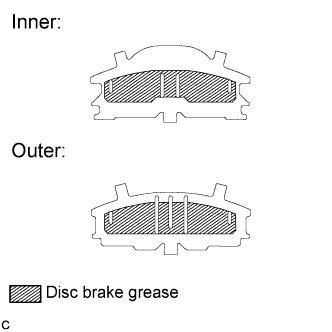 |
Apply disc brake grease to both sides of each front No. 1 anti-squeal shim as shown in the illustration.
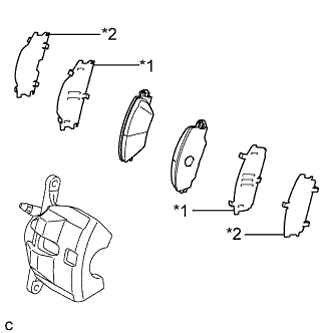 |
Install the front No. 1 anti-squeal shim and front No. 2 anti-squeal shim to each front disc brake pad.
| *1 | Front No. 1 Anti-squeal Shim |
| *2 | Front No. 2 Anti-squeal Shim |
| 8. INSTALL FRONT DISC BRAKE PAD |
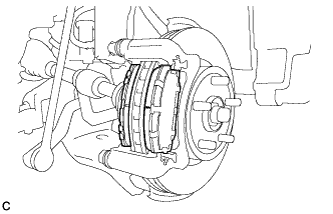 |
Install the 2 front disc brake pads to the front disc brake cylinder mounting.
| 9. INSTALL DISC BRAKE CYLINDER ASSEMBLY |
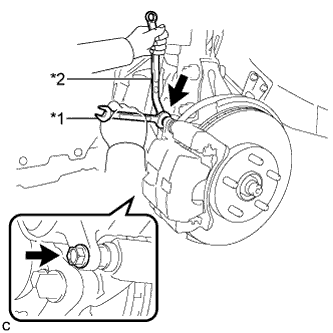 |
Hold the front disc brake cylinder slide pin, and install the disc brake cylinder assembly to the front disc brake cylinder mounting with the 2 bolts.
| *1 | Hold |
| *2 | Turn |
| 10. CONNECT FRONT FLEXIBLE HOSE |
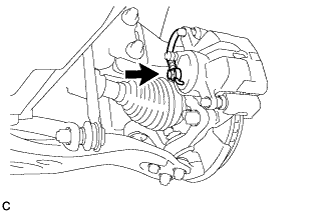 |
Connect the front flexible hose to the disc brake cylinder assembly with a new union bolt and a new gasket.
| 11. FILL RESERVOIR WITH BRAKE FLUID |
| 12. CONNECT CABLE TO AUXILIARY BATTERY NEGATIVE TERMINAL |
Connect the cable to the negative (-) auxiliary battery terminal.
Perform the following procedure if air bleeding is not necessary:
Connect the reservoir level switch connector.
Clear the DTCs (Click here).
| 13. INSTALL REAR NO. 3 FLOOR BOARD |
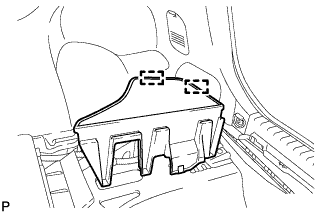 |
Engage the 2 guides to install the rear No. 3 floor board.
| 14. INSTALL REAR DECK FLOOR BOX |
Install the rear deck floor box.
| 15. INSTALL REAR NO. 2 FLOOR BOARD (for Separate Type) |
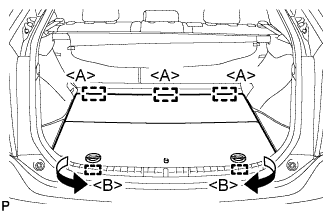 |
Engage the 3 guides <A>.
Engage the 2 guides <B> and install the rear No. 2 floor board as shown in the illustration.
| 16. BLEED BRAKE LINE |
Remove the center cowl top ventilator cover.
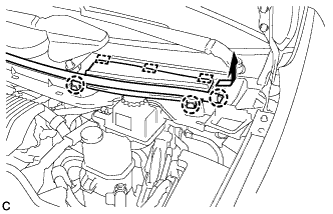 |
Slide the hood to cowl top seal and disengage the claw.
Disengage the 2 claws and 3 guides, and remove the center cowl top ventilator cover.
Bleed brake line.
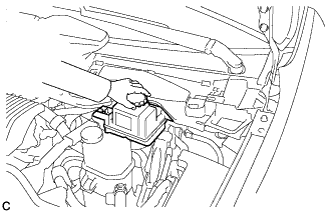 |
Remove the brake master cylinder reservoir filler cap assembly.
Add brake fluid into the reservoir between MAX and MIN level on the brake fluid reservoir.
Connect the Techstream to the DLC3 and turn the power switch on (IG).
Turn the Techstream on and enter the following menus: Chassis / ABS/VSC/TRAC / Air Bleeding.
Select the "Usual air bleeding" on the Techstream display, and bleed air from the brake fluid following the instructions on the Techstream.
After air bleeding, tighten each bleeder plug.
Clear the DTCs (Click here).
Turn the Techstream off and turn the power switch off.
Inspect for brake fluid leaks.
Install the brake master cylinder reservoir filler cap.
Install the center cowl top ventilator cover.
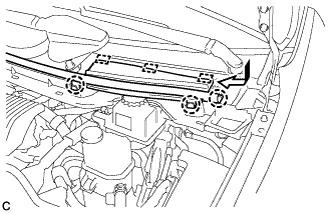 |
Engage the 2 claws and 3 guides to install the center cowl top ventilator cover.
Slide the hood to cowl top seal to engage the claw.
| 17. INSTALL FRONT WHEEL |