 |
Disengage the 2 guides <A> as shown in the illustration.
REAR AXLE BEAM > REMOVAL |
| 1. REMOVE REAR NO. 2 FLOOR BOARD (for Separate Type) |
|
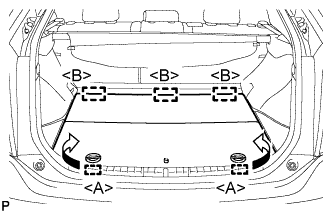
Disengage the 2 guides <A> as shown in the illustration.
Disengage the 3 guides <B> and remove the rear No. 2 floor board.
| 2. REMOVE REAR DECK FLOOR BOX |
Remove the rear deck floor box.
| 3. REMOVE REAR NO. 3 FLOOR BOARD |
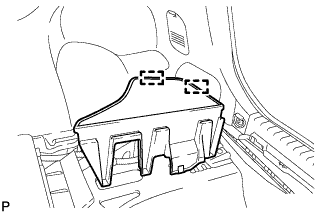 |
Disengage the 2 guides and remove the rear No. 3 floor board.
| 4. DISABLE BRAKE CONTROL |
Wait at least 2 minutes after the power switch off.
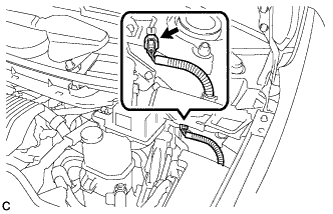 |
Disconnect the reservoir level switch connector with the parking brake applied.
Disconnect the cable from the auxiliary battery negative (-) terminal.
Depress the brake pedal 40 times or more to return all the fluid in the accumulator back to the reservoir.
Check that the brake pedal can not be further depressed.
Release the parking brake.
| 5. REMOVE REAR WHEELS |
| 6. REMOVE FRONT DOOR SCUFF PLATE LH |
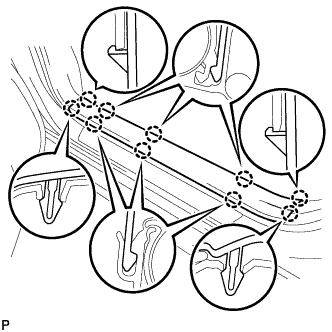 |
Disengage the 10 claws and remove the front door scuff plate LH.
| 7. REMOVE COWL SIDE TRIM SUB-ASSEMBLY LH |
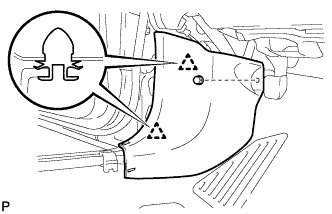 |
Remove the clip.
Disengage the 2 clips and remove the cowl side trim sub-assembly LH.
| 8. REMOVE LOWER INSTRUMENT PANEL FINISH PANEL ASSEMBLY |
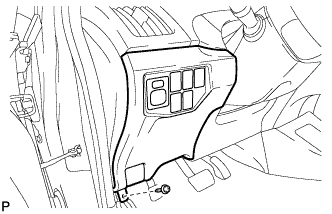 |
Remove the screw <C>.
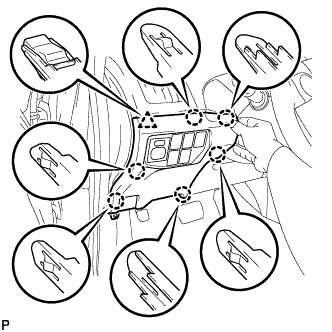 |
Disengage the 6 claws and clip as shown in the illustration.
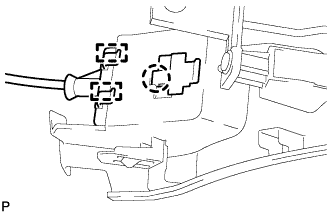 |
Disengage the claw and 2 guides and disconnect the hood lock control cable.
Disconnect each connector and clamp, and remove the lower instrument panel finish panel assembly.
| 9. LOOSEN PARKING BRAKE CABLE |
Completely release the parking brake pedal.
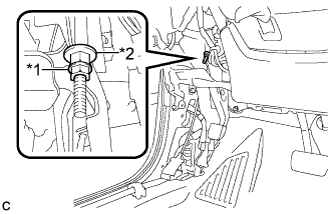 |
Loosen the lock nut and adjusting nut to completely release the parking brake cable.
| *1 | Lock Nut |
| *2 | Adjusting Nut |
| 10. DRAIN BRAKE FLUID |
| 11. REMOVE REAR FLOOR SIDE MEMBER COVER LH (w/ Floor Under Cover) |
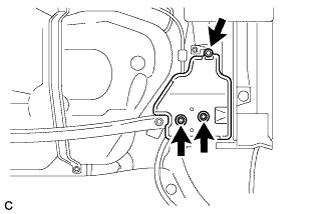 |
Remove the nut, 2 bolts and rear floor side member cover LH.
| 12. REMOVE REAR FLOOR SIDE MEMBER COVER RH (w/ Floor Under Cover) |
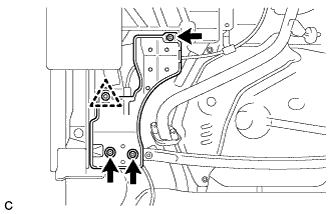 |
Remove the 3 bolts.
Disengage the clip and remove the rear floor side member cover RH.
| 13. REMOVE REAR SUSPENSION BRACE SUB-ASSEMBLY |
Remove the 4 bolts.
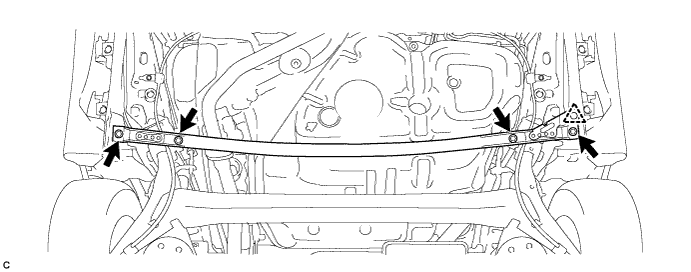
Disengage the clip and remove the rear suspension brace sub-assembly.
| 14. DISCONNECT REAR SPEED SENSOR WIRE (for LH Side) |
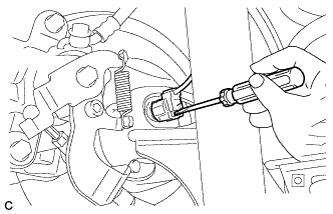 |
Using a screwdriver, disconnect the connector from the rear speed sensor.
| 15. DISCONNECT REAR SPEED SENSOR WIRE (for RH Side) |
| 16. SEPARATE REAR SPEED SENSOR WIRE (for LH Side) |
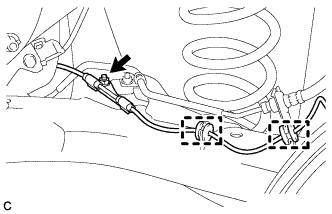 |
Remove the nut and separate the 2 clamps and rear speed sensor wire.
| 17. SEPARATE REAR SPEED SENSOR WIRE (for RH Side) |
| 18. DISCONNECT NO. 3 PARKING BRAKE CABLE ASSEMBLY |
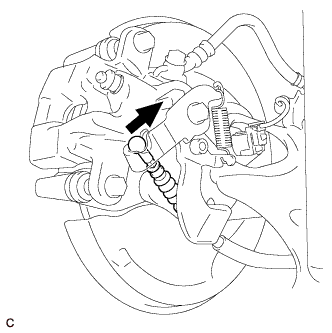 |
Separate the No. 3 parking brake cable assembly from the rear disc brake cylinder assembly.
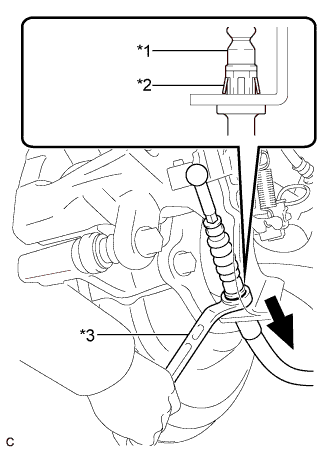 |
Separate the No. 3 parking brake cable assembly from the rear disc brake cylinder assembly.
| *1 | No. 3 Parking Brake Cable Assembly |
| *2 | Clip |
| *3 | Offset Wrench (14 mm) |
| 19. DISCONNECT NO. 2 PARKING BRAKE CABLE ASSEMBLY |
| 20. SEPARATE NO. 3 PARKING BRAKE CABLE ASSEMBLY |
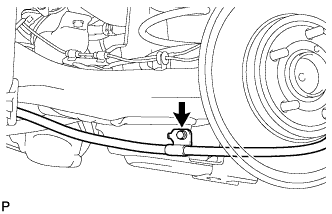 |
Remove the bolt and separate the No. 3 parking brake cable assembly.
| 21. SEPARATE NO. 2 PARKING BRAKE CABLE ASSEMBLY |
| 22. SEPARATE REAR BRAKE TUBE FLEXIBLE HOSE |
Using a union nut wrench, disconnect the 2 brake lines while holding the rear brake tube flexible hose with a wrench.
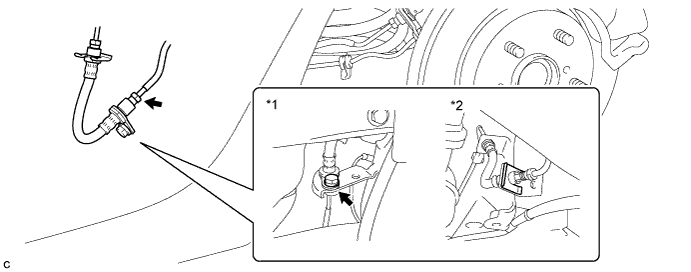
| *1 | LH Side | *2 | RH Side |
for LH Side
Remove the bolt and separate the rear brake tube flexible hose from the rear axle beam assembly.
for RH Side
Remove the clip and separate the rear brake tube flexible hose from the rear axle beam assembly.
| 23. REMOVE REAR DISC BRAKE CALIPER ASSEMBLY LH |
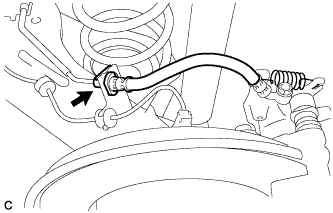 |
Using a union nut wrench, disconnect the brake line while holding the rear flexible hose LH with a wrench.
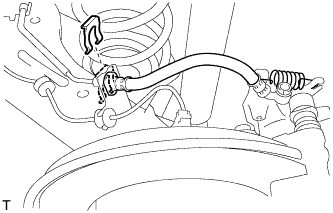 |
Remove the clip and separate the rear flexible hose LH.
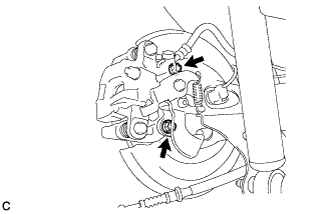 |
Remove the 2 bolts and rear disc brake caliper assembly LH with rear flexible hose LH.
| 24. REMOVE REAR DISC BRAKE CALIPER ASSEMBLY RH |
| 25. REMOVE REAR DISC (for LH Side) |
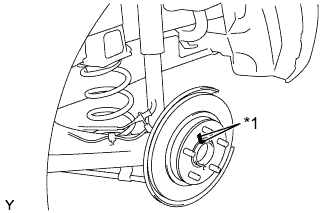 |
Remove the rear disc.
| *1 | Matchmark |
| 26. REMOVE REAR DISC (for RH Side) |
| 27. REMOVE REAR NO. 4 BRAKE TUBE |
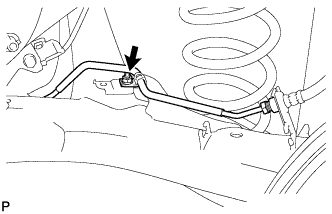 |
Remove the nut and rear No. 4 brake tube from the rear axle beam assembly.
| 28. REMOVE REAR NO. 3 BRAKE TUBE |
| 29. REMOVE REAR AXLE HUB AND BEARING ASSEMBLY LH |
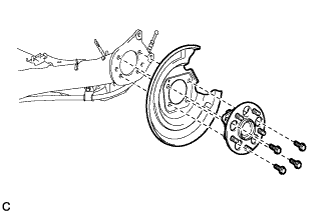 |
Remove the 4 bolts, rear axle hub and bearing assembly and rear disc brake dust cover from the rear axle beam assembly.
| 30. REMOVE REAR AXLE HUB AND BEARING ASSEMBLY RH |
| 31. SEPARATE REAR WHEEL HOUSE LINER LH (w/ Wheel House Liner) |
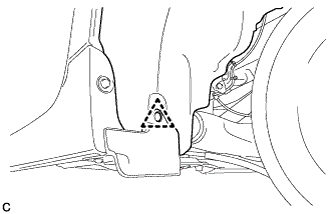 |
Remove the clip and turn back the rear wheel house liner LH to separate the rear wheel house liner LH.
| 32. SEPARATE REAR WHEEL HOUSE LINER RH (w/ Wheel House Liner) |
| 33. SEPARATE REAR HEIGHT CONTROL SENSOR SUB-ASSEMBLY RH (w/ Height Control Sensor) |
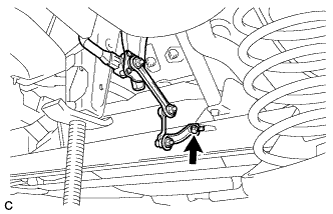 |
Remove the bolt and separate the rear height control sensor sub-assembly RH from the rear axle beam assembly.
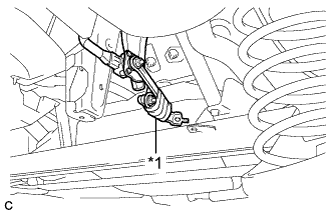 |
Using a vinyl tape, secure the rear height control sensor sub-assembly RH as shown in the illustration.
| *1 | Vinyl Tape |
| 34. REMOVE REAR COIL SPRING LH |
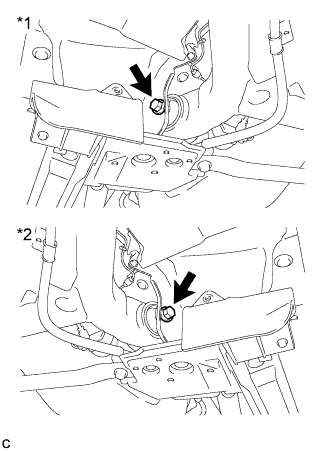 |
Loosen the 2 bolts.
| *1 | LH Side |
| *2 | RH Side |
Support the spring seat of the rear axle beam assembly using 2 jacks and 2 wooden blocks.
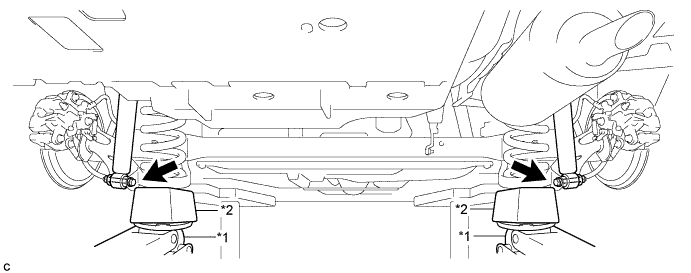
| *1 | Jack | *2 | Wooden Block |
Remove the 2 bolts while holding the 2 nuts and separate the rear axle beam assembly from the rear shock absorber assemblies LH and RH.
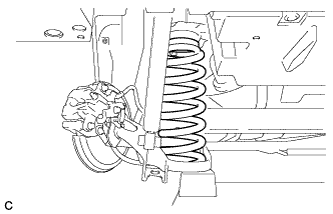 |
Slowly lower the rear axle beam assembly using 2 jacks and 2 wooden blocks, and remove the rear coil spring LH.
Slowly jack up the rear axle beam assembly using 2 jacks and 2 wooden blocks, and temporarily tighten the rear axle beam assembly to the rear shock absorber assemblies LH and RH with the 2 bolts and 2 nuts.
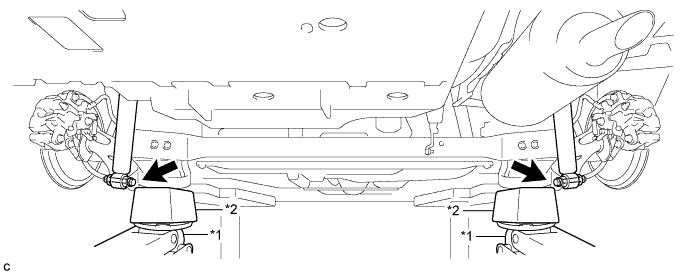
| *1 | Jack | *2 | Wooden Block |
| 35. REMOVE REAR COIL SPRING RH |
| 36. REMOVE REAR UPPER COIL SPRING INSULATOR LH |
| 37. REMOVE REAR UPPER COIL SPRING INSULATOR RH |
| 38. REMOVE REAR LOWER COIL SPRING INSULATOR LH |
| 39. REMOVE REAR LOWER COIL SPRING INSULATOR RH |
| 40. REMOVE REAR AXLE BEAM ASSEMBLY |
Support the rear axle beam assembly with a jack using 2 wooden blocks and 2 attachments or equivalent tools to replicate standard vehicle height conditions as shown in the illustration.
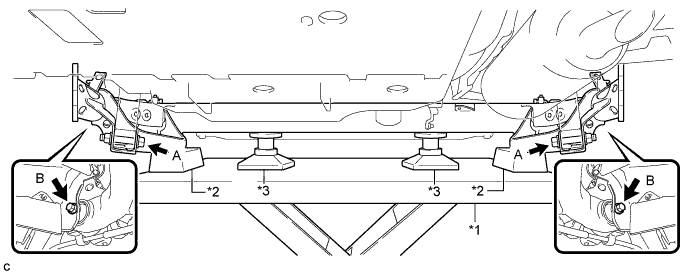
| *1 | Jack | *2 | Wooden Block |
| *3 | Attachment | - | - |
Remove the 2 bolts (A) and 2 nuts while holding the 2 nuts and separate the rear axle beam assembly from the rear shock absorber assemblies LH and RH.
Remove the 2 bolts (B) and rear axle beam assembly.
| 41. REMOVE REAR AXLE CARRIER BUSHING LH |
When reusing the rear axle beam assembly:
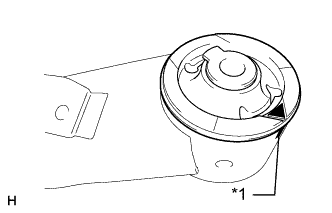 |
Put a matchmark on the rear axle beam assembly so that the mark aligns with the arrow mark on the rear axle carrier bushing LH.
| *1 | Matchmark |
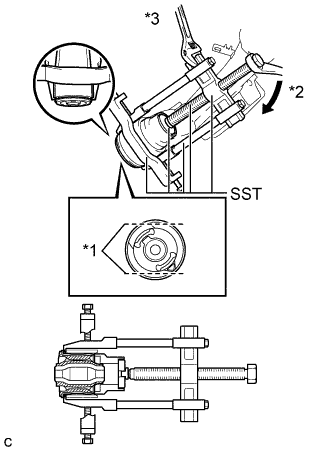 |
Using a chisel and hammer, bend the 2 ribs on the rear axle carrier bushing LH.
| *1 | Bend Portion |
| *2 | Turn |
| *3 | Hold |
Using SST, remove the rear axle carrier bushing LH from the rear axle beam assembly.
| 42. REMOVE REAR AXLE CARRIER BUSHING RH |