 |
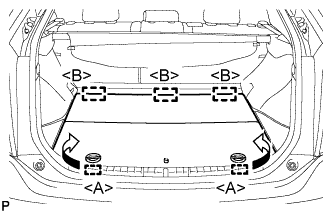
Disengage the 2 guides <A> as shown in the illustration.
FRONT AXLE HUB BOLT > REPLACEMENT |
| 1. REMOVE REAR NO. 2 FLOOR BOARD (for Separate Type) |
|
Disengage the 2 guides <A> as shown in the illustration.
Disengage the 3 guides <B> and remove the rear No. 2 floor board.
| 2. REMOVE REAR DECK FLOOR BOX |
Remove the rear deck floor box.
| 3. REMOVE REAR NO. 3 FLOOR BOARD |
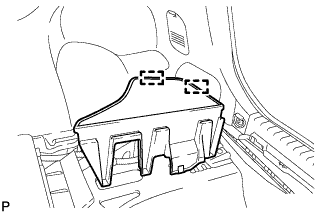 |
Disengage the 2 guides and remove the rear No. 3 floor board.
| 4. DISABLE BRAKE CONTROL |
Wait at least 2 minutes after the power switch off.
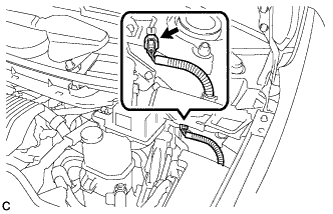 |
Disconnect the reservoir level switch connector with the parking brake applied.
Disconnect the cable from the auxiliary battery negative (-) terminal.
Depress the brake pedal 40 times or more to return all the fluid in the accumulator back to the reservoir.
Check that the brake pedal can not be further depressed.
Release the parking brake.
| 5. REMOVE FRONT WHEEL |
| 6. SEPARATE FRONT DISC BRAKE CALIPER ASSEMBLY |
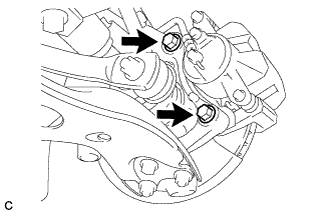 |
Remove the 2 bolts and separate the front disc brake caliper assembly.
| 7. REMOVE FRONT DISC |
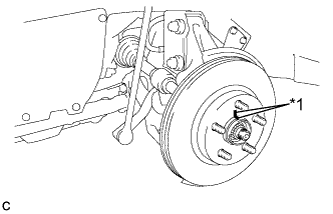 |
Remove the front disc.
| *1 | Matchmark |
| 8. REMOVE FRONT AXLE HUB BOLT |
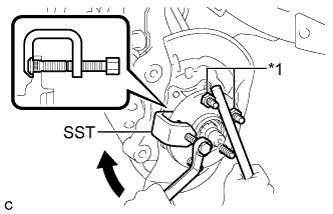 |
Temporarily install 2 nuts to the front axle hub bolts as shown in the illustration.
| *1 | Nut |
Using SST and a brass bar or an equivalent tool to hold the front axle, remove the front axle hub bolt.
| 9. INSTALL FRONT AXLE HUB BOLT |
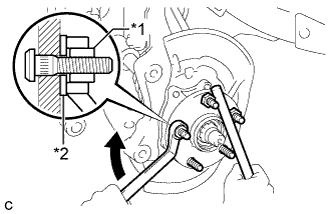 |
Install a washer and nut to a new front axle hub bolt as shown in the illustration.
| *1 | Nut |
| *2 | Washer |
Using a brass bar or an equivalent tool to hold the front axle, install the hub bolt by tightening the nut.
Remove the 3 nuts and washer from the 3 front axle hub bolts.
| 10. INSTALL FRONT DISC |
|
Align the matchmarks of the disc and axle hub, and install the disc.
| *1 | Matchmark |
| 11. INSTALL FRONT DISC BRAKE CALIPER ASSEMBLY |
|
Install the front disc brake caliper assembly to the steering knuckle with the 2 bolts.
| 12. INSTALL FRONT WHEEL |
| 13. CONNECT CABLE TO AUXILIARY BATTERY NEGATIVE TERMINAL |
Connect the cable to the negative (-) auxiliary battery terminal.
Connect the reservoir level switch connector.
Clear the DTCs (Click here).
| 14. INSTALL REAR NO. 3 FLOOR BOARD |
|
Engage the 2 guides to install the rear No. 3 floor board.
| 15. INSTALL REAR DECK FLOOR BOX |
Install the rear deck floor box.
| 16. INSTALL REAR NO. 2 FLOOR BOARD (for Separate Type) |
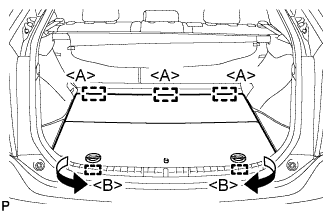 |
Engage the 3 guides <A>.
Engage the 2 guides <B> and install the rear No. 2 floor board as shown in the illustration.