Home › Drivetrain › P410 HYBRID TRANSMISSION / TRANSAXLE › HYBRID VEHICLE TRANSAXLE

HYBRID VEHICLE TRANSAXLE > INSTALLATION

for Preparation Click here


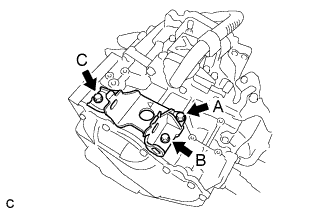
1. INSTALL ENGINE MOUNTING BRACKET LH


    C209289E01
  1. Install the engine mounting bracket LH with 3 new bolts in several steps.

    Torque:
    64 N*m{ 653 kgf*cm , 47 ft.*lbf }

    NOTICE:
    Temporarily tighten bolt A, and then fully tighten the 3 bolts in the order of B, C and A.


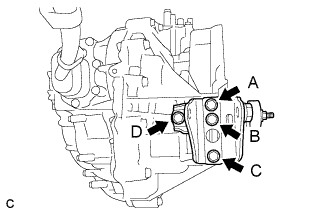
2. INSTALL REAR ENGINE MOUNTING BRACKET


    C209288E01
  1. Install the rear engine mounting bracket with the 4 bolts in several steps.

    Torque:
    45 N*m{ 459 kgf*cm , 33 ft.*lbf }

    NOTICE:
    Temporarily tighten bolt A, and then fully tighten the 4 bolts in the order of C, B, D and A.


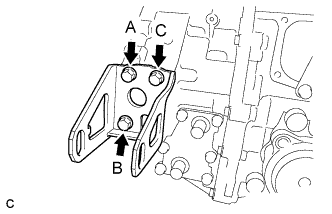
3. INSTALL FRONT ENGINE MOUNTING BRACKET


    C209287E01
  1. Install the front engine mounting bracket with the 3 bolts in several steps.

    Torque:
    64 N*m{ 653 kgf*cm , 47 ft.*lbf }

    NOTICE:
    Temporarily tighten bolt A, and then fully tighten the 3 bolts in the order of B, C and A.


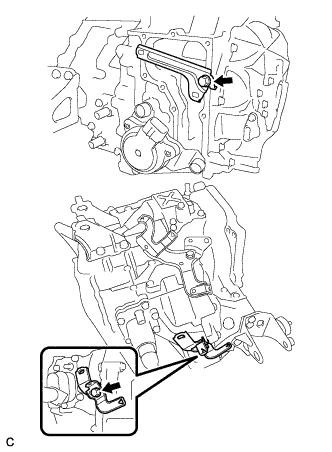
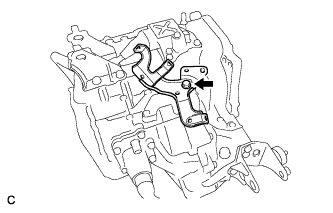
4. INSTALL MOTOR CABLE BRACKET


    C210345
  1. Install the motor cable bracket with the bolt.

    Torque:
    23 N*m{ 235 kgf*cm , 17 ft.*lbf }


5. INSTALL WIRE HARNESS CLAMP BRACKET


    C228437
  1. Install the 2 wire harness clamp brackets with the 2 bolts.

    Torque:
    23 N*m{ 235 kgf*cm , 17 ft.*lbf }


6. INSTALL MOTOR CABLE

NOTICE:
Wear insulated gloves.


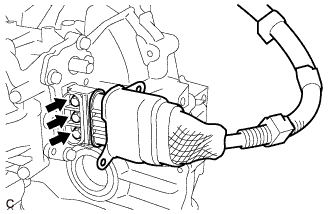
    C209811
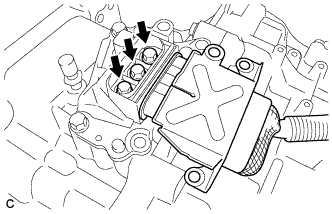
  1. Install the motor cable to the hybrid transaxle assembly with the 3 bolts.

    Torque:
    10 N*m{ 102 kgf*cm , 7 ft.*lbf }

    NOTICE:
    Keep the sealing surface of the motor cable and the connector terminal joint free of foreign matter.


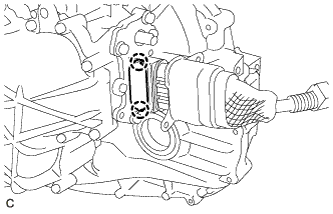
    C209810
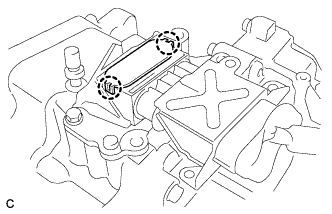
  1. Engage the 2 claws to install a new terminal cap.

    NOTICE:
    When installing the terminal cap to the motor cable terminal block, keep the sealing surface free of foreign matter.


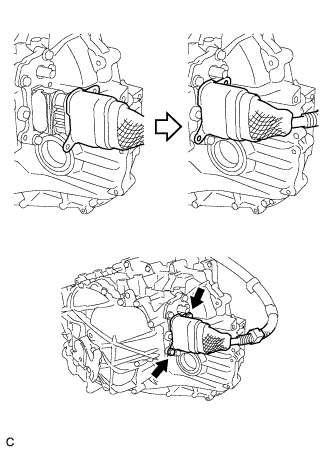
    C209809
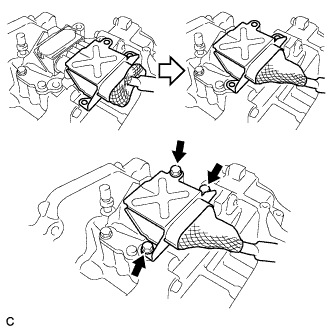
  1. Place the motor cable connector shell in position and install it with the 2 bolts.

    Torque:
    10 N*m{ 102 kgf*cm , 7 ft.*lbf }


    C209807
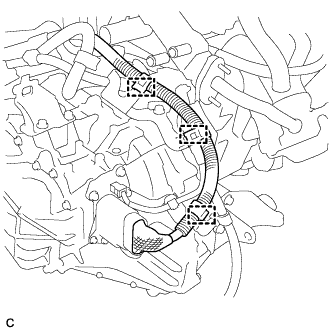
  1. Connect the 3 clamps.


7. INSTALL GENERATOR CABLE

NOTICE:
Wear insulated gloves.


    C209806
  1. Install the generator cable to the hybrid transaxle assembly with the 3 bolts.

    Torque:
    10 N*m{ 102 kgf*cm , 7 ft.*lbf }

    NOTICE:
    Keep the sealing surface of the generator cable and the connector terminal joint free of foreign matter.


    C209805
  1. Engage the 2 claws to install a new terminal cap.

    NOTICE:
    When installing the terminal cap to the generator cable terminal block, keep the sealing surface free of foreign matter.


    C209804
  1. Place the generator cable connector shell in position and install it with the 3 bolts.

    Torque:
    20 N*m{ 204 kgf*cm , 15 ft.*lbf }


    C209802
  1. Connect the generator cable clamp to the motor cable bracket.


8. INSTALL HYBRID VEHICLE TRANSAXLE ASSEMBLY


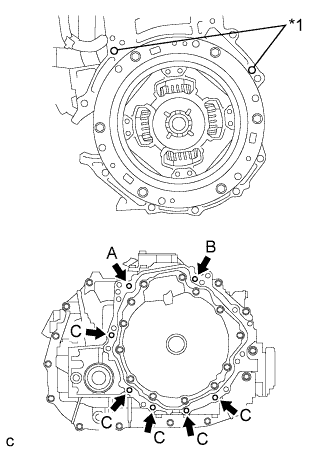
    C209284E01
  1. Make sure that the knock pins are installed on the engine.
    Text in Illustration 
    *1
    Knock Pin

  1. Using an engine lifter, align the engine assembly and hybrid vehicle transaxle assembly, fit the knock pins into the knock pin holes, and tighten the 7 bolts shown in the illustration.

    Torque:
    33 N*m{ 337 kgf*cm , 24 ft.*lbf }

    NOTICE:
    1. Make sure to align the hybrid vehicle transaxle so that the input shaft of the hybrid vehicle transaxle will be inserted straight into the inner splines of the transmission input damper.
    2. When inserting the input shaft of the hybrid vehicle transaxle into the inner splines of the transmission input damper, do not shake the hybrid vehicle transaxle excessively.
    3. When mounting the hybrid vehicle transaxle to the engine, make sure to securely fit the knock pins into the knock holes.
    4. Push in the hybrid vehicle transaxle so that the contact surfaces of the engine and the hybrid vehicle transaxle will be aligned evenly.
    5. While mounting the hybrid vehicle transaxle assembly to the engine assembly, temporarily tighten the bolt (A), and then fully tighten the 3 bolts in the order of B, A and C.
    6. Do not hang the hybrid vehicle transaxle off of the engine if the contact surfaces of the engine and the hybrid vehicle transaxle are not in full contact. The knock holes of the hybrid vehicle transaxle case may be deformed due to the excessive weight of the engine and hybrid vehicle transaxle, resulting in misalignment between the engine and hybrid vehicle transaxle.
9. INSTALL FLYWHEEL HOUSING SIDE COVER


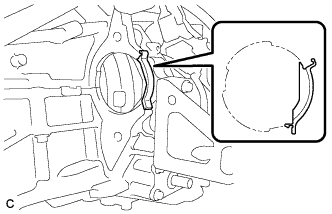
    C209283
  1. Install the flywheel housing side cover.


10. INSTALL STARTER HOLE INSULATOR


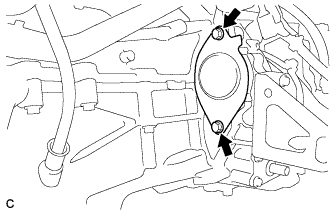
    C209282
  1. Install the starter hole insulator with the 2 bolts.

    Torque:
    37 N*m{ 377 kgf*cm , 27 ft.*lbf }


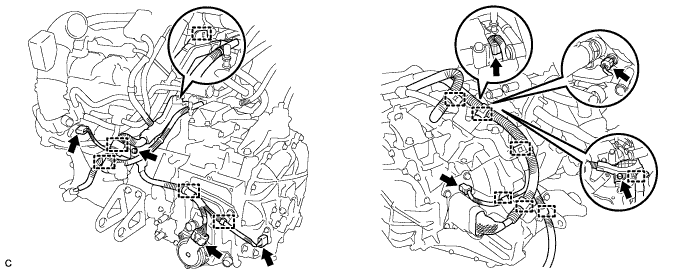
11. CONNECT WIRE HARNESS


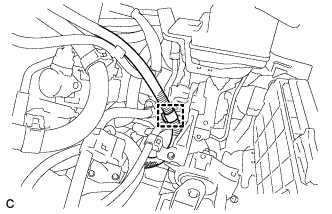
  1. Connect the 12 wire harness clamps and 6 connectors and install the 2 bolts.


    C228438

    Torque:
    12 N*m{ 122 kgf*cm , 9 ft.*lbf }


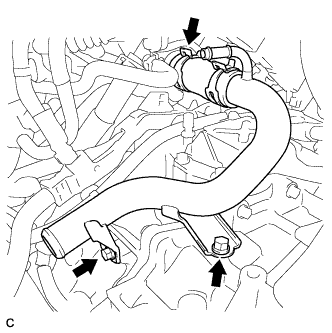
12. INSTALL RADIATOR PIPE


    A213045
  1. Install the radiator pipe with the 2 bolts.

    Torque:
    19 N*m{ 194 kgf*cm , 14 ft.*lbf }

  1. Install the No. 3 radiator hose with the clamp.


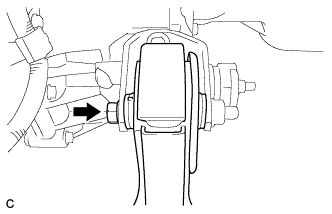
13. INSTALL REAR ENGINE MOUNTING INSULATOR


    A213044
  1. Install the rear engine mounting insulator to the engine mounting bracket with the bolt.

    Torque:
    95 N*m{ 969 kgf*cm , 70 ft.*lbf }

    HINT:
    Perform this procedure only when replacement of the engine mounting insulator is necessary.


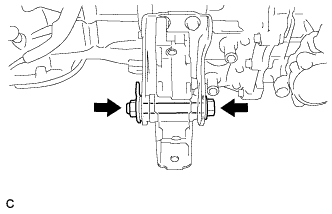
14. INSTALL FRONT ENGINE MOUNTING INSULATOR


    A219120
  1. Temporarily install the front engine mounting insulator with the bolt and nut.


15. INSTALL ENGINE ASSEMBLY WITH TRANSAXLE

HINT: