BACK DOOR > ADJUSTMENT |

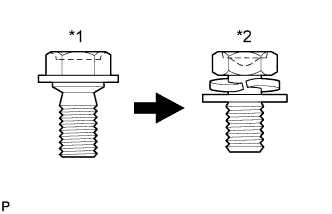
| *1 | Centering Bolt |
| *2 | Standard Bolt |
| 1. INSPECT BACK DOOR |
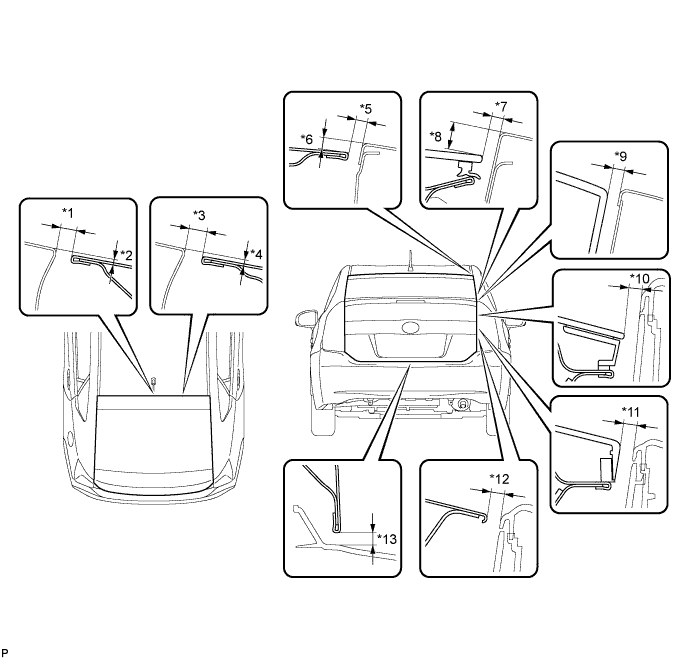
Check that the clearance measurements of areas *1 through *13 are within each standard range.
| Area | Measurement | Area | Measurement |
| *1 | 5.7 to 8.7 mm (0.224 to 0.343 in.) | *2 | 0 to 3.0 mm (0 to 0.118 in.) |
| *3 | 5.7 to 8.7 mm (0.224 to 0.343 in.) | *4 | 0 to 3.0 mm (0 to 0.118 in.) |
| *5 | 3.2 to 6.2 mm (0.126 to 0.244 in.) | *6 | 3.6 to 6.6 mm (0.142 to 0.260 in.) |
| *7 | 2.85 to 6.85 mm (0.112 to 0.270 in.) | *8 | 9.65 to 13.65 mm (0.380 to 0.537 in.) |
| *9 | 2.85 to 6.85 mm (0.112 to 0.270 in.) | *10 | 4.0 to 8.0 mm (0.157 to 0.315 in.) |
| *11 | 4.5 to 8.5 mm (0.177 to 0.335 in.) | *12 | 3.85 to 7.85 mm (0.152 to 0.309 in.) |
| *13 | 4.35 to 7.35 mm (0.171 to 0.289 in.) | - | - |
| 2. REMOVE REAR NO. 2 FLOOR BOARD (for Separate Type) |
![]() |
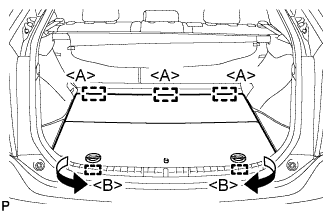
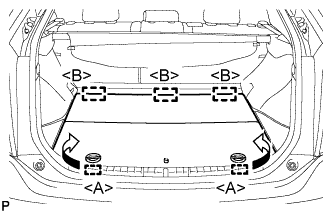
Disengage the 2 guides <A> as shown in the illustration.
Disengage the 3 guides <B> and remove the rear No. 2 floor board.
| 3. REMOVE REAR DECK FLOOR BOX |
Remove the rear deck floor box.
| 4. REMOVE DECK TRIM SERVICE HOLE COVER |
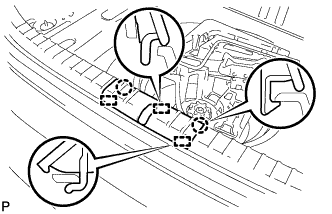
![]() |
Disengage the 2 claws and 3 guides, and remove the deck trim service hole cover.
| 5. REMOVE REAR DECK TRIM COVER |
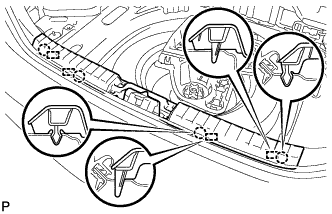
![]() |
Disengage the 4 claws and 4 guides, and remove the rear deck trim cover.
| 6. ADJUST BACK DOOR |
![]() |
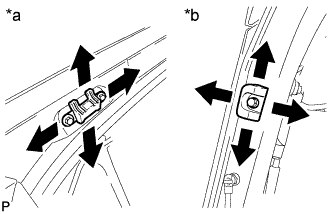
Before adjusting the upper end of the back door up and down or left and right, loosen the bolts.
Tighten the body side hinge after the adjustment.
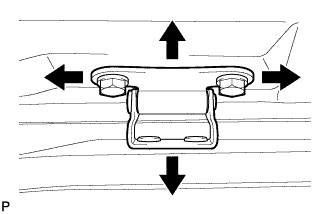
![]() |
Loosen the 3 bolts.
Tighten the bolts after the adjustment.
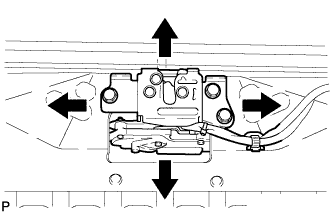
![]() |
After adjusting the back door position, adjust the positions of the lower back door stopper and lower back door stopper cushion.
| *a | Vehicle Body Side |
| *b | Door Side |
| 7. INSTALL REAR DECK TRIM COVER |
![]() |
Engage the 4 claws and 4 guides to install the rear deck trim cover.
| 8. INSTALL DECK TRIM SERVICE HOLE COVER |
![]() |
Engage the 3 guides.
Engage the 2 claws to install the deck trim service hole cover.
| 9. INSTALL REAR DECK FLOOR BOX |
Install the rear deck floor box.
| 10. INSTALL REAR NO. 2 FLOOR BOARD (for Separate Type) |
![]() |
Engage the 3 guides <A>.
Engage the 2 guides <B> and install the rear No. 2 floor board as shown in the illustration.