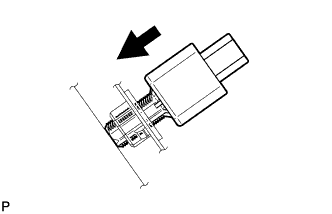
 |
Insert the stop light switch assembly until the threaded sleeve hits the pedal.
- NOTICE:
- When inserting the stop light switch assembly, support the pedal from behind so that the pedal is not pushed in.
STOP LIGHT SWITCH > INSTALLATION |
| 1. INSTALL STOP LIGHT SWITCH ASSEMBLY |
|
Insert the stop light switch assembly until the threaded sleeve hits the pedal.
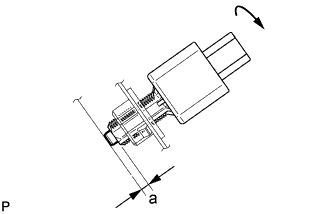 |
Make a quarter turn clockwise to install the stop light switch assembly.
Connect the connector.
Check the protrusion of the plunger.
| Area | Measurement |
| a | 0.5 to 2.6 mm (0.0197 to 0.102 in.) |
| 2. INSTALL NO. 1 INSTRUMENT PANEL UNDER COVER SUB-ASSEMBLY |
Connect each connector.
Engage the guide and claw.
Install the No. 1 instrument panel under cover sub-assembly with the 2 screws <D>.