 |
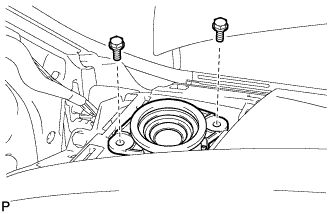
Connect the connector.
INSTRUMENT PANEL SPEAKER > INSTALLATION |
| 1. INSTALL FRONT NO. 2 SPEAKER ASSEMBLY |
|
Connect the connector.
Install the front No. 2 speaker assembly with the 2 bolts.
| 2. INSTALL NO. 1 INSTRUMENT PANEL SPEAKER PANEL SUB-ASSEMBLY |
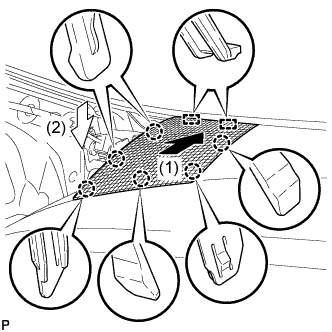 |
Engage the 2 guides and 6 claws to install the No. 1 instrument panel speaker panel sub-assembly as shown in the illustration.
| 3. INSTALL FRONT PILLAR GARNISH CORNER PIECE |
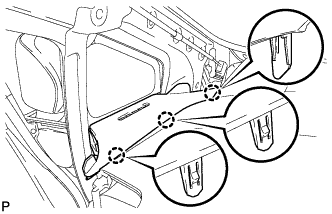 |
Engage the 3 claws to install the front pillar garnish corner piece LH.
| 4. INSTALL FRONT PILLAR GARNISH |
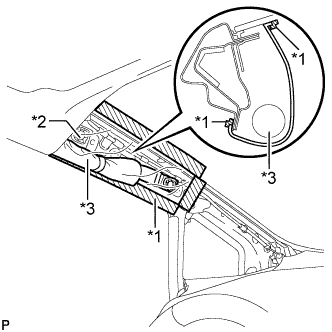 |
Remove the protective cover.
| *1 | Adhesive Tape |
| *2 | Protective Cover |
| *3 | Curtain Shield Airbag Assembly |
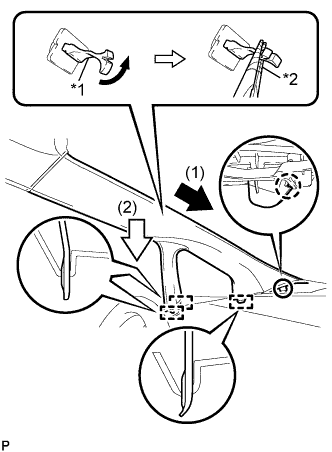 |
Make sure that the front pillar garnish clip is not damaged.
| *1 | Front Pillar Garnish Clip |
| *2 | Protective Tape |
Engage the claw to direction indicated by the arrow (1).
Engage the 3 guides to direction indicated by the arrow (2).
Turn the end of the front pillar garnish clip 90° with needle-nosed pliers and install it to the front pillar garnish LH.
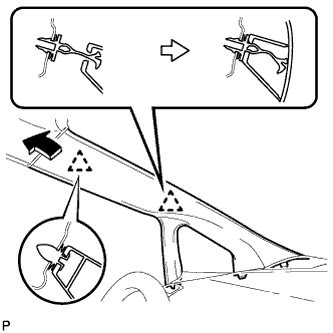 |
Engage the 2 clips to install the front pillar garnish LH.