for Plug Type Antenna Cord:
Disconnect the 2 connectors.
Remove the bolt.
Disengage the 4 clamps and remove the No. 2 antenna cord sub-assembly.
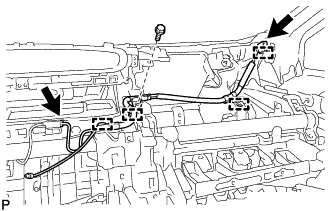 |
RADIO ANTENNA CORD > REMOVAL |
| 1. REMOVE UPPER INSTRUMENT PANEL ASSEMBLY |
| 2. REMOVE NO. 2 ANTENNA CORD SUB-ASSEMBLY (w/o Satellite Radio) |
for Plug Type Antenna Cord:
|
Disconnect the 2 connectors.
Remove the bolt.
Disengage the 4 clamps and remove the No. 2 antenna cord sub-assembly.
for Connector Type Antenna Cord:
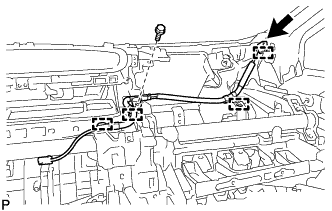 |
Disconnect the connector.
Remove the bolt.
Disengage the 4 clamps and remove the No. 2 antenna cord sub-assembly.
| 3. REMOVE NO. 2 ANTENNA CORD SUB-ASSEMBLY (w/ Satellite Radio) |
w/o Manual (SOS) Switch:
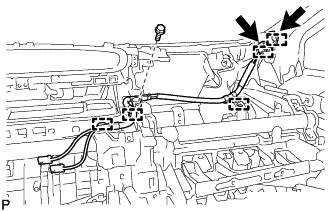 |
Disconnect the 2connectors.
Remove the bolt.
Disengage the 5 clamps and remove the No. 2 antenna cord sub-assembly.
w/ Manual (SOS) Switch:
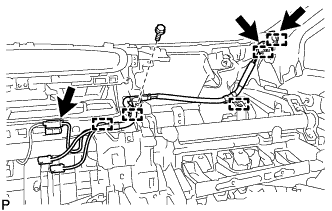 |
Disconnect the 3 connectors.
Remove the bolt.
Disengage the 5 clamps and remove the No. 2 antenna cord sub-assembly.
| 4. REMOVE ROOF HEADLINING ASSEMBLY |
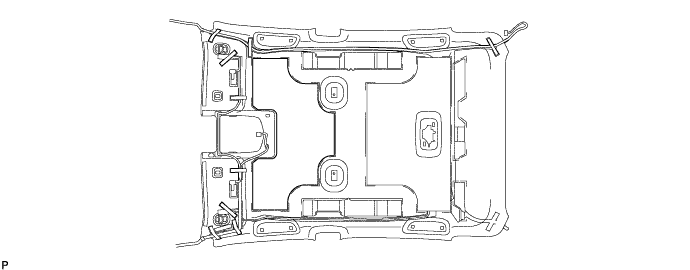
| 5. REMOVE NO. 2 ROOF SILENCER PAD (w/o Sliding Roof) |
Remove the No. 2 roof silencer pad from the roof headlining assembly.
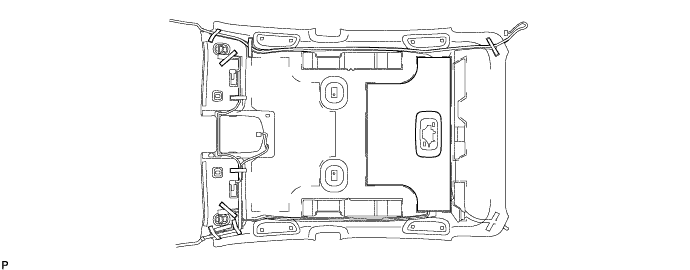
| 6. REMOVE NO. 3 ROOF SILENCER PAD (w/o Sliding Roof) |
Remove the No. 3 roof silencer pad from the roof headlining assembly.
| 7. REMOVE NO. 4 ANTENNA CORD SUB-ASSEMBLY |
Peel the strips of the tape used to secure the antenna cord only to the extent that allows removal of the antenna cord.
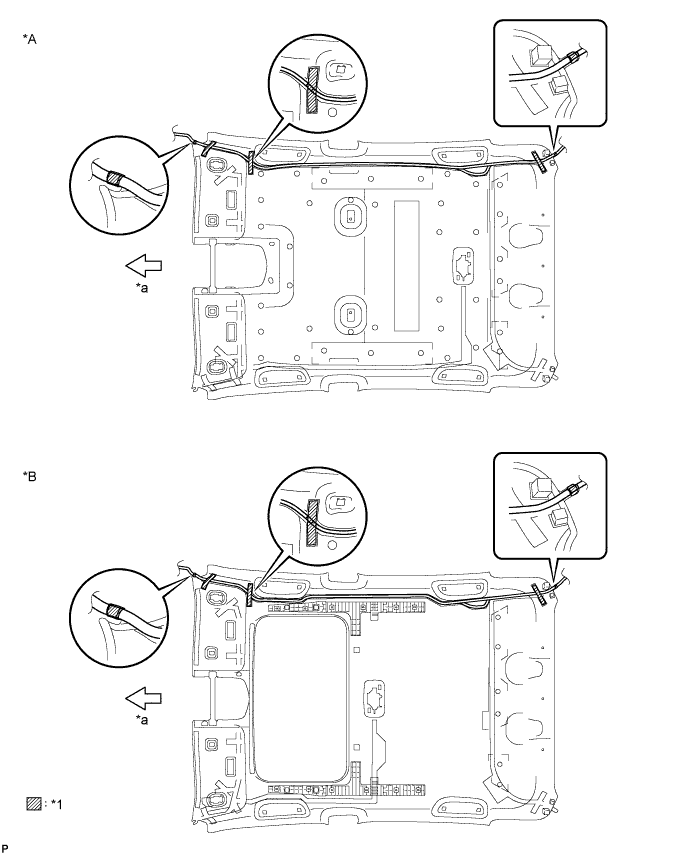
| *A | w/o Sliding Roof | *B | w/ Sliding Roof |
| *1 | Tape | - | - |
| *a | Front | - | - |
Remove the No. 4 antenna cord sub-assembly.
| 8. REMOVE NO. 5 ANTENNA CORD SUB-ASSEMBLY (w/o Manual (SOS) Switch) |
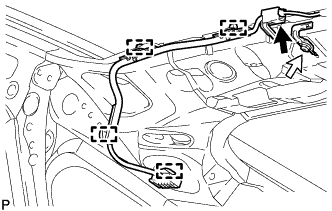 |
Disconnect the connector.
Remove the bolt.
Disengage the 4 clamps and remove the No. 5 antenna cord sub-assembly.
| 9. REMOVE NO. 5 ANTENNA CORD SUB-ASSEMBLY (w/ Manual (SOS) Switch) |
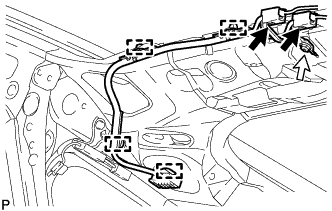 |
Disconnect the 2 connectors.
Remove the bolt.
Disengage the 4 clamps and remove the No. 5 antenna cord sub-assembly.