 |
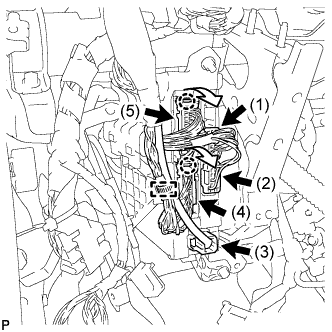
Disengage the clamp and disconnect the wire harness.
MAIN BODY ECU > REMOVAL |
| 1. REMOVE UPPER INSTRUMENT PANEL ASSEMBLY |
| 2. REMOVE LOWER INSTRUMENT PANEL SUB-ASSEMBLY |
| 3. REMOVE DRIVER SIDE JUNCTION BLOCK ASSEMBLY |
|
Disengage the clamp and disconnect the wire harness.
Disconnect the 3 connectors (1), (2) and (3).
Disengage the 2 claws and disconnect the 2 connectors (4) and (5) as shown in the illustration.
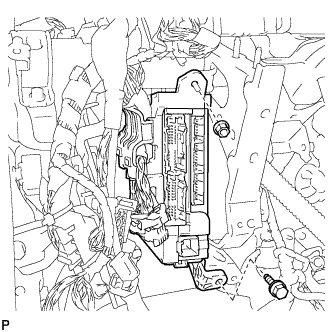 |
Remove the bolt and nut, and disconnect the driver side junction block assembly.
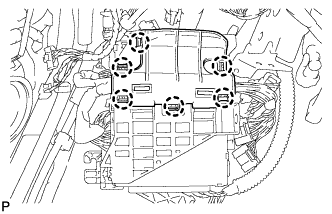 |
Disengage the 6 claws and remove the junction block bracket.
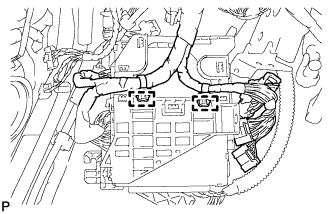 |
Disengage the 2 clamps and disconnect the wire harness.
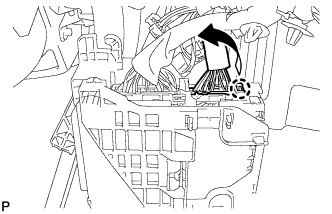 |
Disengage the claw and disconnect the connector as shown in the illustration.
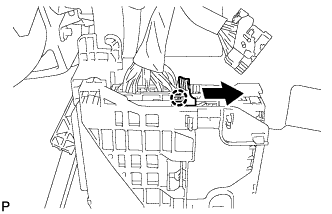 |
Disengage the claw and release the connector lock as shown in the illustration.
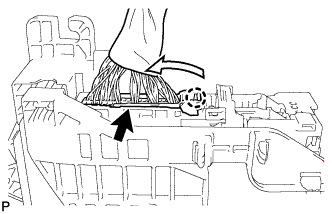 |
Disengage the claw and disconnect the connector as shown in the illustration.
Remove the driver side junction block assembly.
| 4. REMOVE MAIN BODY ECU |
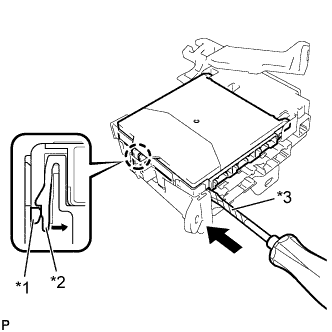 |
Press the claw of the junction block as shown in the illustration to release the lock.
| *1 | Main Body ECU |
| *2 | Driver Side Junction Block |
| *3 | Protective Tape |
With the junction block lock released, insert a screwdriver with its tip taped horizontally between the main body ECU and junction block.
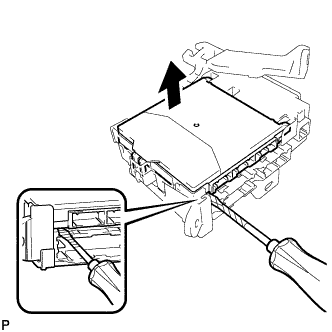 |
Using the screwdriver, carefully raise the main body ECU up to the position where the connector becomes disengaged.
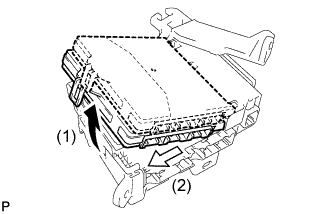 |
Raise the main body ECU as shown by arrow (1), and then pull it out as shown by arrow (2) shown in the illustration.